Jump to content

latest crankbaits


diemai
 Share


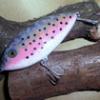
Here are some crankbaits , that I made in winter 2007/08 .

I employed a different working method for them , that I had never used before:wink: . These baits are glued together of two halves of half-round pinewood dowels with waterproof wood-glue with the internal wire-harness set in before .

To have the two halves flush whilst grinding and sanding their outer shape and later bond them , I placed three thin wood-screws trough them . When grinding away material from the flanks of the lures , I replaced those screws with some toothpicks(because the screw-heads would have been disturbing) , that pinned the halves together temporary .

Also employed those toothpicks , glued in , to close up the holes finally before painting .

The harness is running through the upper portion of the lures , so that there is enough space for the screws and also for belly weigths to trim out the finished blank for best action .

Though they don't look very professional , I like using diving lips of aluminium sheet , they can be bend straight , in case the lip slot got out of angle whilst sawing it , they may also be bend in a "cupped" fashion and they already provide a little weight for a stable lure action .

Pictured lures are between approx. 3 1/2" and 5" in length , can't wait to cast them for the first time in May:) .

Questions ? Feel free to mail:) ! diemai


 Share


Recommended Comments

The painting on the green one is very unique. Looks like you wrapped it in rubber bands before applying the green paint. Gives it nice bars but at irregular angles and also varying degrees of thickness. If this is what you did then I take my hat off to you. I really like low tech deco methods - sometimes they produce great results like yours. I only wish I'd thought of it first!

Very nice.

-Don

Link to comment

Thank you , Don , indeed I have utilized slid-on rubber-O-rings to spray through , simply with aerosol cans .

I don't like spending too much time for a state-of-art lurefinish , I don't even possess airbrush gear , I'd rather spent my limited time on thinking about new , different lure models and put those ideas to practice .

I know , that my lures won't win a beauty-contest , but they are not made for such , anyway , they are supposed to catch fish , and that's what they do(most likely , hahahaha)!

Though easy made , this certain design perfectly imitates a small jackpike , those never have the distinctive spotted pattern of pike during their first one or two years of life .This rubber-O-ring method only works on lures , that do not have a too pronounced tail taper , on such the O-rings don't get grip and always slide down the taper .

Try differently sized rings , loop them double or triple to sit well on the lureblank , before the first paint shot make sure , that they can't easily move anymore . Make some short strokes with small amount of paint at one time , repeat several times , to prevent paint dripping under the O-rings .

Good Luck , Dieter

Link to comment

Forgot one important thing : Let paint dry thoroughly , remove O-rings by carefully sliding a pointed , ultra-sharp knife under them , cut away from lure and take rings off .

Don't slide them down the lure , you might damage your paint design .

Good Luck , Dieter

Link to comment

Join the conversation

You can post now and register later. If you have an account, sign in now to post with your account.
Note: Your post will require moderator approval before it will be visible.

Add a comment...

×   Pasted as rich text.   Paste as plain text instead

  Only 75 emoji are allowed.

×   Your link has been automatically embedded.   Display as a link instead

×   Your previous content has been restored.   Clear editor

×   You cannot paste images directly. Upload or insert images from URL.

Loading...
×
×
  • Create New...
Top