Leaderboard


Popular Content
Showing content with the highest reputation on 02/01/2012 in all areas
-
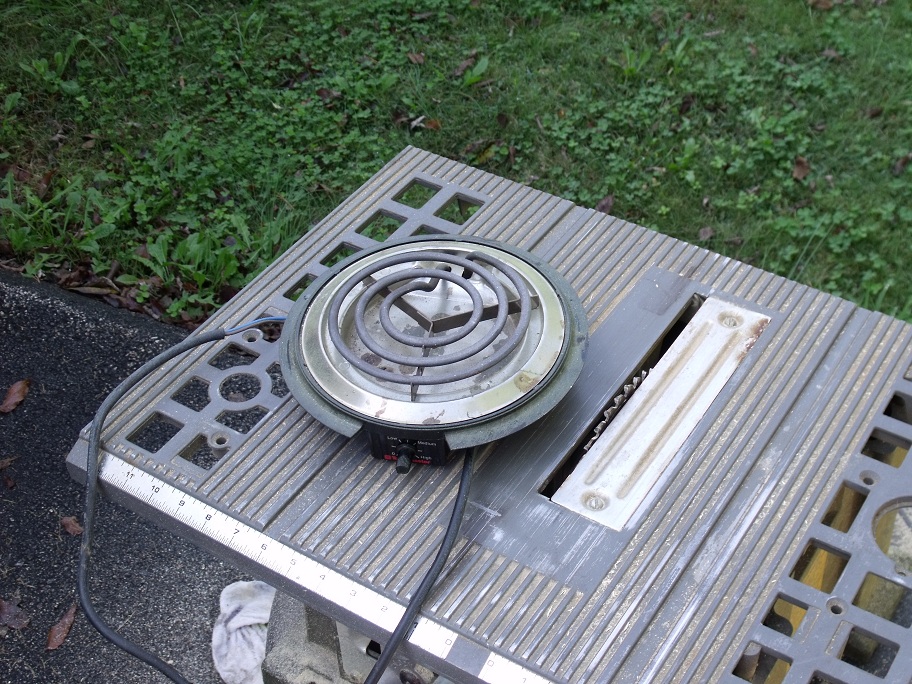
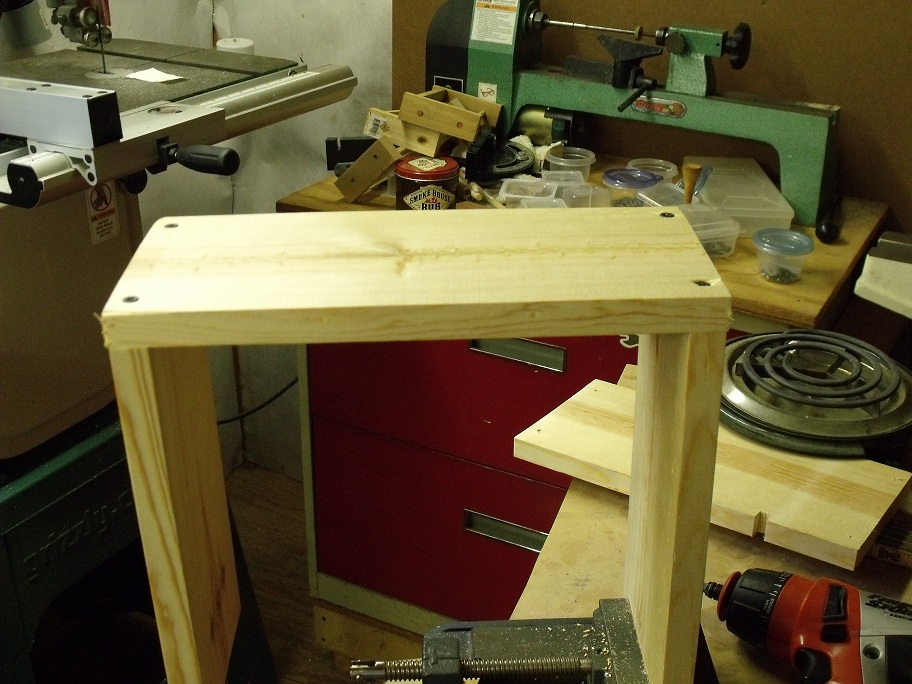
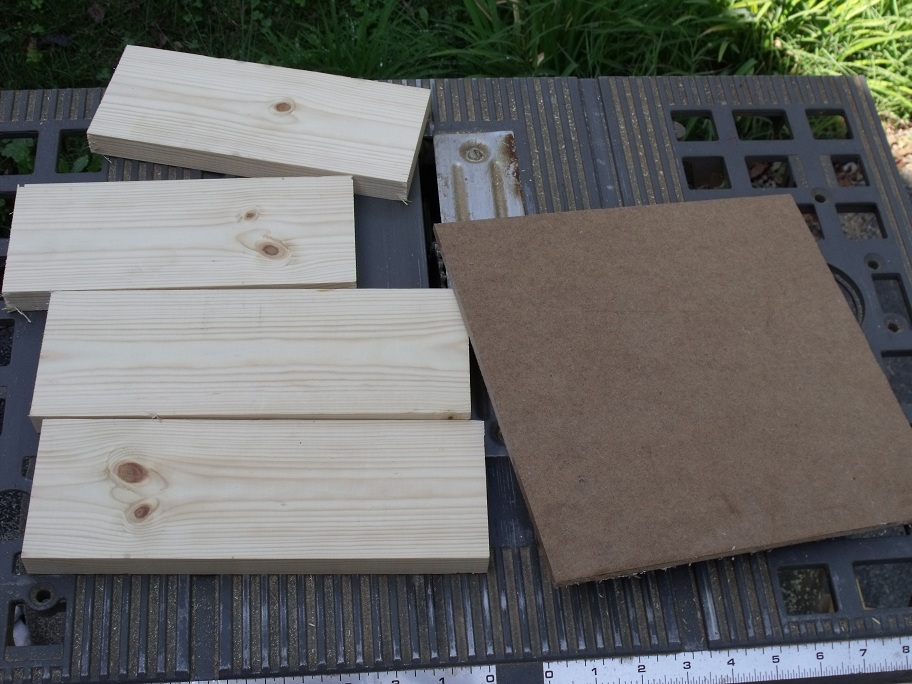
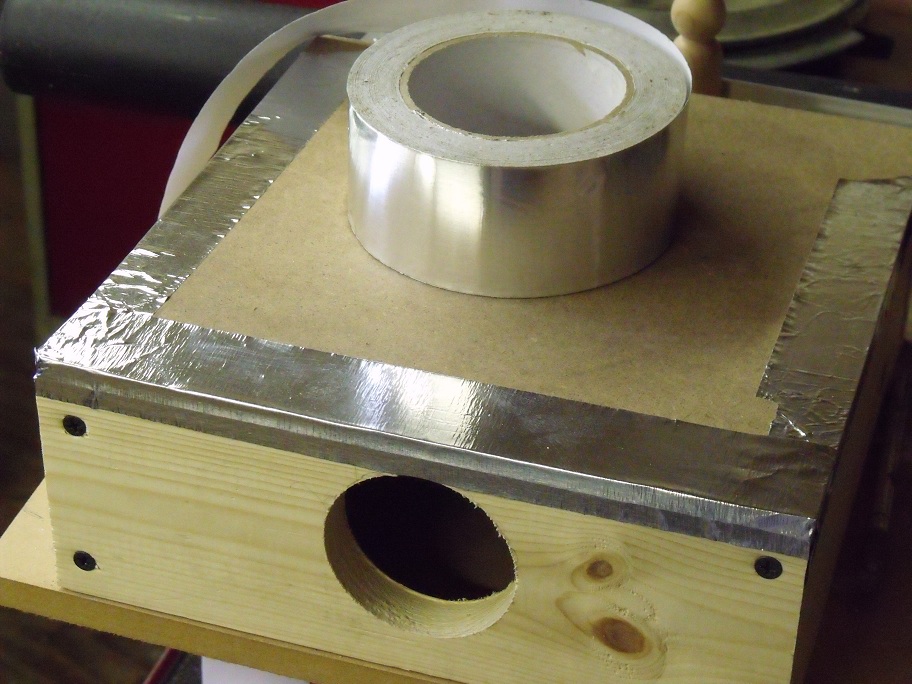
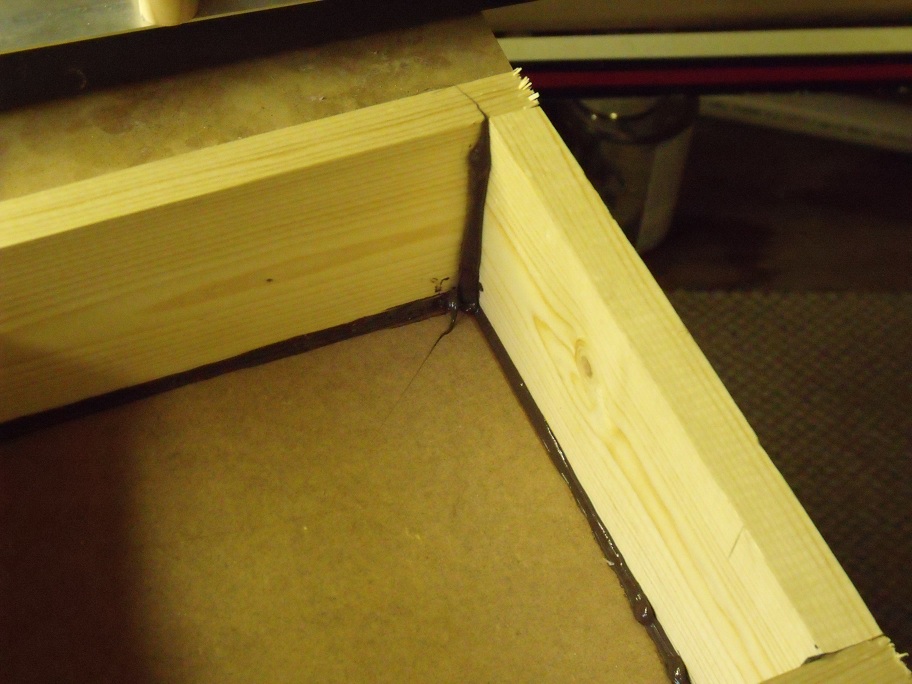
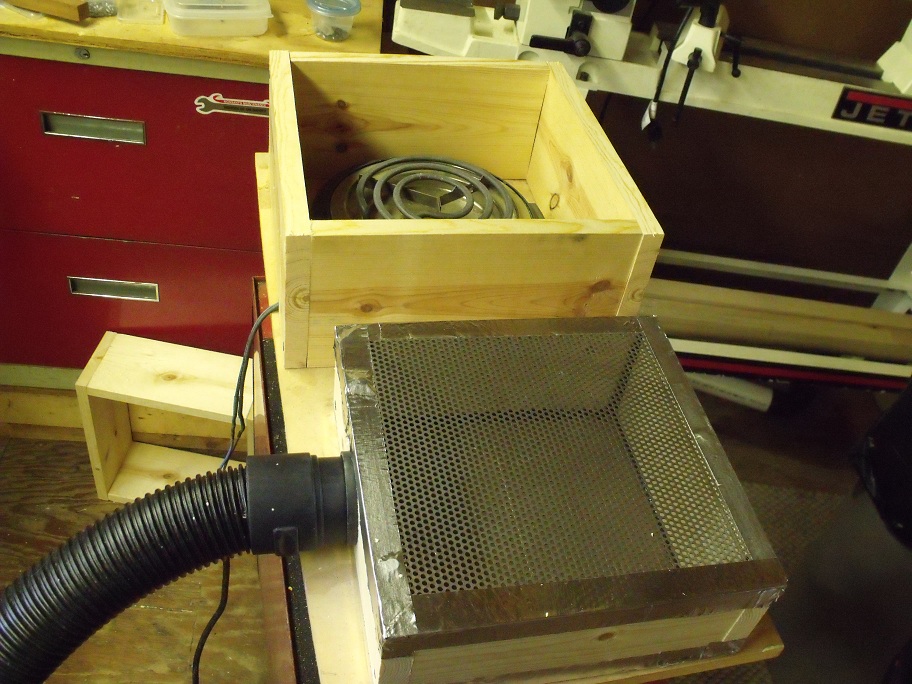
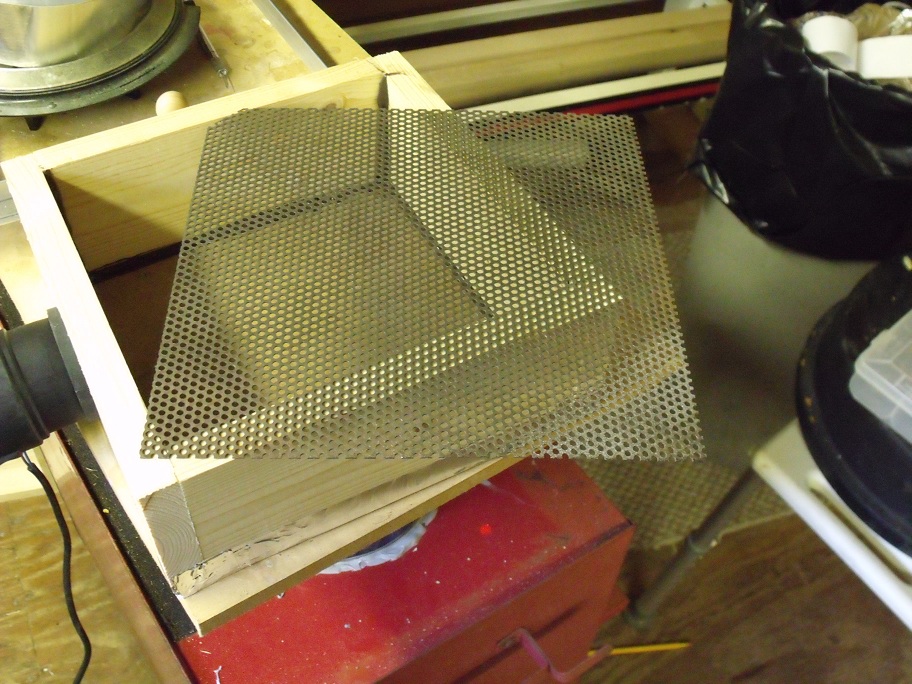
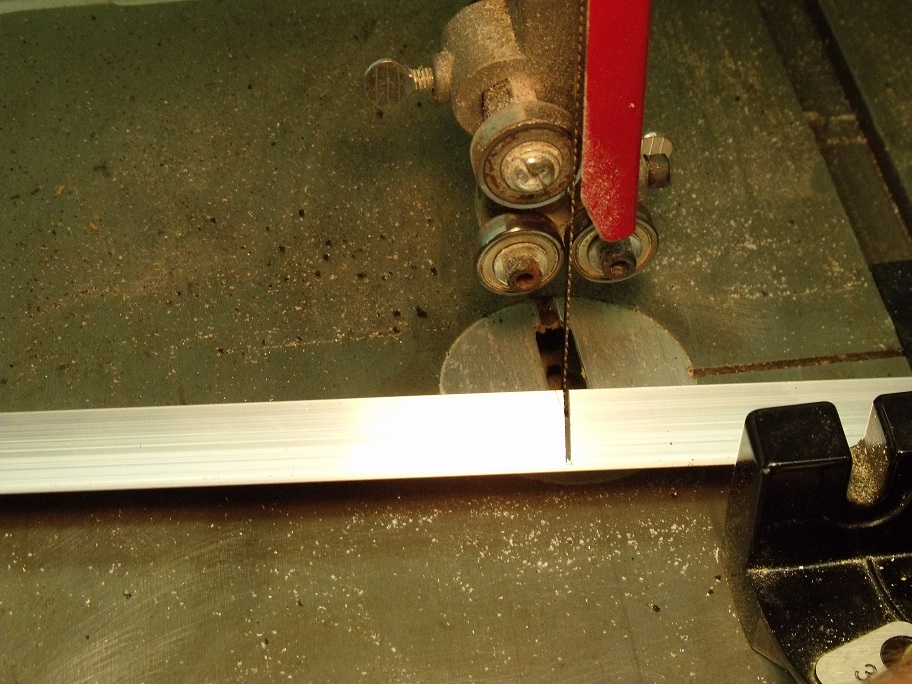
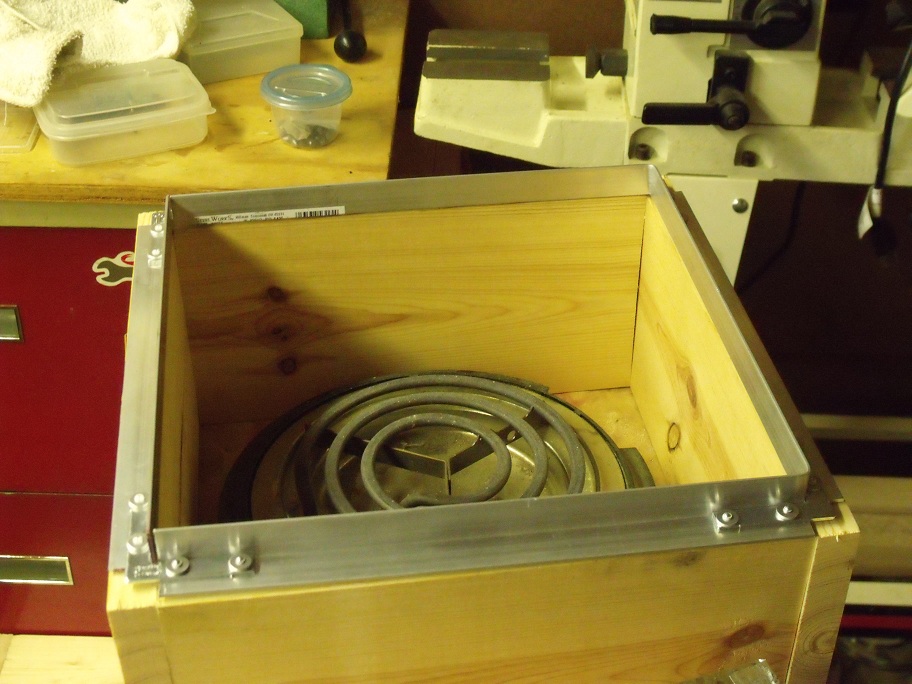
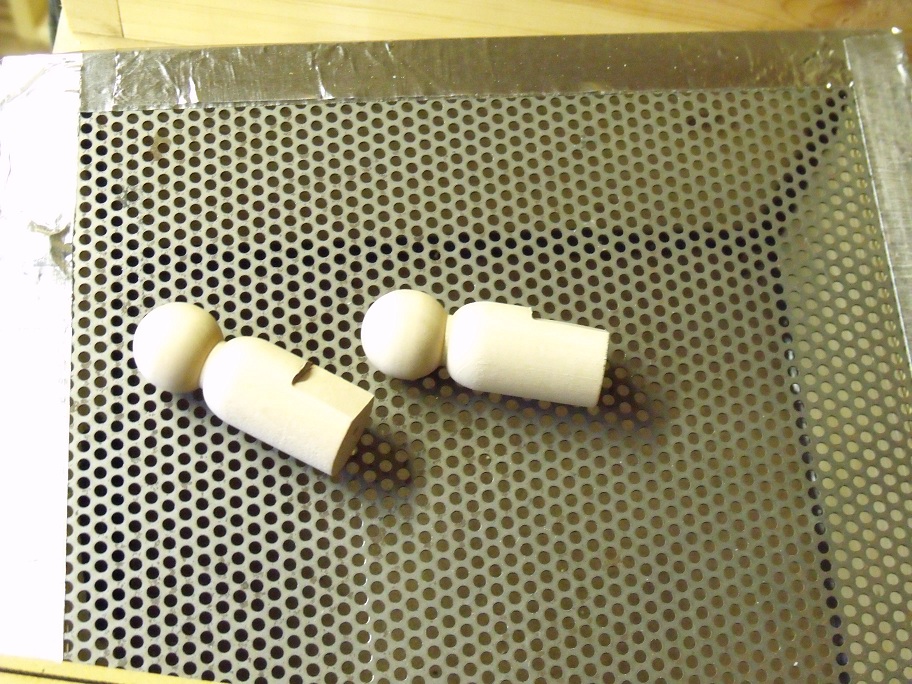
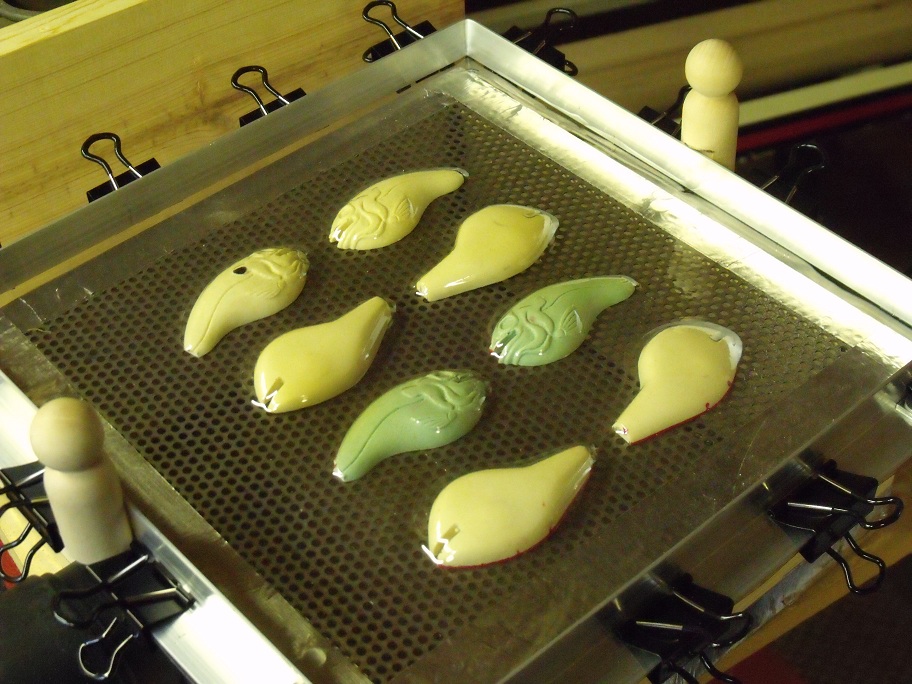
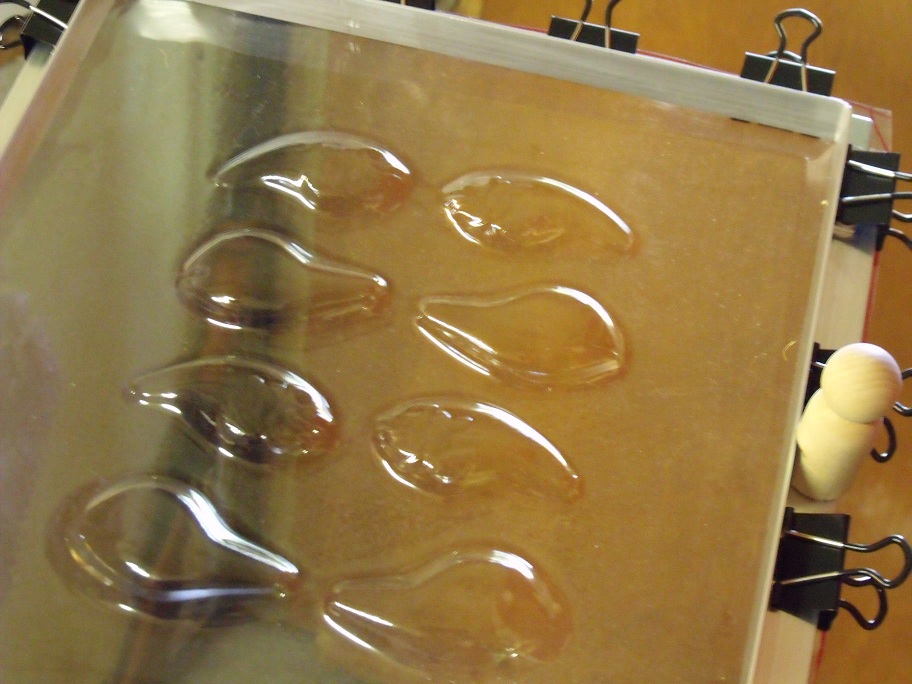
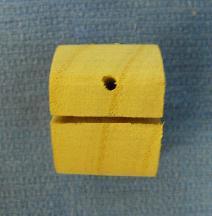
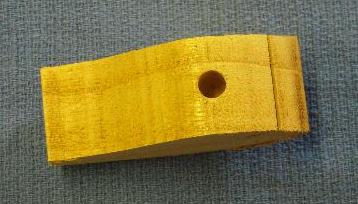
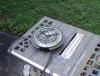
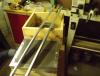
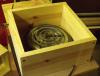
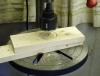
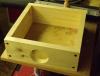
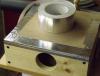
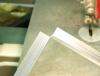
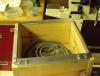
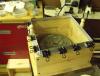
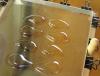
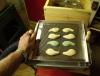
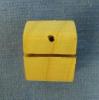
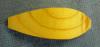
You will need a small hot plate, you can get this at wally world or other store. Enough 1"x 6" x 3/4" to build a 12" OD square frame. We are going to use a shop vac for our suction. One 1" x 6" x 4' piece of pine lumber One 1" x 4" x 4' piece of pine lumber Four 3/8" x 2" flat angle braces 16, 1/8" x 1/8" pop rivets with back up washers. One piece of thin scrap wood, plastic or other type of material 10" x 10" One piece of what is called punch plate for vacuum bed top, 10" x 10" Some silicone caulk, some tape, (I used alum. tape) 16 dry wall screws 1 1/2" long OK, lets get started by building a 12" x 12" box for the hot plate to set in. Using the 1" x 6" lumber cut 2 pieces 12" long and 2 pieces 10 1/2" long. Cut a small notch in one of the boards for the hot plate cord to come through this will become the bottom of the box. This box is screwed together with the dry wall screws. Screw the 12" pieces to the 10 1/2" pieces. Now lets build the vacuum bed. Using the 1" x 4" piece of lumber, cut 2 pieces 10" long and 2 pieces 8 1/2" long. and screw the 10" pieces to the 8 1/2" pieces using the dry wall screws. Before screwing the last piece on use a hole saw to cut a hole in it that will fit your shop vac. The bottom of this hole should be about 3/8" from the bottom of the box we are building. We are also going to tape the 10" x 10" piece of whatever you use on the bottom of the box. We will then caulk the seams inside the box. Now tape the punch plate on top of the box. We now have our vacuum bed. Now we need to build an angle iron frame with a 10 1/2" inside dia.and a 12" outside dia. I think the pictures will explain this. The frame will match the 12" box perfect and slip down over the 10" box. Use the 3/8" x 2" flat angle braces on each corner, attach with the pop rivets and washers. Add a couple handles from a piece of dowel. This completes the construction process Now to use this, cut your plastic to form 12" x 12" and attach to the alum frame with the binder clips. Place your models on the punch plate, I use baits cut in half, and get a good right and left side. Set the temp on hot plate about theree fourths of the way, not on high. I have had not a fire but, i guess you could if it got too hot. Place the plastic in the frame over the hot plate and start the shop vac. The plastic will sag at first then tighten up then sag again, it is time to place it over the vacuum bed.


 1 point
 -
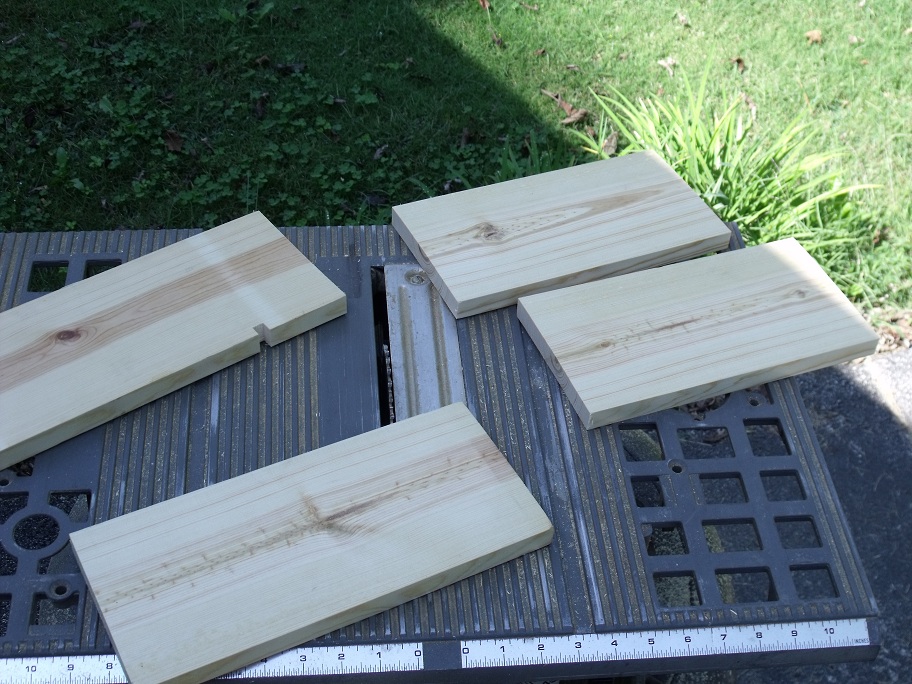
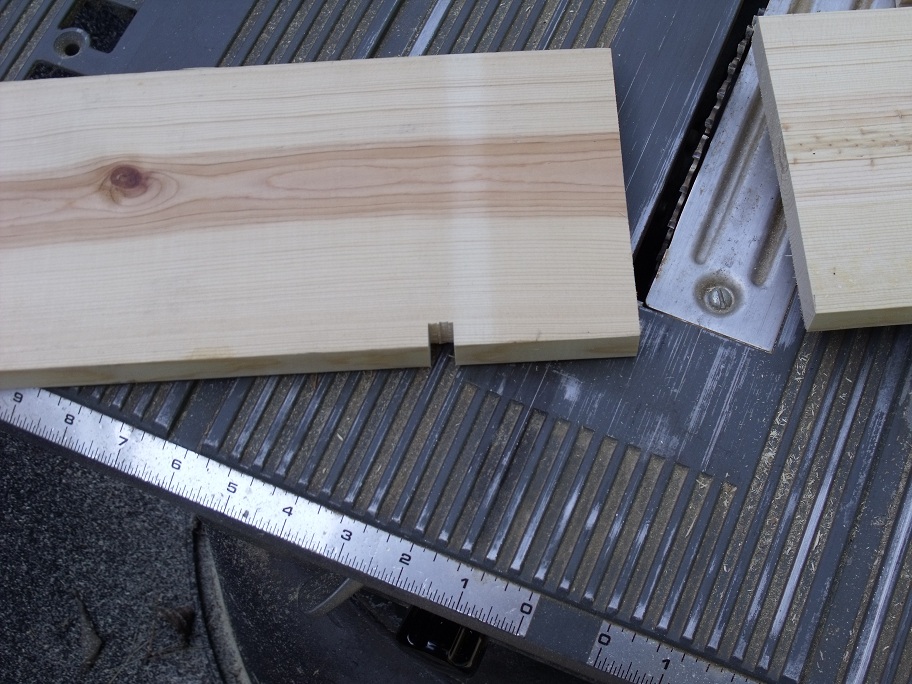
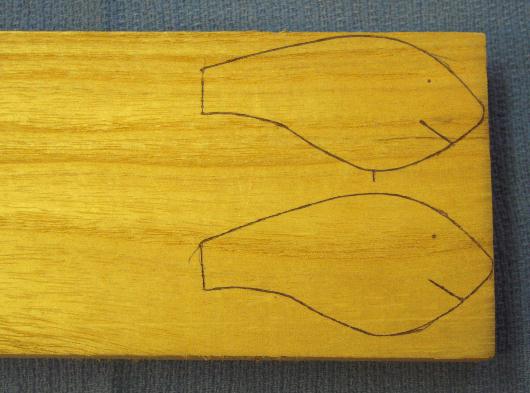
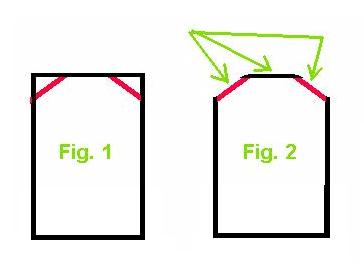
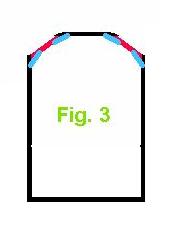
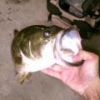
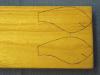
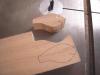
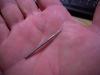
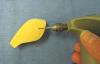
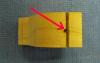
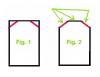
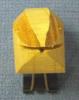
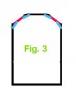
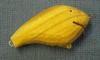
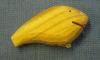
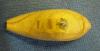
HAND CARVING YOUR OWN FISHING LURES Do you have an idea for a “new and improved” lure or an oldlure that’s not available anymore? Or would you just like to copy another lureand make some modifications to it? That’s not a problem any longer. I'm going toshow you in the following steps how to hand carve your own custom lures. If you follow the steps below, you'll find outthat it's really not a hard thing to do and you can step away from repaintingother people’s lures. I’ll start by selecting a pattern for my lure. This can be apattern that somebody else has drawn up or I can create my own pattern. I usecardboard for my lure patterns. I then write on my pattern any informationabout that lure such as: location of hook hangers, location and amount ofweight for the lure, thickness of the lure, eye placement, lip angle and type,and any other pertinent information. That way the information is always handy.I also cut the lip slot into the pattern. Select the wood that you want to use to carve your crankbaitout of. Here, I'm using Paulownia. I have several boards that I have planned tospecific thicknesses. You can also use a block of wood and after you cut outthe profile of your lure, you can just cut the lures off at the thickness thatyou want. There are other various woods that can be used including basswood,balsa, and poplar. The choice is up to you. I’ll trace my pattern onto the wood making sure that I markthe location for the eyes and for the lip slot. I also want to make sure thatthe grain of the wood runs the length of the lure and NOT from top to bottom.This will ensure that the lure has structural integrity. Once I've completed that, I’ll take the wood over to theband saw and cut out the profile of the lure. At the same time, I’ll cut thelip slot. Before I cut out the lure I will check and see that the table of theband saw is 90-degrees to the band saw blade. This ensures that the lip slot will beperpendicular to the lure. If I wait until after I carve the lure, it's hard tocut the lip slot and get it right. Using a small 1/16-inch drill bit, I’ll drill a guide holefor the placement of the eyes. NOTE: This is optional. I do it to give me areference point to countersink my eye sockets. In this step I will widen the lip slot. For that I use a1/16-inch diameter diamond grinding bit. I like to use one that has a 1/16-inchshaft. That way I can get deeper intothe lip slot. This bit will follow the already cut lip slot almostperfectly. Be sure to widen the lip slot before you do the tapers on your lureas the bit will sometimes tear out a small chuck of wood as it exits the lipslot. After I widen the lip slot, I then hollow out a smallchannel at the bottom of the lip slot that will allow me to insert the back endof the line tie if the line tie is in the lip. Next, I'll go ahead and drill the holes for the rear hookhanger and line tie (if the lure’s line tie is not going to be in the lip). I willalso drill a hole to accept the belly weight. The next step is to taper the nose on both sides and thentaper the tail. I can do this taper either by carving the taper with a goodcarving knife or I can sand the tapers on a belt sander. I’ll try to keep thesetapers as symmetrical as I can. You can see in the picture that the nose istapered about a quarter of the way back from the nose and the tail is taperedfrom about midway of the body to the tail. This taper may vary depending a loton the type of lure that you're making. Now I’m ready to start carving the lure. I will start bycarving the shoulders on either side of the back as in Fig. 1 above. I willcarve until the widest point on both sides is about the same width as what I'veleft across the back. I want those threeplanes to be basically the same width. You'll see what I'm talking about in Fig2 above. Once I get those flat planes carved on the shoulders I will roll thelure over and do the same thing on the belly. I originally started with four corners on the lure. Now thatI have carved those corners off, I have eight corners. Carve those corners offand that will basically round the edges of the lure for you. For you guys thatare carving musky lures or large swimbaits you will wind up with sixteen corners.Just carve them off like I did the eight corners. That should be enough tofinish the rounding of your larger lures. After I carve the lure I glue in the belly weight, the rearhook hanger, and the line tie, if there is one. My carving is now done. I’m going to sand the lure. I liketo use the fingernail sanding sticks that you find in the beauty department ofyour local shopping center. The ones at Wal-Mart are 100-grit on one side and150-grit on the other side. I use these because they tend to round the lurebetter than just sandpaper. Sandpaper tends to follow all of the contours ofthe lure and doesn’t give me that good rounded finish that I want. It’s just myway. Your way may work better for you. After I have finished sanding the lure Iwill sand the lure again with some 220/240-git sandpaper to give me a finalfinish. I give the lure a final inspection to ensure that I have allof my tapers symmetrical, all of my knife marks are sanded out, and the lurehas a general overall good appearance. My lure is now ready for a couple of coats of sealer. A few final notes: keep your knife sharp, take your time,and always check and make sure that you keep both sides symmetrical. I hope that you’ll give this a try. One you create your ownlure that swims like you want it to, there will be no holding you back. Good luck and I hope this helps. Gene Graham aka “Lincoya”


 1 point
 -
No names will be mentioned. No need. My question is how long do you wait for a mold offered on a web site. Paid in full at the time of ordering. In your experience will it eventually come?. Phone calls and emails were all made. Going out on Friday. We all know that story. Now the emails are ignored. I took the chance. It was not a custom mold. Do your molds just show up one day when you have given up all hope? It will be coming up on 10 months. I have been around a while. No names are mentioned here. I think TU should think about limiting sponsorship.1 point
-
Absolutely no reason why you should not report to the better business bureu do it online he'll get the point when enough complaints are lodged.1 point
-
I've used 5 different brands of plastisol over the past 5 years. My summation as follows- 1- Some hard pack 2- Some smoke more 3- Some smell more 4-Some bubble more then others 5- Some yellow faster then others 6- Some baits are more stickier for 24 hrs. 7- Some are just simply priced out of consideration for those in business 9- Then is is the proverbial "bad-batch" for whatever reason from a respected brand Re-heating(in a microwave oven)- light colored plastiol-unused and cutoffs,(clear especially,) will cause a color change and yellowing reguardless of additional heat stabilizer w/ all the brands I've used. The presto pot w/ stirrer is your friend for the aforementioned problems. The dependable heat control is basically very accurate. I've NEVER had plastisol bubble in a Presto Pot. All that said, it's up to the idividual as to what he's willing to "put-up with" for the price,performance and aggrevation with all the various brands of available plastisol. Edited for punctuation1 point
-
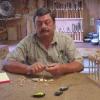
very good video! but one question i have is were do you get those ball bearings you use for weight? Is there a certain plave you go to get them? I have been trying to source a place you can get them at like the ones you see in crank baits and the ones you seem to be using. any info would be much appreciated!1 point
-
I had experienced the same thing before. I used createx paints and used a hair dryer to speed up the drying time. Not long after I sprayed the clear on them. I found my problem to be the temperature of the bait was too warm when I sprayed. Now if I used heat to cure the paint, I give it about an hour to cool back to room temperature before I spray. My guess was the cool clear coat was warming up after hitting the bait. Then as it cooled down it would wrinkle up. After After I gave it time to cool the clear didn't wrinkle up anymore and stayed smooth.1 point
-
Magicians dont reveal secrets for a reason, it keeps the audience guessing1 point
-
you mean the vise ? i know sort of a late reply sorry about that i did not notice your post anyways i have another tutorial, this time about how i foil my baits, its not very long but gets the point across i think.1 point
-
Greg, I bought my aluminum from Metal Express. Follow this link:Metal Express - Catalog - Category List - Aluminum They have a plant close to me in Waukesha, so I was able to go pick up my order. They will ship to you and the price was very reasonable. My blanks were 2" x 6" x 5/8" thick. Good luck! Rock1 point