Leaderboard
-
in all areas
- All areas
- Images
- Image Comments
- Image Reviews
- Albums
- Album Comments
- Album Reviews
- Topics
- Posts
- Stories
- Story Comments
- Story Reviews
- Classified Ads
- Classified Ad Comments
- Classified Ad Reviews
- Records
- Record Comments
- Record Reviews
- Websites
- Website Comments
- Website Reviews
- Status Updates
- Status Replies
-
Custom Date
-
All time
February 2 2011 - January 17 2025
-
Year
January 17 2024 - January 17 2025
-
Month
December 17 2024 - January 17 2025
-
Week
January 10 2025 - January 17 2025
-
Today
January 17 2025
-
Custom Date
02/20/2018 - 02/20/2018
-
All time
Popular Content
Showing content with the highest reputation on 02/20/2018 in all areas
-
TU has the better and more diverse forum and gallery. Makelure has the video tutorials that we cannot post on TU. The two really do complament each other.1 point
-
1 point
-
1 point
-
Ditto If I read these right, the jigskins come in 9" max. Some of yours are 11". It is possible to use decals you make yourself. Check out the video starting about 6:40. https://www.makelure.com/store/pg/54-How-To-Videos.aspx#prettyPhoto/67/ That is how I made did the following: http://www.tackleunderground.com/community/gallery/image/17327-red-sided-shiner-1jpg/ Maybe this will help.1 point
-
1 point
-
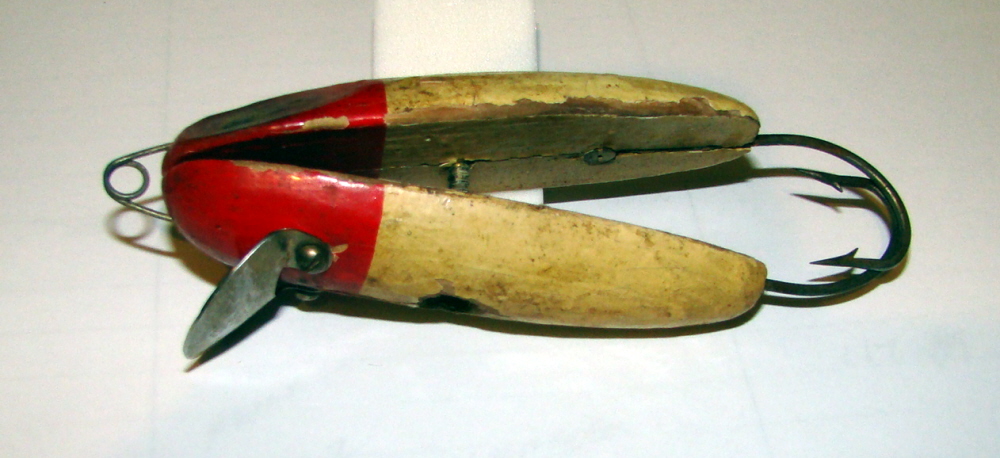
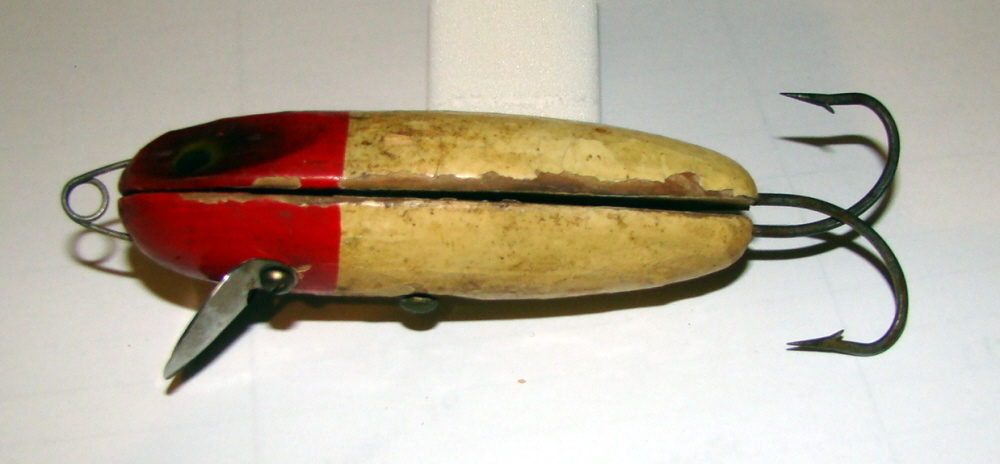
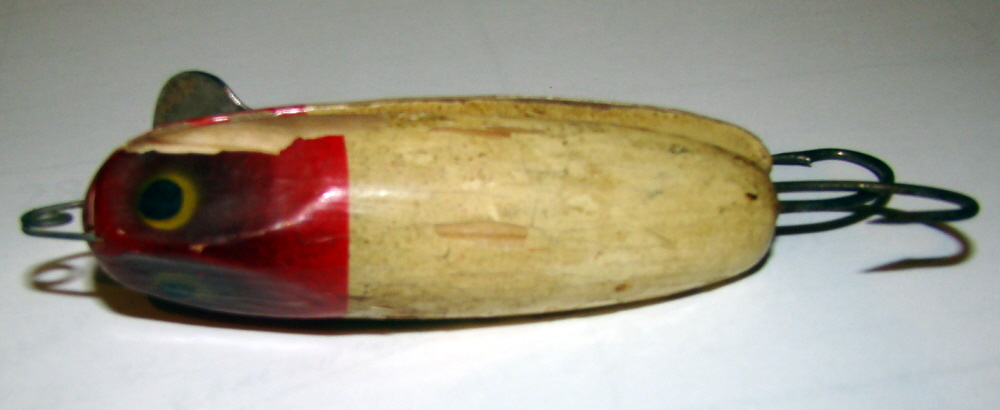
I got this lure out of a old tackle box. It is red and White balsa wood 4" long 3/4" wide no markings on it . When open the hooks become weed free and when the fish bites it the upper and lower hook open to catch the fish. I looked every where and cannot find it. I know somewhere out there someone knows. Looks like a summer job to make. Wayne1 point
-
Don't use these, but they've been around for a bit. https://www.barlowstackle.com/JigSkinz-ProSkinz-C348.aspx https://www.ebay.com/itm/4-PACK-OF-JIGSKINZ-SHRINK-WRAP-FOR-YOUR-LURES-/3223894473691 point
-
I am so glad that you got what you need. There is a wealth of information on this site. Hover your mouse over ACTIVITY at the top right of the screen, on the drop down menu go to search, click on it and enter your question. Great information from a lot of people. Some of us are new tackle makers, even first timers, and that is OK because they are the future. New people, new ideas. Some of us are experienced hobbyist. From this group I believe you will get a lot of great information, some weird ideas, some unique ideas, some time tested ideas, some new ideas. Those of us in this category are always innovating. Sometimes we get it right, sometimes we don't. Some of us are professionals, either suppliers, manufacturers, or custom makers. From this group you will get ways that work for them, ways that keep their business going. I believe what you will find out is that we don't all agree with each other. Sometimes we even seem to disagree with each other. Don't think of this as right and wrong ideas, consider this as ideas that work for some and not for others. Sometimes we get downright disagreeable with each other. Just remember, we all come from different backgrounds, with different equipment, with different experiences. But that does not mean someone is more or less correct, just that their experience has yielded different results. When someone starts to put someone down, or their ideas down, give them the benefit of the doubt, consider it a bad day. Good luck on your tackle making. It is a fun and rewarding thing to do, or in my case, HOBBY.1 point
-
1 point
-
1 point
-
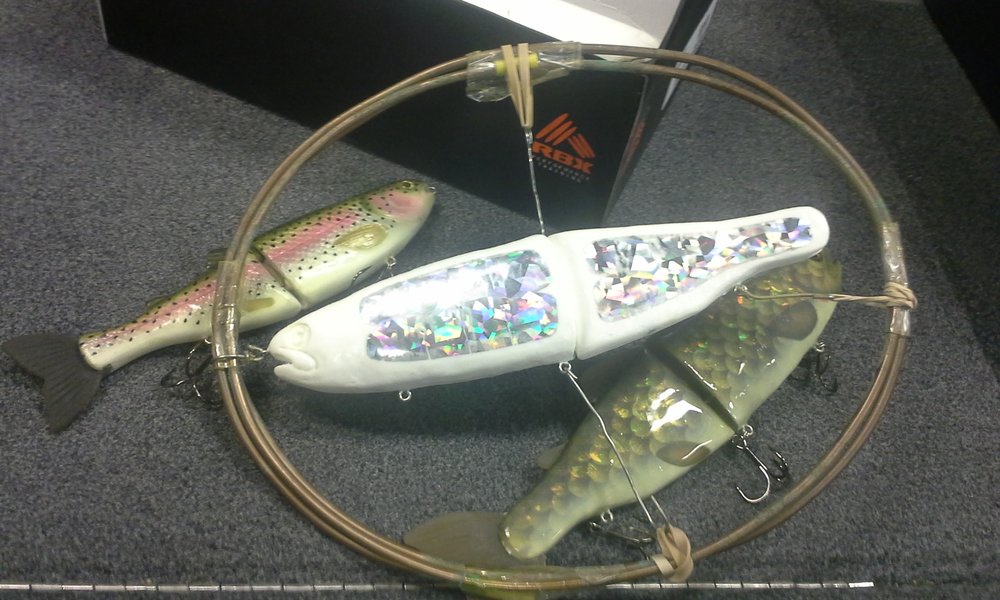
I made a holder for large baits out of some spare brake tubing I had left over after replacing the brake lines on my boat trailer. I just squeezed it to be oval instead of round. Use a small stout "s" bend wire at the line tie. Then stretch the bait out with another bent wire. Use a rubber band to the wire and wrap around the tubing as many times as you need to to get the right amount of tension then hook back on the wire. In this case, because the line tie is on the bottom of the after section of the bait it is a little unstable so I stabilize the bait with the middle wires. At the bottom of the bait on the first section is another hook hanger so bend another wire and stretch a rubber band to the bottom of the tubing. On the top, I bend one final wire a little longer and reach down in the joint to hook the upper hinge joint, then rubber band to the top. This perfectly suspends the bait in the tubing. I don't have to use a rubber band around the joint, it is held apart and the gap is maintained. When top coating, I do the joint first using a brush I can push the bait from one side to open the joint up a little on the opposite side, then do the other side of the joint the same way. Then you have a nice coat in the joint area and it is held suspended, stretched out and the v-shaped joint does not touch anywhere. Just finish coating the rest of the bait. This should work for most anybody. This particular bait is an ABT 12 inch Glide Bait that weighs over 10 oz. Finished 9 and 12 inch baits are laying on the boat deck. Hope the explanation and photo are understandable. Saves having to take the bait apart and repair the joint later. Also easy to hang when you change colors or have to mix more epoxy. Barry1 point
-
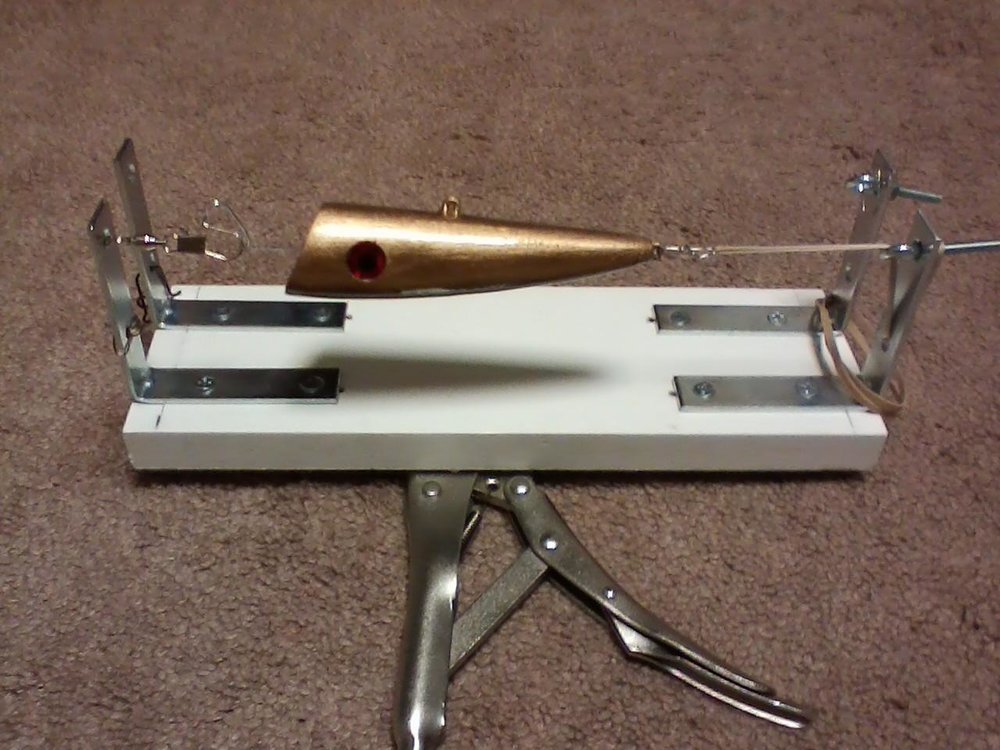
I made a big lure holder out of scrap wood and cheap L brackets. There is a description and picture of it in the post titled 'big lure holder'. http://www.tackleunderground.com/community/topic/33862-big-lure-holder/?tab=comments#comment-279044 Works well for me on jointed baits too. To cover the joint, I wrap a rubber band or 1/8 inch or 1/4 inch wide painters tape from Grainger.1 point
-
Separate the sections, and coat the insides of the joints with D2T, lapping it 1/4" onto the face of the lure. That way, you can rotate the lure by hand until the epoxy sets, making sure the epoxy doesn't pool, and then hang the sections to cure. Then assemble the lure, hang it between two points on your turner, so that the joints are held open, and coat the faces with your Etex, or whatever epoxy you use. D2T is thick, so you only need one coat for good protection on the inside of the joints. You can do two coats on the faces, once the joints are done.1 point
-
I went to Harbor Freight and found some big old monster Forceps. They work great. I also found some very small vise grip type plyiers as well. Now, the paint or epoxy in the joint is a different problem. I have my lure turner so it always has the lure level, so I just don't put the epoxy in the joint and it stays out. Others use a rubber band wrapped around the joint, and that also seems to work well.1 point
-
1 point
-
ddl a simple "I don't see a photo:, would have sufficed. The link is to google pics, supposed to be able to share photos. Simply posting photos to this site got me limited out and the system refused to accept any more. What do you see when you click on the link? relax you will live a longer and better life1 point
-
1 point
-
Hi FishCandy, When you click on the link, it's says - Google. 404. The requested URL is not found on this server. Jim1 point
-
ddl a simple "I don't see a photo:, would have sufficed. The link is to google pics, supposed to be able to share photos. Simply posting photos to this site got me limited out and the system refused to accept any more. What do you see when you click on the link?1 point
-
1 point
-
I paint mine before installing the wire. When I paint the base color I just use a 1/8" metal rod. I built a custom jig to paint the scale pattern for ten lures at a time. https://photos.google.com/photo/AF1QipMMDBjW-P-EbxIqEFi7GdO2GAvVH7ec23L3S_Dz1 point
-
our body baits hang by wire on a rack. painting 6 of a color we can go over each lure .using fast dry paints when using templates there set on side on an easel type board ,squirt 1 side when all done flip and repeat..sounds strange but that's how its done here. ,spinner blades are racked on pins and sprayed 250 on a rack.1 point
-
1 point
-
This holder is set up for 2 lures. The lure in the picture is a 6 inch popper. Swivel snap wired to the L bracket on the left. Eye bolt with rubber band and snap on the right. 1 inch by 3 inch scrap wood. You can also put an eye screw on the side of one the ends to hang it vertically for drying. I recommend setting it up for 2 lures at the most as would be hard to paint lures in the middle. If the lure is 8-12 inches I only put one lure on it at a time.1 point
-
Make the cut while blank is square. Glue it back together with waterbased PVA wood glue with a bit of newspaper between joint. Carve lure. Run joint under warm water to separate.1 point


