

dtrs5kprs
-
Posts
647 -
Joined
-
Last visited
-
Days Won
4
Content Type
Profiles
Articles
TU Classifieds
Glossary
Website Links
Forums
Gallery
Store
Everything posted by dtrs5kprs
-
Can usually pull mine out in one piece, just have to scrub the glitter from the bottom edges, spout area. It helps if you remove one of the screws attached to the pouring handle, loosen the other one up, then swing that assembly out of the way. ***The big pots clean easier than the small pots, and the newer pots with rounded top lip clean easier than the older ones with the sharper lips.
-
I use the same Createx paints that I shoot thru my airbrush...but will work with just about any paints.
-
Is there a way to make tubes efficiently without a machine?
dtrs5kprs replied to earthworm77's topic in Soft Plastics
Sorry just tried link & it is jacked up somehow. Post is below: SUBJECT: # 26699: how to hand dip tubes Submitted by dtrs5kprs (208.247.100.130) from KANSAS on 7/24/01 9:30:00 PM I've seen and been a part of a few posts and lots of e-mail regarding tube dipping methods lately. Wanted to post my method as a courtesy to all who were kind enough to share information. 1) Dipper...I have fashioned a few dippers using the following: a) Aluminum rods of 1/4"-3/8" dia., depending on diameter of tube desired. Cut these to length, longer than size of tube you will be dipping (I use 7" size). Floor drain plate...drill out holes to proper size, then attach rods using JB weld. I ususally "quick fix" them in place first using 5 minute epoxy. c) Eye bolt & nut...run thru center of drain plate. This will be used to hold the dipper & can also be used to hang it for cooling. These dippers have 6 rods, but can also be made as 3's by using the inside holes on the drain plate. They are light, and dissipate heat fairly well. 2) Tail-cutter...I have tried a variety, but after posts from Hughesy & T-Mike have happened onto this one. a) Olfa rotary cutting blades (or Fiskars). I am using size 28, but there are several. These can be found at Michael's, Hobby Lobby, & similar craft stores. Trim or corner paint roller, short plastic handle with roller removed. This serves as the frame for the cutter. The wire is about the same size as a #8 or #10 machine screw. c) Flat washers (sz #6-10 depending on wire diameter), between 5 and 15 depending on # of blades. d) Neoprene backed washers, I am using size 10 on these, about 4 of them. I put this cutter together by alternating blades and flat washers, and use a pair of neoprene washers on the open end of the frame to hold them in place. This makes the blades fairly stable and allows for easy adjustment of pressure and blade changes. Currently, I am using a 5-blade set-up. This will cut thru both sides of the tube, with a couple of quick cuts to make in the "in-between" flaps. It makes about 14-16 cuts, with the # and width varying based on the # and spacing of blades. I use a rotary cutting mat to protect working surfaces and the blades. I am still trying to get a "perfected" heating method. Currently I am using a large, microwaveable corningware pitcher, that has a depth of about 10". It takes about 30 minutes to get the 1/2 gallon or so plastic in the pitcher hot, and it remains hot for quite a while. I can usually get 3-4 sets of dips (about 3-4 layers per set) before I need to reheat for a couple of minutes. Dipping...I dip in a few quick layers. I usually dip the tube a little longer than I want the finished bait to be. The first two dips form the length and the tail, the next two or three form the body. These are the dips that add thickness. You should allow the tubes to cool slightly between the second dip, and each ensuing dip. This keeps the tubes from thinning out in the middle. You can immerse the dippers into a large container of cold water to quick cool the tube for removal, or just hang from a rod, bar, peg hook, etc. When cool, just peel a small part of the tube's tail free from the rod and it should slide off. I apply a thin coat of worm oil to the aluminum rods with a toothbrush to make this easier. Set them aside, re-oil and go back at it. Once you have dipped a few batches it goes pretty well. 2-colors can be made with 2 batches of plastic, although I would recommend doing this with individual rods rather than a dipper (to save on qty of plastic required). This method will work on a small scale with a few loose rods, or with several dippers. Either #500 or #502 (or blends) Lure craft plastic will work. The 500 is VERY heavy and cuts much better than the 502. It also seems to cling to the rod better. You can add hardener or resin (from the bottom of a 5 gallon bucket or gallon jug) to 502, plus some heat stabilizer to stiffen it up to 500 level. The 500 cooks at a higher temp than 502. I do not recommend using 536 plastic for tubes. Colors and glitter are, of course, the usual hand-pour smorgasbord. Thanks to Ron, Hughesy, Triton Mike, Dave @ Lure craft, and all others who have provided answers & ideas on this subject. I hope this helps some of you who have questions. If there are any Q's or more specific info is required please feel free to contact me via e-mail. Don't let 'em jump, Dave Reeves ***I no longer epoxy or JB weld in the rods, now using adjustable collars to hold them in the drilled plate...allows easy change of length, diameter, etc. Be VERY careful using one of these cutters, as they are VERY sharp blades, and it is pretty easy to slip on the handles. -
Is there a way to make tubes efficiently without a machine?
dtrs5kprs replied to earthworm77's topic in Soft Plastics
Try this link to an article I posted on BFHP last year. Pretty decent setup for "garage" production of quality tubes. http://www.wmi.org/sql_messages_html/onfly_file/doc.asp?num=26699&ini=d:asp_inifishing_tactics_3way.ini&no_nav= Let me know if that does not get you there & I will try to find a copy, or walk you thru it. -
The "lubricant" seems to work about like the LC plain oil. Had some bad early experiences with Fish Formula, think it may be a mineral oil base. You can use the MF scented oil alone, but I cut it into the lubricant to stretch it, with no drop off in stench.
-
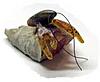
Try using the erasers on cheap wooden pencils. Sand them down to the diameters you want and dot away. Also works for shad spots, rogue eyes, etc. Pic attached shows results.
-
I buy and use their lubricant in place of LC's worm oil. It works just as well, may be a little less viscous, little clearer...WAY cheaper. The scented oil works well also. The garlic is good and strong.
-
One voice of dissent...I tried shooting a bunch of heads with createx last fall, then clearcoating with devcon or flexcoat. Results were much poorer than with powder paint or sprayed vinyl. Used the auto air with catalyst as a base coat and still had issues.
-
Should work fine. I used the cut outs from a large hole saw and threaded rod with very similar alligator clips (do they look at you funny at Radio Shack too?). From looking at your pics I would recommend turning the baits perpendicular to the rods (pegs, posts, whatever) vs the vertical method...seems to finish more evenly, esp on fat cranks.
-
Heat stabilizer seems to improve flow also, esp with lee pots.
-
Qty discounts are the key. Have used flake from both companies, think overall you ruin less batches with the MF (to scorching, clumping, hot spotting, etc). MF also has WAY more colors. Guess the price is also going to vary based on the weighing method discussed previously. ***Oil is one of the things MF is cheaper on...both the scented and unscented lubricating oil...plain was around $13-15/gal if I remember my last invoice correctly.
-
The "bakers" salt from lurecraft is really pretty well suited for pouring/sprinkling. I do use coarse non-iodized for senkos and tubes. If you are really serious about getting a fine flake you need to use a ceramic mortar and pestle...from a kitchen store or pharmacy supply outfit.
-
would have to look to be sure, but I believe it was the next kit down in price from the master set...about $20 or so, just wire stem brushes, no solvents or needles.
-
Roughly...15 drops/1ml, 30ml/1oz...applies more to calibrated dosing devices (like rx eyedrops) but it should get you close. Obviously with a "cut your own hole" yorker type cap, you are going to have some variance based on hole size. Also squeezing vs drop by drop will affect it.
-
Let me know if I can help...have a bunch of good clear water spinnerbait patterns from T-Rock, etc.
-
Think the catalog is a little jacked up there...MF is a lot cheaper, if you can use up the bulk quantities.
-
Bring it! Just getting into that area myself...like I need another addiction.
-
Am looking for Lews rods with the semi pistol trigger handles. Not overly concerned about the condition, action, or quality of the blank as long as the handles are usable. These are the "checkered" hard rubber/plastic grips used around 1987-88, before Lews changed to a simialr foam grip. Just handle assmblies would be ok too, if there are any broken rods out there. Please shoot me some mail if you can help with this. Thanks.
-
Have tried a bunch of different ways to clean my Paasche's...various cleaning solutions, home recipes (dish soap, simple green, etc). Finally broke down and ordered one of the micro brush sets form Dixie Art. It makes a WORLD of difference in your ability to spray. I run Createx almost exclusively, and have been spraying, flushing the brush, and following with a reamer when things seemed off a bit. Was absolutely floored when I ran the brushes through with some cleaner the first time and saw lots of GUNK get scraped out. This was on a VL and Milennium I thought were clean. Let me definitely suggest you try the micro brushes if you have not already done so. Besides cleaning the "bore" they also do a great job on color cups, trigger assemblies, and gunked up needles.
-
Practice...and a hot pot When trying to handpour 2-part molds you need to step up to the plate and get that plastic good and HOT also. To get it into a 2-part of that type, w/o injecting it somehow, the plastic needs to be quite a bit warmer than the temp you would run on an open mold.
-
Rock on! That link got there nicely. Thanks.
-
Does anyone know how to access any of the info, pics, etc... that we have all contributed to tacklemaking.com? Just wondering if some of those posts were going to be lost forever.
-
Have poured a bunch of craw/creature baits with silione skirt strips molded in in place of plastic antennae. With my molds, I had to pour a layer of plastic, place the silicone, pour the final layer (excluding 2 color claws...the dreaded third pour). Obviously this slows things down.
-
The Lee pots work great once you get used to them. Microwaving and transferring is the way to start off. Most of my small pots run well at about 6-8, can't keep a full pot cool with less heat...the big pots run better at a little lower setting. Have found lots of variance pot to pot. Heat stabilizer really will help keep things heating correctly. Also remember to decrease heat as you pour and reduce the volume of plastic in the pot. Would also recommend ordering at least 4 to start, really not useful unless you several colors ready to go.
-
Your salt mix is pretty close. Am using 536 and LOTS of salt with very good results form the del-mart molds.

