


nova
-
Posts
2,960 -
Joined
-
Last visited
-
Days Won
13
Content Type
Profiles
Articles
TU Classifieds
Glossary
Website Links
Forums
Gallery
Store
Everything posted by nova
-
Personally I prefer the epoxy (thinned) because I like the "glassy" finish I get with it; however, it can change the fit of a 2 piece mold slightly if you aren't careful how you apply it. I have tried the glue sealer but I couldn't get that finish I look for even with 3 or 4 coats. Some of the guys use it and they say it works for them. www.novalures.com
-
Sounds like a lot of work for an effect in a bait. I'll send you a pm. www.novalures.com
-
It can if the sealer is too thick. The elmer's should not create too much of a problem. Also, try baking the molds in you kitchen oven at 150 degrees for about 1/2 hour. You'll be surprised how fast you can dry out a POP mold. I seal mine with epoxy and I can make a mold in the morning and have it dried, sealed and be pouring by the evening. www.novalures.com
-
 Here's another color to the line. It's a lepoard frog color. Looks a lot better in full sunlight. www.novalures.com
 -
I live in Nova Scotia and I pour in my shop on sunny days with no heat and no problem. www.novalures.com
-
 Very nice color combos Cal.
 -
Do a search here for them. I have never used them but I know from some of the posts here that you have to be very careful with some of the floating additives. (health) www.novalures.com
-
It all depends on how many molds you have as well as how much practice you have had. I have 4- 5" molds and I have no trouble getting 100/ hour. That includes heating the pyrex and trimming the baits and re-mixing more plastic. www.novalures.com
-
Jay; You'd better forget about the quart thing. You'll go through that in no time. You are going to make mistakes; especially with the heat; and ruin some of the plastic as you learn.(we all have) I'm not sure how many you will get but once you get the hang of pouring it will be cheaper than 3/$5. www.novalures.com
-
I've been dealing with Hagen's for years now. I can only say 2 thumbs up. Great people to deal with. www.novalures.com
-
 Not yet Swamp; the water is pretty hard right now;lol. Most of the guys I've shown them to are thinking topwater simply because most of the frogs on the market are topwater. Got a couple more colors in development as we speak. Thanks for the comment. www.novalures.com
 -
This is my latest design. It's called ST FROG. The "st" stands for swim tube. This color is my 2 color firetiger. The bait is almost 4 1/2" long. www.novalures.com
-
Thanks guys. The frog is not sealed but it should float a fair size hook as the tube hollow section is probably better than twice the size of a 4 1/2" regular tube. Again, I'm amazed at just how long it takes to make these compared to a regular swimtube. www.novalures.com
-
Ok guys; here you go. Only two colors this time but I'm working on 2 more. One color is bullfrog; although I'm still going to tweek it just a little. The second color is my two color firetiger On the firetiger the pic doesn't show it very well; but the belly has a greenish pearl effect to it. I'll say one thing though; doing these ST Frogs is much more involved than I thought it would be. (very time consuming) Still going to be a little more till I'm ready to put them on the market. Anyway, I hope you like them. www.novalures.com
-
Nothing wrong with those. Keep it going. www.novalures.com
-
The 2 main things that put bubbles in plastic are stirring and moisture. When you stir the plastic, don't do it like you are trying to whip cream. The moisture part is something that we all deal with at one time or another. If you leet your heated plastic set for a moment the bubbles will float to the top and you can deal with them there. www.novalures.com
-
That's discustingly clean; lol. I don't think mine evre looked that way. If it did I couln't find anything. Just kidding; nice setup. www.novalures.com
-
Pretty close Longhorn. With my description you wind up with a bigger piece of plastic that actually forms the box for the mold and all you have to do is pour the POP into it. I described it this way because he stated that he was nervous about loosing his mold to heat fracture. By doing it this way he only has to pour one time instead of muliple times increasing the possibilty of fracture. www.novalures.com
-
I really like the belly color. Is that turquoise highlite? www.novalures.com
-
Gather up all the scrap plastic you can find. Form a box around the mold leaving about 1" clearance all around the mold. Then pour the heated plastic all over the mold letting it fill all around it and over it to about 1/2 to 3/4". After the plastic sets up and cools remove it and you will have a negative master of your mold. Then all you do is fill the negative cavity with POP and there you go. www.novalures.com
-
I know how you all feel. I don't think that I'll post a prototype again. All this did was frustrate everyone including me. www.novalures.com
-
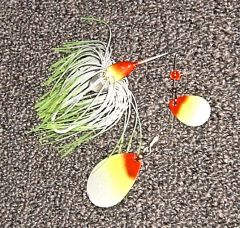
Sorry this is taking so long guys. I got the blades I ordered the other day and now I'm waiting for the eyes. I hate waiting on the mail. I think that their good horse is sick. Soon as I get the eyes I should be able to post the finished product soon after.(couple of days). www.novalures.com
-
Don't do it. You'll have one heck of a mess. The plastic cup could simply melt. Stick with pyrex. www.novalures.com
-
I know what you mean. That's why I make almost all my molds and rods/irons myself. I've been at it since 92' so you can just imagine the $ I've spent over the years(shhh don't tell the wife;lol). Look at it this way; if you need to have a hobby that will give you a scense of accomplishment and satisfaction, I can't think of any other that does it better for me. www.novalures.com
-
Try one drop of brown with the white and work your way up till you get what you want. Amber instead of brown may also be an option. www.novalures.com

