


jigmeister
-
Posts
347 -
Joined
-
Last visited
-
Days Won
27
Content Type
Profiles
Articles
TU Classifieds
Glossary
Website Links
Forums
Gallery
Store
Everything posted by jigmeister
-
New tutorial on making vertical pour silicone mold
jigmeister replied to jigmeister's topic in Soft Plastics
From main Tackle Underground home page scroll down to "Member submitted tutorials" > "Soft Plastics How To " -
Good for making one piece molds for full round straight tailed worms and stick type baits
-
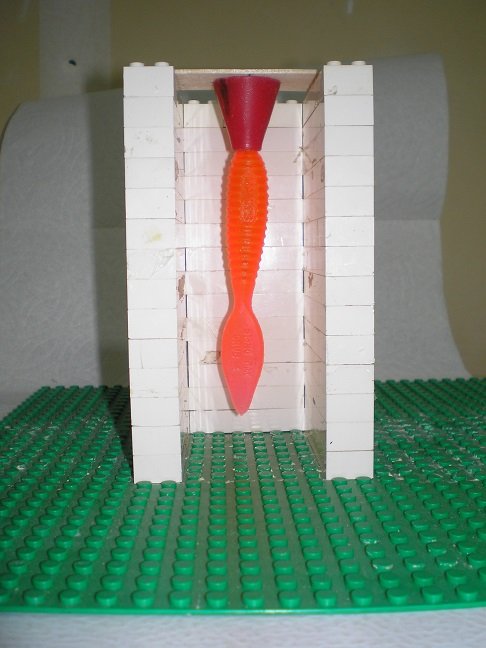
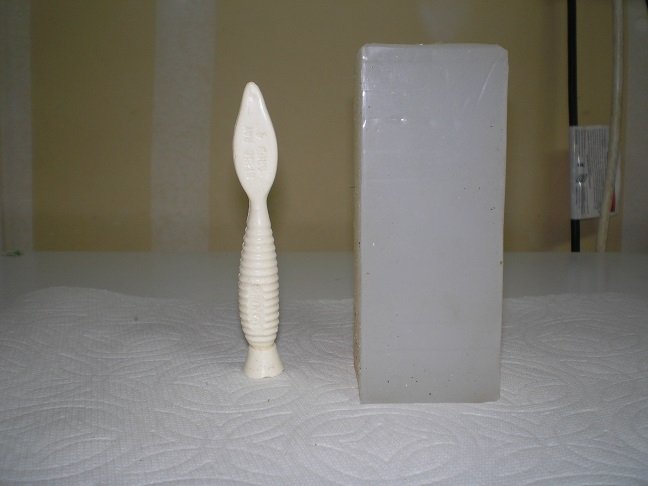
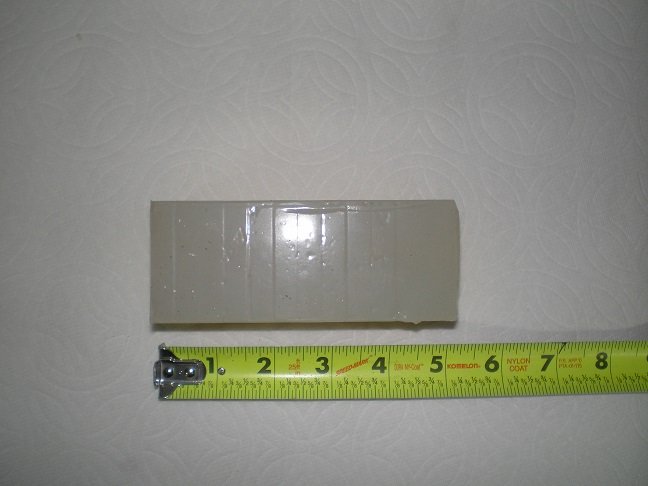
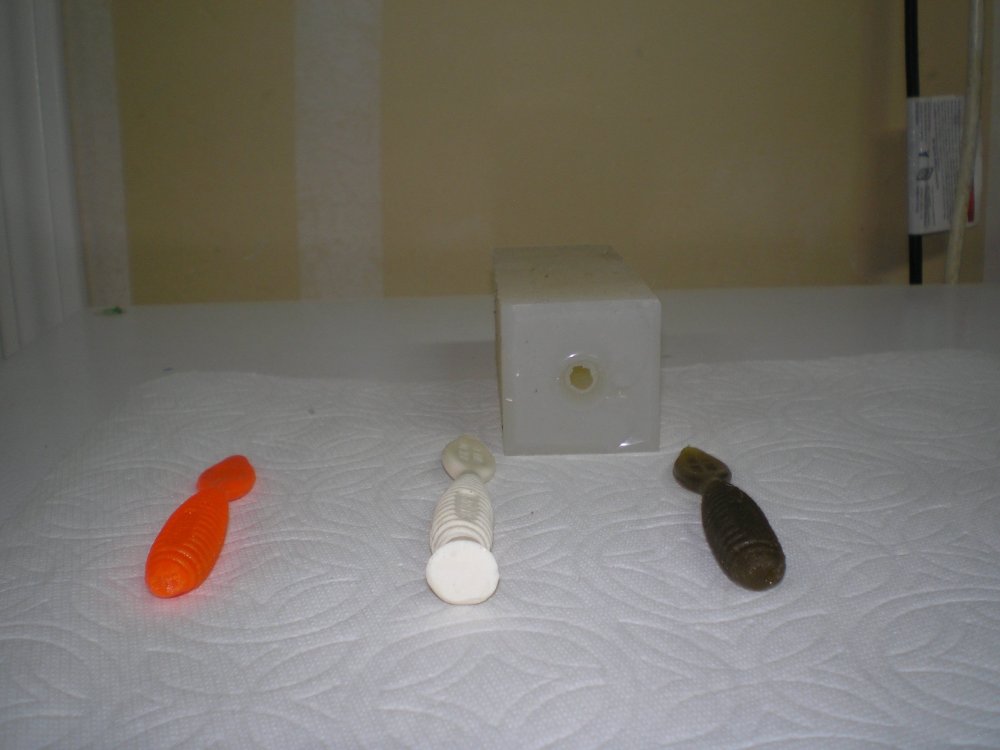
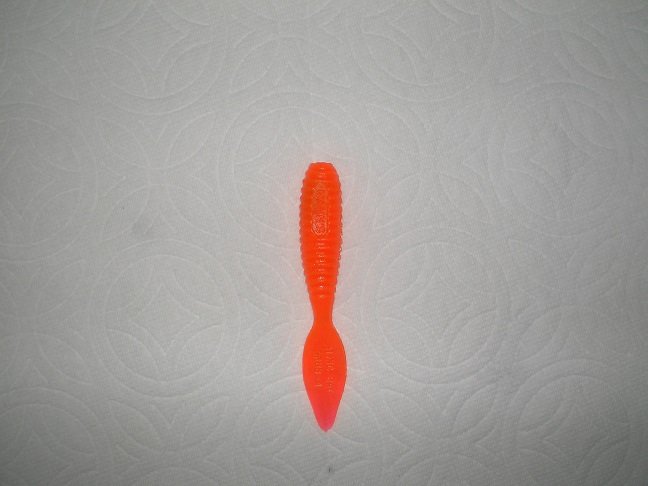
This works great with "no longer available" or hard to find soft plastics like the 4" spade tailed grub below using a mold box (I made mine out of LEGO's sealed on the inside with clear packaging tape) and Platinum cure silicone since the viscosity is very thin and picks up detail without bubbles but is so thin it will leak out of a poorly sealed mold box . Picture below shows a cutaway of vertical mold box with bait hanging from plastic cone glued to this strip of wood serving as sprue to pour plastic . A piece of spinnerbait arm wire is imbedded in cone then pushed into grub body to hold in place . A small tungsten worm weight can be hung on a sewing pin and inserted in tip of tail to insure bait hangs straight (if needed) but this also makes a great vent hole Following manufacturers directions mix and then slowly pour silicone into mold box until desired height is reached If desired you can slowly raise and lower bait in and out of silicone a few times to make sure there are no bubbles sticking on bait Demold from box when silicone is fully cured and gently pull master from mold Pam spray can be worked around sprue hole and top of bait to make removing bait easier demolded mold is pictured below (note how mold box LEGO brick shapes were picked up thru sealing take by silicone ) In picture below is a hard master made from 2 part polyurethane casting resin poured into new mold Polyurethane casting resin can then be sanded or built up /shaped with epoxy to alter original factory bait to make a new design of your own . Make sure to fish with and are happy with your new design before wasting any expensive mold material ! (been there done that) If you ready to start making multi-cavity molds of your new design you can make a new 1 cavity mold with your hard master and pour multiple polyurethane hard copies oriented sprue side down in the sprue box for a multi-cavity mold of your new creation for production without the expense or delay of having an aluminum mold custom made . Pictured above is the original Methiolate grub , Hard master with sprue made in new mold , and new green pumpkin grub poured in new mold shown in back ground . With mold positioned with sprue hole up you can pour plastic into mold with pouring cup . If you end up with a void in cavity or suspect you might you can gently squeeze mold towards the bottom forcing air bubble out then pour more hot plastic into the mold . In conclusion the pro's are this method allows one the ability to rapidly produce and modify prototype soft plastic baits with minimal features with hand pouring in a semi clear mold you create . The cons are the cost of the Platinum cure silicone and the limitation of shapes you can pour and still get finished baits out of the mold
-
I have made some molds out of platinum cure silicone for full round straight tailed baits with the masters oriented vertically in a row suspended off the bottom with fine gauge wire . You can put a big sprue at the top of the mold for ease in hand pouring and removing the bait . after cooling the baits pull straight out due to the give of the mold and bait and no flashing to contend with . The cured Platinum cure silicone is transparent so you can see the plastic when pouring in too. The Platinum cure silicone is expensive but so are machined aluminum molds
-
I started out stripping paint off some bomber crank baits that were clear underneath the paint using acetone with no sanding . I inquired with Bomber to see if I could purchase the baits I wanted unpainted which they said they sold but the price was about twice what one of their painted bait's cost ??? Later I started stripping Rebel Pop-R's with acetone to get a clear popper that lay underneath the smooth models .
-
I have done many over the years using acetone soaked rags . I started out sanding baits but it took forever and discovered using acetone was ultimately faster . With the rag wet just keep rubbing the bait with the hooks and split rings removed . You will see the paint collecting on the rag as you go . When a rag is full of paint discard it and use a new rag again soaked with acetone . when all of the paint is gone a clear bodied bait will look slightly cloudy after all of the acetone evaporates from the surface . I then take a new clean rag soaked with acetone and wipe the bait in one direction (head to tail) 1 time each on the top ,sides ,and bottom of the bait and set aside to dry to remove any cloudiness or thin paint residue on the surface . (sometimes you may have to do this final step a couple of times but usually not ) Use the real acetone from the hardware store not the scented stuff for removing nail polish .
-
Gene Larew Mega Ring Shad
-
Has anybody tried to make a soft plastic jointed swimbait?
jigmeister replied to RiverSmallieGuy's topic in Soft Plastics
Do a search on "Castaic Catch 22" swimbaits . They were soft and had multiple joints with a flexible mesh material molded into the bait . Sounds like what you're asking about . -
Recipe for "Keeper Custom worms" 082 color
jigmeister replied to jigmeister's topic in Soft Plastics
Wow thanks for the tip , When Keeper quit making baits I had heard that the original owners had given the business to their son (who had trouble keeping up with orders and eliminated a lot of colors ). Next the sister in law who poured baits for Keeper Custom worms started Wrights Bait company and brought back a lot of the lost colors . I found some Wrights and bought the equivalent of the original 082 color years ago and this matches what Wrights has on Ebay for sale so it must be the same "Wrights " from all appearances ... -
Keeper custom worms based in Reedley CA. was taken over by "Wrights bait co " who continued some colors but I don't know if Wright's is still in business but can't seem to find them . I bought up a bunch of the 4" 082 st worms before the supply dried up and now running low . Any out here master the color of this old school split shot worm . This 2 color pour is a light transparent brown and watermelon / chartreuse mix . I'll have to get a picture attached for clarification .
-
I would suggest trying a different type of paint for the eyes . Only jig heads I paint eyes on are swim jigs . I have been using enamel in a 1/2 pt can from wally world and have had no issues . I only use yellow paint with a black dot in the center though .
-
If you have a dial caliper you can measure the hook wire diameter you want to modify the mold to fit and get a dremel ball cutter that matches the hook diameter as close as possible . Don't forget the hook eye diameter will sometimes also be bigger so I also measure and using a drill bit matching the hook eye size and drill a shallow hole in each mold half . Closing the mold on the desired hook size and striking with a hammer ( or pressing the mold between the jaws of a vice also works) to make an imprint of the hook in both mold halves . I have used the dremel ball cutter bits in battery hand drills and a drill press over the years . I start on one half removing aluminum and occasionally laying the hook in the slot I am cutting . Eye balling the hook I try to only cut deep enough so 1/2 of the hook wire diameter is resting in the slot then I start cutting the other half of the mold repeating the process . When cutting the second half I also try closing the mold up on the hook until it just closes . If you remove too much aluminum from the slot you cut the hook can roll off to one side slightly which is not desirable so that's why it's best to go slow . If you remove too much metal you can use JB Weld to fill in any mistakes .
-
Great Idea ! Thanks for sharing
-
looking to buy a single cavity fake stone type mold for 4.95 Flirt style worm . Someone in Ukraine was selling them on Ebay and is out of this mold . Anyone have one they no longer need
-
One theory I have heard is to locate the kill spot above the belly hook hanger so if a fish target's the spot he will hit the bait around the belly hook . Makes sense .
-
Another option is to soak bare wooden lure bodies overnight in a mixture of 1 part linseed oil mixed with 9 parts mineral spirits . Take them out and hang to dry for a couple of days . You can then prime coat and paint any with any oil based paints . I had a problem with cedar swimbaits having the paint split from absorbing water while fishing until I tried this sealer . If you hit a rock and ding the paint the wood is still protected
-
Here is some Scroggins /Ditto Baits info Big Show’s Baits ~ Ditto Gator Tail Worm – Anglers Channel Big Show’s Baits – The Ditto Fire Craw – Anglers Channel
-
I would say if you' re planning on using those brush hog style baits with a Texas rig you could get some offset EWG hooks with the extended shank (VMC VANADIUM BASS EXTENDER EXTENDED SHANK EWG WORM HOOK or similar I believe Gamakatsu might also make one ) and tie a bigger barb on the hook by the eye to hold the skirt in place and possibly another barb behind the first one to hold the brush hog in place . If putting them on a jighead just do the same if it doesn't have adequate keepers for both . For the tail skirted Ned rig you could try making a barbed keeper an inch long out of a piece of a small thin paper clip to push thru the skirt into the tail of the TRD to hold the skirt in place . Making a round bend on one end of the wire and folding it over at 90 degrees and a barb at the opposite end would prevent the skirt from slipping off the wire when attached to the worm
-
That color from what I recollect was first sold by Cotton Cordell lures . They had the purple / brown like in your picture they called chameleon purple and they also had a chameleon green that was a shifting green brown color . In the early 70's I think a few different lure companies were selling these colors. As far as the Ditto worm style the only ones I remember were the Gator tail and they also made a craw style bait( Ditto Fire Craw in the early 80's ) I can remember flipping way back when . Larry Nixon won a lot of money using Gator tail worms in Bassmaster tournaments in the early 80's might know the name of the worm you have come across. Terry Scroggins has original Gator Tail and Fire Claw molds from what I read .
-
Interesting concept I am wondering if the less dense head would be unstable and possibly roll over on retrieve?
-
Kind of late but what I did was make a silicone mold from hard masters I created . At both ends of the cavity I cut slits with a razor knife for the rigged hook harness line to slip through to hold the hooks at the proper height in the mold before pouring . I rotate the hooks to one side of the mold to allow for pouring the plastic into the cavity without hitting the hooks . I made up a little fixture that sits on the tabletop beside the mold and holds a piece of brass rod horizontally slightly above the mold at hook level and after pouring I move the rod sideways against the hooks to center the hooks in the worm while the plastic cools . I heat the plastic in a pyrex cup before pouring . I fould some other dacron line made by "Gudebrod" called "meat master " that works but the flyreel backing seems to be much easier to find . Some historical context : The Deaver Fishfinder worm is said to be the inspiration for Jack Chansellor's "Do Nothing" worm " .


-
you could solder them together with a soldering iron as well
-
If it was me I'd be tempted to try some painted tungsten worm weights for spinner bodies
-
Badges ? We ain't got no badges ? We don't have to show you no stink'n badges!
-
Looking for info on Lloyd Deaver's "Fish Finder " worm
jigmeister replied to jigmeister's topic in Soft Plastics
Thanks for the article . If they (Deaver's )were produced into the 90's that would explain the two color hand pour in the Green weenie color . Attached pictures show 4" Deaver worm on left and Chancellors 4" Do nothing worm on right


