


BobP
-
Posts
5,782 -
Joined
-
Last visited
-
Days Won
193
Content Type
Profiles
Articles
TU Classifieds
Glossary
Website Links
Forums
Gallery
Store
Everything posted by BobP
-
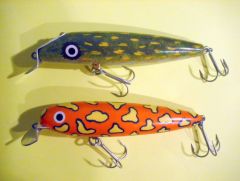 diemai, nice designs! I especially like the paint patters.
 -
Propionate works fine as a waterproof undercoat but I wouldn't use it as a topcoat - it's softer than epoxy and if the humidity is not perfect when applied, it turns milky. For a uniform coating, you need to dissolve the pellets in acetone and make a thin solution, then dip the lure multiple times to build up the coating. I do 5-10 dips. The acetone flashes off in 3-4 minutes, after which you can re-dip. JMHO, there are other topcoats that are so superior in every way that I just don't see any reason to try prop as a topcoat.
-
Chaos, G-10 is the circuit board material that has become popular for crankbait lips. It is thinner and stiffer than Lexan polycarbonate. G-10 comes in a variety of colors but the white/slightly green variety is the most popular among builders. If you check out Janns Netcraft or lurepartsonline.com, you can see pics of this type lip.
-
Jack, in addition to being off-center, another problem might be that your lip is too long. It's hard to diagnose problems like this sight-unseen and without knowing how much ballast you used in the bait. If the ballast is inadequate, that can also amplify any problems with the lip. As far as trimming the lip, yes, you can try that. Look from the tail of the bait along its belly and judge how much of the lip is exposed on each side of the bait. You want them equal. After you correct the exposure on the sides by trimming, you will also need to re-shape the leading edge of the lip slightly on a rounded lip. All of this pre-supposes that you have first tried tuning the bait by bending the line tie as described earlier.
-
I haven't had a need to, but there's no reason why you can't use dye to color epoxy. Mix it in after mixing up the epoxy batch. Epoxy is pretty forgiving about adding stuff after the batch is mixed. I would use dye dissolved in solvent, not water. If the dye is powdered, mix it with denatured alcohol or try mixing the powder directly into the epoxy. Should work OK.
-
I would check Janns Netcraft or Lurepartsonline.com to see if they have a circuit board lip close to what you need rather than buy a whole 12 inch square piece of material and having to shape a new lip. Cut off the old lip, cut a slot for the new lip, then epoxy it in with 30 minute epoxy (quick set 5 min epoxy will quickly turn brown). If possible, you don't want to cut the new slot so deep that it pierces the air chamber of the bait, but if you do, make sure the epoxy fills any voids so it won't leak. I use a Dremel tool with a thin fiber-reinforced cutoff wheel to do this. I can guess you're unhappy about breaking a $27 jerkbait, but all is not lost.
-
I also recommend a small band saw for its speed but have used only a scroll saw for 10 years now, and yes - it gets the job done. Just slower! It will cut soft woods like balsa as quickly as you want. Hard stuff like basswood or cedar can be tedious and hardwood thicker than 1" is very tedious. If you are going to be making more baits than just a few at a time as a hobby, a band saw is definitely indicated. If you are going to be making larger baits for pike, also go with the band saw. If you want to cut out Lexan lips, again the band saw is better. A scroll saw will cut Lexan but wants to grab and lift the Lexan off the table on the upstroke, which is not a good thing. I cut my lips out with simple metal snips.
-
Your compressor turns on whenever you activate the airbrush's trigger. Most lure painters use airbrush pressure in the 10-45 psi range, so you need a regulator. Regulators have a dial control and a pressure indicator dial, and many also have a built-in moisture trap. If you go to Sears or Home Depot, you can find one in the air tool department for around $20-25. You don't need an air tank on this type of system. As you gain experience in lure painting, you may want to upgrade your system to a common tool compressor or an airbrush compressor that incorporates an air storage tank. The storage tank lets the compressor runs less often and buffers its output to eliminate air pulsing as the compressor works. But your present system will work "as is". Don't forget to pick up the necessary standard male/female hose adapters when you get the regulator and use some plumber's tape on the threads to make up an air-tight system.
-
I think any topcoat will do unless it states that it contains UV filtering agents. Even then I doubt the filters will block enough UV to inhibit charging the grains, but I'm not a paint chemist.
-
Dan, whatever you use under ETEX needs to be water-based or the solvent in the epoxy can cause it to run. Option 2: shoot a little clear acrylic over your signature to protect it from the epoxy solvent if you want to use a solvent based ink like a Sharpie. Option 3: dip a cheap fine point caligraphy pen in black Createx and sign your lures with that. Mine came from Michael's Crafts, cost a couple of bucks, and will last forever.
-
SS, since UV light will penetrate clearcoat, the glow grains will charge nicely underneath it. Maybe if your clearcoat has UV filters, as some epoxies do, it could be a problem. My spoons charge up just fine under ambient daylight (even on a cloudy day) and a topcoat of Dick Nite moisture cured urethane. BTW, the Glonation site has a link to a lure company that uses their glow powder in soft plastics. I'm not sure I would use the large-grained Glonation paint on a regular crankbait since you can't spray it and the paint job would look pretty ugly. But I painted a lipless crankbait with the stuff and it turned out OK - a solid white lipless crank with an eye popping greenish-white glow in deep water. I guess there's always a fly in any ointment: the bigger the glow grains, the stronger the glow - but you can't shoot large grains through an airbrush (at least not the airbrushes I use).
-
To me, paint stripping depends on how much you need to keep the buoyancy of the bait constant (suspending baits) and the condition of the existing paint. On a Rattle Trap, buoyancy is not an issue but I would sand any chipped, scratched, or oxidized paint so you start with a smooth hard surface. For new paint to adhere properly, all the old finish should be lightly sanded and then wiped down with denatured alcohol. That removes oxidation and gives the surface some "tooth" to promote better paint adhesion. In practice, it's hard to do spot repairs to perfection on old baits so I often end up stripping plastic baits completely. Wood baits are a whole 'nother story. I never want to strip a wood bait down to bare wood. I usually strip paint mechanically with a small thin sharp blade (I use a small Swiss Army knife) by getting the blade just under the finish and lifting/popping/peeling the finish off the lure. It takes a little finesse but you can usually strip a bass lure in 15 mins. Less for a chrome Rattle Trap since that finish will peel very easily. A refinement I haven't tried but has been recommended by other TU'ers is to run a torch over the lure quickly enough to bubble the finish without catching it on fire or causing the lure to swell. Hot old finish comes off much easier than cold old finish. Some pros shops remove old finish in a blast cabinet.
-
Opaque colors suspend pigment in a solid base. Transparent colors suspend pigment in a clear base. In practice, there is overlap between the two. A light spray of opaque will show the color underneath it, but not as much as a light spray of transparent. On the other hand, a heavy spray of transparent will cover an underlying color as well as a medium spray of opaque. I tend to use opaques for my base colors like white, neon yellow, and black, and transparent for everything else, which I sometimes want to layer for intermediate color effects.
-
If you're just starting out, a good beginner pattern is shoot a solid color basecoat (often white), then shoot an "all-over" color like pearl white or neon yellow, then do the shoulders and back with a darker color, then add accent colors if desired on the throat and belly. Dark solid colors will totally cover lighter solid colors. Like Gene suggests, there are no hard and fast rules and you will discover variations and refinements as you go along, especially using stencils and layering paints to get blended effects that seem more natural. Retrobass, on TU, we're more about building and showing airbrushing results than learning how to airbrush. Google airbrushing for numerous sites dedicated to the art of airbrushing and go to YouTube and do the same search for loads of video tutorials on the subject.
-
If you're talking about a plastic copy of a wooden DT-10, check here: http://www.predatorbassbaits.com/id69.html I've never seen true unfinished Rapala crankbaits sold anywhere. But a lot of guys buy originals and repaint them because the Rapala DT's don't come in a very wide array of patterns.
-
I have some acrylic base glow paint that I got from: http://www.glonation.com/ Mine has glow grains that are too large to pass through an airbrush so I brush it on lures (especially jigging spoons) in several heavy coats, then topcoat with Dick Nite urethane. You can darn near read a newspaper by the light this stuff puts off. The glow is produced by charging the paint's glow grains with UV light. Even on cloudy days, there's plenty of UV to get the job done. The length of the glow varies according to the color of the glow paint - white lasts for up to 12 hours, other colors for less time. The manufacturer warns against thinning. It comes as a gel with the grains dispersed in it. If you thin it much, the grains will fall out of the paint. Also, you cannot mix glow paint with other paint since the grains will be covered and the glow will be hidden. I have compared the glow from a spoon coated with heavy coats of acrylic glow paint to a factory-built Cabelas glow spoon which was undoubtedly spray painted. The home-painted spoon shines like a beacon in a dark room while you can just see a faint glow from the edges of the Cabelas spoon. I can't say if the bass always prefer the brighter spoon - they aren't talking - but I catch lots of largemouth, white bass, and stripers as deep as 55 ft on hand painted glow spoons. If you want it "in their face", the hand painted spoons certainly "shine" (pun intended). The more numerous and larger the glow grains are in the paint, the more glow you will get.
-
swarma, I think your source resells Chinese-produced plastic knockoffs. The pic is a knockoff of a Megabass Griffin. I've never used your source but I've tried the same bait from another reseller and my opinion is the same as SMALLIEHUNTER - buyer beware. Chinese knockoffs copy the externals of a high quality Japanese bait but not the important internals - type and thickness of plastic, ballast amount and placement, internal compartments, etc. The construction quality is often poor. So if you are hoping to get a $25 Japanese crankbait for 60 cents, you are going to be disappointed. I'm not saying all knockoffs are bad. Some work OK even if they don't really imitate the original. But my experience has been so spotty that I recommend you hang some trebles on them as soon as they arrive and test them on the lake to see if they are worth painting. fishinnbama, I hesitate to name suppliers because I've only tried some baits from several sources. You might pick different baits and have a different experience. I have liked baits from Janns Netcraft and also had good luck with Japanese-made knockoffs (which go for $4-5) from Bustin Bass Baits.
-
If you're looking for some pike/musky bait building plans, check out http://www.lurebuilding.nl/indexeng.html
-
Gordon, unfortunately, the durability of auto clearcoats seems to be directly related to their toxicity and requirement for a separate hardener. Only you can judge whether a one part rattle can clearcoat is durable enough for your lures - but I've never found one that was.
-
Rob, because there's more wood up front, the buoyancy on a popper is mostly toward the head of the lure, not the tail. Sounds to me like you want the ballast more forward to get the popper's cup in the water. I think the only way to get the float right is to test it in water with all the hardware installed and the wood undercoated. I'd tape over the existing hole and screw in (just a few turns) a screw eye along the belly about 3/4" forward of the present hole and hang lead on it until you get the float right. If you want to adjust the position or amount of ballast, it's quick to do with a screw eye. Then weigh the screw eye + lead and voila, that's the exact ballast weight needed and its position. If you don't have a digital scale, use a bent straight pin instead of a screw eye, run the test, and then epoxy the lead into the body at the correct position. The paint and topcoat (epoxy or urethane) will only add about .03-.04 oz to the lure. I'd do exactly the same thing with the walking bait. Different guys want more/less tail depth than others, so a float test is essential on them.
-
I got some Megabass 110 jerkbait KO's that said "silver". They look like standard shiny chrome finish to me, which is what I wanted. 152nd, what clear coat did you use that caused a reaction? I'd like to avoid the problem!
-
The largest Dremel round-over bit is only 1/8" which is too little to make any difference when rounding over a crankbait, IMO. In a "buying fit", I got the Dremel bit and router table, used it once and got rid of it. A couple of passes with a sanding cylinder does the same amount of work - don't waste your $$. Besides, most of us just don't feel safe trying to run a 20,000 rpm razor sharp router bit over a piece of 2 1/2" x 1" wood used for a bass crankbait. Flex shafts, etc: my Foredom rotary tool has a flex shaft as a basic part of the tool but I've never used one with the small Dremels. Depending on which model Dremel you choose, it could be an advantage or not. A lot depends on your experience and how you like to use the tool. One recommendation I have for Dremels is not to limit yourself to only Dremel bits. It will accept any bit with a 1/8" or smaller shank diameter, including toothed wood carving burrs, millimeter drill bits, etc from other manufacturers. All you need to use them is a set of Dremel collets so you can fit smaller shank tools into the Dremel.
-
I'm wondering about the advantage of an undercoating that penetrates as deep as possible into balsa. Great adhesion, yes. Toughness, yes. Penetrating balsa deeply and filling its air passages with a solid - ???
-
I've been using Dremels as my main tool for making crankbaits for 10 yrs. My mainstay has been the least expensive 2 speed model. It comes with a 3 yr warranty and Dremel, which is a division of Porter Tools, offers excellent warranty service. I disassemble it and blow out the wood dust about once a year. The only thing that ever broke is the slide switch. An email to Dremel and a rebuilt unit arrived within 3 days. Not too shabby! I also have a much more expensive Foredom rotary tool that has more power and accepts attachments with up to 1/4" dia shafts. But the Dremel is so handy that I still use it 90% of the time.
-
I use denatured alcohol. Just a few drops is enough to extend the brush time by a couple of minutes and the epoxy will still harden "on schedule".
