


BobP
-
Posts
5,782 -
Joined
-
Last visited
-
Days Won
193
Content Type
Profiles
Articles
TU Classifieds
Glossary
Website Links
Forums
Gallery
Store
Everything posted by BobP
-
RG, I find crackle medium is extremely variable - the brand and how well it works, the base coat the crackle medium sits on, whether you should dry it according to instructions on the bottle or should leave it wet or damp when you spray the paint over it, whether to air dry it or heat dry it. etc. Bottom line, you have to experiment until you get the effect you want. I suggest you do both sides at the same time so that, whatever drying regimen you use, you will end up with 2 similar crackled sides.
-
You can use copper electrical wire, some commercial custom builders like D-Bait use it. I don't know what gauge though. You can also use soft brass or soft temper stainless stell (aka "safety wire"). Of the options, I prefer soft stainless in .040" diameter which I get from McMaster-Carr online. It is the hardest of the "soft wires". A word about softer temper wires - the small diameter of the line tie and hangers on a bass bait prevents the wire from deforming. Wire that seems pretty floppy in your hand can perform well if bent into a small loop for a line tie or hanger. I have used as small as .032" dia brass wire with no problems. .But a good "all around" choice for soft wire diameter is .040". Advantages of soft wire - MUCH easier to shape for through-wire frames, easier to tune baits with soft wire line ties and less chance of breaking the waterproof seal at the bait's nose, which ruins the bait. If you choose soft stainless, you also don't have to worry about corrosion caused by dissimilar metals (copper wire, stainless split rings, etc).
-
I've used general purpose PVC pipe cement with good results. You want to use the clear, not the purple prep solvent (but the clear is not sold in all states) because the purple stuff WILL bleed through your paint job - been there, done that. The PVC cement is nice because it bonds in a few seconds. I've cut sections out of Zara Spooks and glued them back together with no later problems.
-
I've heard some commercial builders dip balsa baits in a thick "build coat" (e.g. flooring glue) to encapsulate any rough wood and so avoid the need to sand them. A more mundane approach is lots of sanding. After sanding raw balsa down to 400 grit, I dip 7-10 times in prop or brush on 2 coats of Devcon thinned with lacquer thinner, first coat sanded smooth, then a second coat to further smooth the surface and waterproof any spots that might now be unprotected. I lightly sand the 2nd epoxy coat to degloss the surface before painting. It's more work than hardwood baits but you end up with a very smooth durable balsa surface.
-
If it's external scratches, you can clearcoat the lip at the same time as the body and they will disappear. If you dip the lure in polyurethane like Dick Nite clear, it will look "perfect". If you clearcoat with brushed epoxy, unfortunately, you will see brush marks and run the risk of the lip yellowing over time. Why something other than hemostats or Xacto handles for holding the baits? Both are reliable. If you are thinking about the clearcoat drying or curing, that's another vote for Dick Nite or a similar polyurethane. Just dip'em or spray them, hang them up by the line tie .... and walk away.
-
Thinner foil = less obtrusive edges. A lot of guys coat the bait with Devcon Two Ton epoxy, which is thicker than Etex and levels out well over foil edges. You should burnish all the edges of the foil before you coat it, of course, to make it lay flat. I like adhesive Venture Brite-bak foil because it's relatively thin, durable, has a good adhesive backing and so is quick and easy to use.
-
Ksredneck, The less shaping required being easier, I'd start with a flat sided crankbait if you have a way of cutting out the starting blank. Trace the bait shape, cut it and the lip slot. Mark the width of the bait with a compass around the blank and sand it down to final width. Then round over the edges, install ballast and hardware, undercoat, paint, glue in the lip, and topcoat. Look in all your tool drawers to see if you can find a little extra patience. The point is not to finish as soon as possible, but to finish it as well as possible.
-
If you're looking for a "quick and dirty" solution, not sure you'll get one. The predominant way hardbait builders do it is with an airbrush and water based airbrush paint, protected with either an epoxy or moisture cured polyurethane topcoat. If you lack the equipment to do that, your best bet is to use aerosol cans. Shoot thin coats of white paint until you have hidden the old colors, then shoot the new colors, then shoot a topcoat of exterior polyurethane clearcoat. I strongly suggest you stick to one type/brand of paint because if you mix them, you are likely to find one coating will cause another to bubble or wrinkle when used together.
-
Like Ben says. I don't want to sit around watching paint dry! I shoot a color, dry it with a hair dryer, shoot the next immediately. Painting goes faster! A couple of tips - if you shoot a heavy layer of paint, put the dryer on low speed and gently dry it so you won't push paint around on the bait. Also, don't dry it too hot or too fast. You can boil the paint. When you use a hair dryer on a wood bait, you will find out if your undercoating/waterproofing is working. If there is a weak spot for air to escape, it will blow a bubble in the Createx while you dry it with a hair dryer. Bottom line, don't hit it too hard or too fast. It only takes a minute anyway. Impatience ruins lots of baits
-
I assume the guy is sanding the gloss off the topcoat. Guess what? Dip it in water and it becomes glossy again, so I don't see the point. But if it makes him happy....
-
That cutaway pic is really nice, Gene. Thanks! Interesting to see how far forward the ballast is positioned. String, I guess the plastic chamber with lead is a subtle rattle chamber, doing double duty as additional ballast. And that long root on the lip insures very consistent lip alignment and a strong installation, plus provides added strength to the balsa body. You gotta hand it to Rapala, they know how to design mass production wood baits!
-
Frank, I don't know what solvents are in DN but they seem pretty active. I stripped some lures that had been dipped in DN and it looked like it had soaked through the acrylic paint to bond to the plastic underneath. That's usually a good thing but in this case, maybe not. I don't think there's a definitive answer until Rivereyes tests to see what happens. The problem with trying to strip solvent primers off plastic is that the faster solvents like lacquer thinner or acetone melt plastic and make clear plastic lips cloudy. I'd try a less volatile petroleum based solvent like naphta first - if it is necessary.
-
You don't say what solvent you use to dissolve the prop but apparently it isn't acetone. I use acetone and it works great. Dissolves prop faster than most, dries quickly, doesn't smell much.
-
Primer? I don't got to show you no stinking primer! I never use primer. On plastic I shoot a white acrylic basecoat and then color. The topcoat is what holds paint on the bait. If the topcoat stays intact, the primer has no function. If the topcoat fails, primer won't keep the paint on there. So I just can't see what function primer has in this application.
-
Anything lead - fishing sinkers, lead solder, lead shot, lead tire weights, or cast lead ballast weights. Many use lead ballast/hook hangers on their baits. You can buy them from several online sources like lurehardware.com
-
There is no easy way to strip solvent based primer off 100 baits. But don't worry yet. It's good that your primer is curing and out-gassing its solvents while you wait for the DN to arrive. If it's designed for plastic, the primer may take a week or two to fully cure. Run a test batch with DN before you go whole hog. You may find there's no problem at all. If there is, I would try covering the problem primer by dipping the baits in propionate dissolved in acetone, as a barrier - I use prop to undercoat wood baits and have had no bad reactions with DN. Not a sure fix, but worth a shot.
-
I think a microwave motor would have to be fairly robust to rotate several pounds for quite a few minutes (prospectively). I use a little 2" dia a/c stepper motor on a 6 lure turner and it has worked for 5 years and counting. But the bottom line is "motors work for as long as they work".
-
I've never thrown a Dredger but read about it and some other deep cranks in a Tackle Tour crankbait shootout published recently. Give it a read at http://www.tackletour.com/reviewdeepdivers.html I wish the TT guys had included more deep divers. Oh well, maybe next time. Hmm - a deep diver that looks like a $7 DT-16 but with lead on the lip.... Hey Ollie! Pass the adhesive lead golf tape! (actually, I like my cranks to float)
-
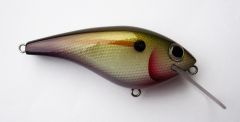 String, your paint makes me feel like a swamp dweller looking up at a hawk flying by. Really neat but hey, you know you ain't never gonna be able to do that yourself. This one is my favorite of all the the Strinjam Specials I've seen so far. Super work.
 -
 Nicely done, Ben!
 -
No Real Good Forum For This - How To Make Fish Hooks?
BobP replied to mainbutter's topic in Hard Baits
OK, if you want to use "natural materials" just like our ancestors - say, 30 thousand years ago - check out some archaeological stuff online about ancient maritime cultures. Directions - drag the jawbone of the whale into the cave. Using sharp rocks, cut and beat on that sucker until it looks vaguely like a giant hook. -
DN is a pretty thin coating so how it will do mixed with glitter is a ?? Probably depends on the flake size. I use the hobby glitter that comes suspended in clear acrylic medium, in 2 oz bottles. Thin it a little with water and apply it with a soft brush. That allows you to put glitter exactly where you want it, in the density you want - and nowhere else. The 2 oz bottles of glitter are cheap and come in a wide variety of colors.
-
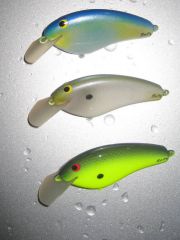 light balsa, thru-wire, G-10 lips, .29 oz with lead and tungsten shot ballast
 -
Yep, what Ben said! DN will begin to cure in the storage container, typically when the level gets down to about half and the void space fills with moisture laden air. Whatever scheme you come up with to preserve DN, the aim is to minimize the volume of air that contacts the DN during storage. Some guys who brush DN decant theirs into small jars that are tightly sealed. I can't do that because I dip baits and need a larger jar, so I use Bloxygen to displace the air in the storage container. There are several "aerosol finish preservers" that may work as well as Bloxygen, but that is the brand I tried and it works. The worst case scenario for DN storage is to keep it in the original can, opening and closing the lid as needed. The metal seal eventually deforms and leaks air, beginning the cure process - which will happen any way when the level gets down to around half. You have to take precautions to make it last but it's a really nice finish and IMO worth the trouble.
-
The total weight of the WEC is something to think about. You may be using wood with a different density - balsa varies between 6 and 18 lbs/cu ft. If you have a specimen E-1, weigh it and work out the amount of ballast for your copy by subtracting you copy's component weights (raw wood blank, lip, hardware, estimated finish) from the specimen weight. That's why a digital scale is so useful. Perhaps another TUer has an E-1 they could weigh for you?