


BobP
-
Posts
5,782 -
Joined
-
Last visited
-
Days Won
193
Content Type
Profiles
Articles
TU Classifieds
Glossary
Website Links
Forums
Gallery
Store
Everything posted by BobP
-
A guy's gotta do what a guy's gotta do...but why anneal wire when you can buy a 1/4 lb spool for less than $7. One spool lasts me about a year, making around 100 baits. McMaster-Carr Go ahead and order some polycarbonate sheet for lips while you're at it!
-
If it's hard temper stainless I think it will be strong enough but I don't think it's ideal. If it's soft temper stainless, it's too weak. The weakest wire I've tried was .031" dia soft brass. Never had it break and the lures stayed in tune but it is puny looking. .0403" soft temper stainless is stronger and works well - I regularly use it for thru-wiring and for line ties on bass baits. JMHO, soft temper stainless in .0403 or .050 dia is ideal. I find it frustrating to shape hard stainless. It's hard to bend it accurately and it's hard to keep it in a single plane while bending, which it must be to fit inside a bait and glue the halves together. I also don't like hard stainless inside balsa because it is easy to damage the nose of the bait while tuning it. Considering the effort it takes to build a crankbait and the relatively cheap cost of wire, get the right stuff. 1/4 lb spools from McMaster-Carr are quite reasonable. If you want brass wire, I recommend .050" dia soft temper. It's a bit softer than soft stainless but brass is a tradition on shallow bass baits. Some say it helps the bait to "hunt". Don't know that's true - I frankly doubt it - but the most sought after classic cranks used brass wire, so it's still a plus feature for many crankbait nuts. Don't worry that soft wire will deform in use. When bent into a small diameter circle, it is surprisingly strong. Some thru-wired bass baits use copper wire - the popular D-Bait is an example. It also works well in terms of shaping and strength but I don't like its propensity to corrode, especially in contact with dissimilar metals.
-
I use a little Badger airbrush compressor with auto on/off that develops max 50 psi, 40 psi constant working pressure. IMO, you want a compressor that has a minimum 30-35 psi constant working pressure to drive an airbrush used for crankbaits. Some of the cheaper Chinese compressors advertise 30 psi but only deliver 15 psi working pressure. No good IMO. Whichever compressor you choose, you'll need a pressure regulator (it usually comes with a pressure gauge) and a moisture filter ($15-20 each), plus adapters to fit everything together. You can get them at home centers like Home Depot that carry air tool accessories. I like my compressor (it was free!) but since I work in my garage and noise is not an issue, I'd buy a small tool compressor with an integral air storage tank if I were shopping for a new one. A lot of guys use ones costing $60-100 that develop 100-120 max psi.
-
Diemai, I know a lot of guys like screw eyes for hook hangers but I prefer hand twisted stainless wire. First, I'm not building for sale and don't have a "time is money" consideration. It takes me about 15 minutes to twist up a set of hangers and line ties for a batch of 5 lures - a little longer if I'm installing them on the lips of medium/deep divers. Here's what I like about them: unlike screw eyes, hand twisted hangers do not have tapered shafts so they have more glue surface when installed in pre-drilled and epoxied holes. Mine are .029-.031" dia stainless which is easy to twist and you can make them any length needed, plus you can also size the eye diameter to fit the lure. The wire is much thinner than the wire in a screw eye and so less obtrusive. It's easy to mount or remove split rings from them without bending the split ring like I do on screw eyes. Lastly, I use soft temper stainless wire for line ties. Hand twisting them adds strength to the tie while leaving it maleable enough to tune the bait without damaging the nose.
-
It can be a challenge to fit the hardware, including joint hinges, into a swimbait gets smaller than 4-5 inches. It can be done but it takes some planning.
-
Yes. IMO, any wood except balsa is strong enough not to require thru-wire construction if we're talking bass baits.
-
 Nice idea. I used to think it was a waste of time to build wooden lipless baits because commercial ones were so cheap. But they aren't cheap any more and there is good reason to fish a quiet bait, especially one you can fish over shallow grass without getting buried in it.
 -
For shallow running baits, down to 5 ft or so, a line tie on the nose is the typical solution. The closer the line tie is to the surface of the lip, the harder the bait will thump. The more down angle you have on the lip, the wider the action will be and the shallower the bait will run. The longer the lip, the deeper it will generally dive. Nothing on a crankbait works in isolation; all the parts influence each other dynamically. It's a good idea to take a look at the lip configuration on some baits you admire and use that as a starting point for your own bait. The lip slot is best cut immediately after you cut out the blank, while it is still "square" and before you start contouring and rounding off edges.
-
 I trolled a Rapala Husky Jerk painted in Electric Chicken in Canada and the pike there liked it...... but of course, those igorant Canadian pike like ANYTHING, unlike the highly educated bass down here in the Southland, many of whom have graduate degrees in lure identification.
 -
I tried a few cedar blanks with the grain running perpendicular to the length of the bait. I was trying to avoid a problem you get hand sanding cedar with the grain - the hard grain stands out, the soft grain gets hogged out. But cutting the lip slot in cross grain significantly weakens the wood around the head of the bait, so much so that I wouldn't trust the lip and the top of the bait's head not to snap off during use. Not a good idea.
-
When I used a VL with inexpensive hobby acrylics, the 3 tip worked for color basecoating and the 1 tip for everything else. Since I was painting only 2-3 baits at a time, I often used the small tip for everything so I wouldn't have to change tips. Tip selection is individual - you'll choose the tip that's right for the particular paint and the way you work with your airbrush. I generally use the smallest tip that won't clog.
-
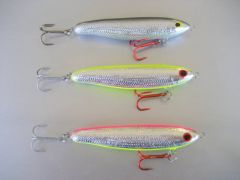
Three small sinking twitch baits I made for trout and redfish on the coast. Details: Basswood, double epoxy undercoated, Brite-bak foil, double Dick Nite topcoated (dipped), final weight .42 oz. These are based on a Mirrolure M-19 body. I'll try the foil - gray back in freshwater. The foil - neon yellow and the Electric Chicken (neon yellow belly- foil - neon pink) are very popular on the NC coast. Just love the name "Electric Chicken":lol:
-
If you're workng with fairly soft balsa, splitting a bait is no big deal provided you scribed a center line around the bait after you cut out the blank. I use a single edged razor blade. Rejoining the halves with 5 minute epoxy provides the bait with a reinforcing "backbone". Remember to wipe the epoxy out of the lip slot unless you are installing it at the same time.
-
I use a scroll saw and a Dremel with various shaping/sanding/drill bits. Can't live without my Dremel! Burn through one per year but they have excellent warranty and service. I also recommend a small band saw vs a scroll saw if you have a choice. Of course, if you REALLY mean hand tools, you can use a hand scroll saw, a pocket knife, and sand paper. It's just harder to cut straight with a hand held saw, in my experience. BTW, I recommend Norton 3X sandpaper, it lasts and lasts (available at Home Depot).
-
Like most fish, perch have various shades according to where they live. A simple "standard" pattern (all unmixed Createx colors, no scale effects) is: Orange belly, gold lower sides, green shoulders, 4 black perch points shot through a template, black back. Danderson's is undoubtedly nicer but more complex - depends on the amount of effort you want to expend. I paint some baits in simple perch every year before fishing in Canada, and it works great up there.
-
Click on "How To" at the top of this page, then go down to Member Submitted Tutorials and click on "Hardbait How To". This will show a bunch of picture assisted tutorials from TU members. To get a complete list, drop down to the bottom of the page and change the time period from "last 30 days" to "From the Beginning". The tutorials include a couple on building crankbaits and at least one on swimbaits. One easy build procedure: This uses Devcon 2 Ton epoxy for all the durable coating/gluing requirements, which works well and keeps it simple. Trace a lure you like, transfer the trace to some clear plastic and cut out a template Use the template to mark your blank on the wood (include the angle of the lip slot) Cut out the lure blank and the lip slot; cut or sand the wood to final thickness if required. Scribe a centerline on the bait top and bottom, and mark spots for the ballast, hook hangers, and line tie. Round over the edges to the final shape and sand it smooth. Install the ballast and hook hangers using epoxy. Brush on an waterproofing undercoat of Devcon 2 Ton epoxy cut 25-50% with lacquer thinner or acetone, let it cure hard, then sand out any rough spots. Spray a white color basecoat and then the final colors, dry with a hair dryer as you go. Install the lip with Devcon 2 Ton at this point. Brush on a topcoat of Devcon 2 Ton epoxy (best undiluted but you can add a few drops of lacquer thinner if necessary to improve flow-out. Buy pre-cut lips from several suppliers like Janns Netcraft or can cut your own from polycarbonate sheet or G-10 circuit board (McMaster-Carr carries both). Likewise with hook hangers, using store bought screw eyes or hand twisted from stainless steel wire (.029"-.031" dia is good). It is always best to measure and mark every dimension, cut, round-over limit, and hardware placement to get a bait that is symmetrical and runs straight. Wood grain lines and the non-linear shape of a crankbait will fool your eye so if you eyeball stuff, you are going to be misled. IMO, for starting out, shallow diving baits are easiest to build and a hardwood like basswood, which works consistently and has virtually no grain effects is best. It shapes and sands more slowly than balsa so you can correct mistakes before the bait becomes a toothpick. Devcon 2 Ton epoxy cures to a no-sag-no-run state in about 45 mins, can be handled in 5-6 hrs and is hard cured in 24 hours. When used as a glue, the bond is permanent in about 2 hours (at 70 degrees temp).
-
Envirotex Lite, aka ETEX, is a solvent modified two part epoxy. It's thinner than D2T and requires turning for a couple of hours, plus multiple coats to get a sufficient coating thickness.
-
Most of the glitter airbrush paints I've tried give a metallic sheen effect to the underlying paint. An example is Smith Wildlife colors Chrome Pearl, which imparts a nice silver baitfish sheen. If you want a flake (scale) effect using larger glitter, I haven't found any that will shoot through an airbrush. For larger glitter, I use cheap bottles of acrylic based hobby glitter, cut about 50% with water and painted on the lure with a soft artist's brush. The advantage is that you can control the amount and position of the glitter.
-
You might want to post this on the Wire Bait forum too. There are probably more guys there who make and use lead molds.
-
The balsa has to be sanded smooth to start (you knew there was no Free Lunch!). I sand down to 400 grit and then dip 6-10 times in prop solution. If any areas are rough after 2-3 dips, lightly sand them before continuing. For baits I fish myself, I don't get too worried about minor surface irregularities on balsa because I topcoat them with epoxy, which hides minor problems. As I understand it, commercial builders often use what they term a "build coat" to smooth out irregularities in balsa before finishing. It's more, and thicker (typically about 1 mm thick), than a grain filler. You see it on a lot of balsa baits if you strip the finish. One product I've heard used for it is flooring glue.
-
Never try to topcoat a lure with Devcon 5 minute epoxy - it cures way too fast and will turn brown. Nu Lustre is a brand used by a few guys here on TU. They also make a version with UV protection (more expensive). Always measure accurately and mix epoxy thoroughly or you will end up with epoxy that won't cure hard, and make sure you're mixing it all and not leaving unmixed resin or hardener in a nook or cranny that might make it onto the lure.
-
I thought Etex was the "epoxy of choice" for custom musky bait builders? IMO, all epoxies share a basic chemistry and most have similar physical chacteristics. I haven't heard of a brand that is demonstrably more durable or tooth resistant than Etex or D2T. Most Musky guys are HAPPY to have their lures chewed on.
-
Some ACE hardware stores sell Devcon Two Ton. Michael's sells Envirotex Lite (aka ETEX). Both are popular crankbait topcoats but you need to read up on how to use them. I haven't used Plaid glaze and I'm betting it's just a water based clearcoat for craft projects, and won't be durable. If you want to try spray cans, I'd be looking at the solvent based polyurethanes.
-
I don't sell but read comments about small scale operations here on TU. I think the essence is you have to make a consistently good crankbait, do it efficiently, be able to scale it up and down according to demand, and market it so you can make a profit against the time and materials you invest. No small task! Crafting bodies with hand tools in the hobby mode won't hack it if your baits are good enough to develop a demand. Most shops have a production line of power tools with custom jigs set up to cut and shape quickly with consistent results. They have standard steps in finishing that take less time than we hobbiests do to produce a marketable finish. And they build baits in larger batches. In short, it's a whole 'nother ball game from hobby building if you want it to become an actual profitable business. I see a variety of custom crankbaits displayed in a few bait shops in my area. It's a good way to build customers because tournament anglers frequent those shops looking for "something different" to help them compete. If your bait is a "cut above" in quality and results, you'll build a local reputation and orders will increase. I have no idea on what basis they are stocked - perhaps on consignment? - but it's probably a better deal for the store than they get from the big lure companies. Also, most small scale custom builders opt to market their lures on a web site, a few opt for Ebay. There are hundreds of lure websites you can peruse to see the good, the bad and the ugly among them. I also see custom builders selling from booths at Fishing and Boating shows in the area. There are lots of marketing outlets, you just need to choose the ones that suit the baits you produce, in the volume you produce them.
-
I hand twist all my hangers and use Malin hard temper .031 " dia wire from McMaster-Carr. Ain't no redfish gonna break it. You can also use Malin Hard Wire 180 lb test .029" dia leader wire. Comes in a 6" coil in a neat plastic envelope at tackle shops. The coffee color makes a nice stealth hanger.
