


BobP
-
Posts
5,782 -
Joined
-
Last visited
-
Days Won
193
Content Type
Profiles
Articles
TU Classifieds
Glossary
Website Links
Forums
Gallery
Store
Everything posted by BobP
-
I mark the center line with a compass containing a lead marker. If sanding will erase the lines, I go ahead and drill small holes with my Dremel where the hook hangers and line tie will go. I can enlarge the hole on the belly to accept the ballast/hanger when I'm ready for it. I also draw lines as "sanding limits" on the back and belly to guide me when I'm rounding over the edges with a Dremel sanding cylinder.
-
Airbrushes are simple and straightforward. If the needle and nozzle are not damaged, the siphon tube and internal paint channel on the front of the brush are not clogged, and you are generating enough psi, it will run OK. You might try soaking the disassembled brush overnight in some airbrush cleaner to loosen any clogs. If you run water down the siphon hole and get a steady stream out the tip (when disassembled) it's clear. Most brushes will bubble through the threads on the screw-on tip a little when shooting a soap solution unless you seal the threads with bees wax. But I don't think minor leakage through the threads is your problem.
-
Hey, Mark, I'm not sure which way is "reverse" and which is "?forward?". I'm assuming reverse means that the following segment is concave and the leading segment convex so the following segment catches more water when moving?
-
I don't think it's done for an effect on action. It allows you to orient a standard treble with 2 tines down or up. To get them perfectly aligned, it usually requires a hanger turned between vertical and horizontal., but horizontal gets it pretty close. However, it doesn't work on all trebles - for instance VMC In-Line trebles, which are made to lay flat on the belly of a lure.
-
craw segments - that why God created painting templates! To freehand stuff like that, you not only have to be GOOD, you have to be good TWICE in mirror image! Or you can be a duffer like me and resort to some frisket material, a pencil and an Xacto knife to make a painting template. The factories use them, why not us?
-
Jimbo, the .35mm might fit but you'd also need the nozzle and the other front end parts to go with it and I personally consider a .35 tip as a "generalist" rather than a "detail" tip. And Iwata parts aren't cheap. I use an HP-B with .2mm tip for fine shading but when you start talking about fine details, I start thinking templates. I've never used a Micron but at $268 that's twice the price of an HP-B (new, on Ebay). A lot of detail work depends on technique, not the airbrush per se.
-
A Paasche VL will shoot about any kind of paint but you get better results with airbrush paints. Besides Createx, I use Smith Wildlife and Van Dyke Nature's Gallery paints about 50/50. If you mix brands to get particular colors, you can sometimes run into compatibility problems that cause clogging. But I haven't had problems with these 3 brands so far.
-
So far I've had no delamination problems just scuffing the existing finish with 400 grit and shooting a white basecoat with one of the highly pigmented acrylic latex whites. They have names like "Super Hide" or "Cover White". When I used cheap hobby acrylics, plain Apple Barrel white worked OK too. I don't like solvent based auto primers because they leave a distinctive odor after drying that can smell up an entire tackle box. Bulldog adhesion promoter is probably an even better base but I haven't tried it.
-
To me it would depend on what I already owned and their tip sizes. I have an Iwata HP-B with .2mm tip but wanted something to shoot thicker airbrush paints and for color basecoating so got an Iwata Revolution B with .3mm tip. The Revolution was reasonably priced but has the same Iwata quality. I use an airbrush compressor that sits beside the work so it's easy to change pressure. If I used a tool compressor on the floor, a MAC valve on the airbrush would be a great feature. I frankly feel Iwata charges too much it. If I wanted MAC, I'd think about buying an NBI "Iwata clone". Guys seem to like them OK and you can't beat the prices. JMHO
-
Definitely seal the bait before you get it wet. It takes a long time for wood to dry. I use thinned D2T epoxy or acetone/propionate to seal balsa because they both reinforce as well as seal. You can tell how a bait will FLOAT in a pail of water and that's useful on suspending baits and topwaters. But If you want to know how it PERFORMS, the only way is to retrieve it in a lake or pool. So I go ahead and ballast the bait, finish it and take it for a spin on the lake. If it's no good, I drill out the ballast, reposition/resize it, and patch it up with epoxy putty. If that fixes the problem, I only have to fix up the patched area.
-
I build a number of "standard" crankbait designs (which vary over time) and I try to "improve the breed" as I go. When a buddy I gave a bait to a year ago asks for one "just like that purple back one you gave me", I wouldn't have the foggiest idea what he's talking about except that I can go back to my notebook and find out how I built that bait. The body template I used, the wood, The lip shape and material, the hardware and ballast, and the paint pattern, plus the finished weight of the lure. If you can build 100 baits and remember how you built number 23 from memory, you must be a "Crankbait Idiot Savant". When I started throwing Lucky Craft cranks, it took me a few months to get over the feeling that I was throwing $20 bills out of the boat on every cast. All I can say is "GET OVER IT!". Bass fishing is a pay-to-play pastime unless you only use live worms.
-
I'd be thinking of shooting dye instead of paint - sort of like using a Sharpie but with much nicer results.
-
If you aren't snagging cover occasionally, you aren't fishing right! One reason I started making crankbaits is that I hate losing a $15-20 custom crank in a laydown tree or brushpile. If I made it, I'm not out big bucks, mostly just the enjoyable time it took to craft the lure. I keep several Plano boxes full of replacements as "hot spares".
-
 I like it very much, should be a cold water killer!
 -
I use locking forceps to hold while painting and alligator clips on my lure turner. No disasters yet with lipless cranks but the xacto solution looks more secure for that specific lure type.
-
Step 1 - waterproof/undercoat with epoxy, wood filler, propionate, wood hardener, etc. Sand it smooth. Step 2 - color basecoat with acrylic latex (usually white) Step 3 - airbrush the fish design with acrylic latex paint Step 4 - Clearcoat with an epoxy, DN poly - something tough, clear and waterproof You can use Devcon 2 Ton or Envirotex Lite (aka ETEX) epoxy for both steps 1 and 4 if you wish. Dilute mixed D2T 50/50 with denatured alcohol or lacquer thinner to use as a penetrating waterproofer. If you randomly substitute solvent based waterproofers and clearcoats, you will run into compatibility problems like delamination, bubbling, running and other bad results. Find a finish system you like that is compatible, and stick with it. JMHO
-
DN = Dick Nite Fishermun's Lurecoat. It's a solvent based moisture cured polyurethane. You will often see a banner ad here on TU for Dick Nite. Click on it and you will be taken to a special discount page on the Dick Nite site for TU'ers. Do a search for lots more comments/advice on it.
-
I'd suggest epoxy in the holes and on the threads of your screw eyes. It's not just a matter of keeping the action the way it was when you first threw it (which epoxy will do). It's also about keeping water from seeping into the wood and causing the finish to delaminate and the bait to explode.
-
Not many TU crankbait builders have tried it. The few that did have not given it good reviews. Wood cranks are different from other lures because they MUST be 100% waterproof or the bait is destroyed.
-
You didn't mention whether the bait had a lip. If it does, changing the lip to one that is wider and/or set at a steeper angle will probably give you more slow speed wiggle.
-
The Gallery Upload page says max 500 KB. That's plenty large enough! I store pics on my computer with Picasa, a very nice freeware Google program that downloads pics from cameras, does basic editing, and can export pics in any size you choose. For uploading to TU, I export the pic from the Picasa album in smaller size to a separate folder on my computer, then upload it directly to TU. If you right click on a jpeg photo on your computer and choose "Properties" from the pop up menu, it will tell you the size of the jpeg. JMHO, 50-100 KB is big enough for good detail on TU gallery posts. I'm used to sending small pics 'cause some of my friends live waaaay back in the woods where only dial-up modems live. They don't appreciate receiving large jpeg files!
-
What thickness balsa you start with depends on the construction method and type balsa you use in building the bait. Guys who make lots of baits recommend "hard balsa" (12-15 lb/cu ft density). Soft balsa, aka competition balsa, aka regular balsa, is too soft for crankbaits unless you go to extremes to reinforce it inside and out. That takes time and effort but it is more buoyant - if that's your priority. One building method is to use balsa half as thick as the finished bait, cut out the rough blank (twice), then glue the halves temporarily while you shape and sand the lure. You don't want the wire frame in it while shaping and sanding. I haven't used this method so don't know what kind of temporary adhesive is used. Another method is to cut the rough blank from balsa as thick as the finished bait, and scribe all around the center line of the bait while the wood is still "square". Shape and sand, then use a razor blade to separate the halves along the centerline you scribed. Many builders find that hard balsa is stout enough that you can forget thru-wire and just drill holes for the hardware and epoxy it into the bait. Thru-wire is of course more durable, so it's player's choice. So how you build tells you what dimension balsa to buy. I don't own a table saw so don't rip balsa because the source provider always does a neater job than I can do with a scroll or band saw.
-
Wade, airbrushes, paint and clearcoats have been discussed in depth here on TU. Enter the terms in the little "Search Forums" block in the upper right hand corner of this page and you'll be covered up with info.
-
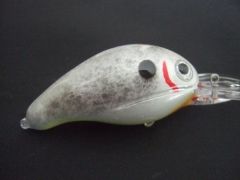
Best & fastest way to remove the original paint from crankbait?
BobP replied to Wade2be's topic in Hard Baits
In a big hurry, huh? The best way is not to remove the paint at all - just scuff the surface with 400 grit paper to clean up any dings and give your new paint something to grip. Even on suspending jerkbaits, leaving the old paint on won't be detrimental 99% of the time. One tip - if you're going to do much hand sanding, try some Norton 3X sandpaper from Home Depot. It lasts and lasts, and does not clog like other sandpapers. 3M has come out with a 3X version that may be similar but I haven't tried it. If you're painting hundreds or thousands of baits, you might invest in a blast booth and use nut shells or other mild abrasive to do the job. -
Do a search on airbrush in this forum to get recent threads about brands and cheaper alternative airbrushes. There are some that have been getting good reports from TU users and the price is very reasonable (less than $40) for a brush with good specs. (gravity feed, .2 to .35 tip, MAC air control valve, etc). Does price affect quality? Of course, and so does the brand. But that doesn't mean there aren't some good values available.