


BobP
-
Posts
5,782 -
Joined
-
Last visited
-
Days Won
193
Content Type
Profiles
Articles
TU Classifieds
Glossary
Website Links
Forums
Gallery
Store
Everything posted by BobP
-
There are guys who build from scratch, build from blanks, and repaint existing crankbaits. Some are better at one thing than others and decide to concentrate in that area. It's all about what's interesting to the individual, or what's productive and practical for the custom builder. I think a majority of Undergrounders probably build from scratch or are working toward that goal.
-
I've never tried vinegar and don't know why it would disolve paint any better than water. Personally, I use a solvent like isopropyl or denatured alcohol, lacquer thinner or acetone for fine tipped airbrushes. For a Paasche VL or similar brush with larger tip, cool water works fine.
-
A Rapala Tail Dancer Deep trolls 20-25 ft deep on 14 lb Fireline and is about the right size. Most bass baits that run 15-20' deep on a cast will troll 25+ ft. Large wide lips. But whether the body shape is to your (or the muskies') liking is another matter. The Tail Dancer has a minnow shaped body that the pike in Canada loved when I tried it. I'll try making just about anything but Rapala makes them so well and sells them at a very competitive price, so ....
-
I've tried both lip wire methods and never had a difference regarding the lure's ability to track straight, if the wire is anchored solid. To me, the twisted wire method is easier, neater, and more exact. I cut a slot in the back of the lip and fold the wire over the top, crimping it down for added stability (pls note: the wire is soft stainless steel or brass, not hard stainless). JMHO, the twisted tie with one hole allows you to move the line tie forward/back a bit to fine tune the lure's action if needed. Don't know how big a 12 penny nail is, but I usually bend my line ties so they are 2-3 mm ID.
-
I've used Hard As Nails polish to paint threads on bucktail jigs, and it lasts well. But if I were doing it, I'd use spray paint for most of the work too. No brush job will ever look as nice as one that's sprayed.
-
I like both and agree CB has definite performance advantages like quicker dives and better rebound off solid cover. On the other hand, PC is clear and doesn't enlarge the bait's perceived size as much as translucent CB. I see some commercial makers now build deep divers with large CB lips. Brian's Crankbaits and Sisson are examples. I'm trying both but not sure 1' deeper dive is worth the bigger perceived size. Of course, that sort of implies I know how bass think. Not likely, but ya gotta base decsions on something.
-
I never find just the right ready-made lip when building a crankbait. You might check Ebay where some factory leftovers are occasionally sold. But it's not hard to do your own from a sheet of polycarbonate or circuit board. All you need is a lip outline, some inexpensive metal shears to rough cut the shape and a Dremel with a fine sanding cylinder to exactly shape the lip. Takes about 10 mins. The polycarbonate or circuit board costs a few bucks from mcmaster.com for a 1'x1' sheet which will do alot of lips. And they are much more durable than the molded plastic originals.
-
I use a HP-B and for most airbrush paints, I just squirt it in and shoot it. That includes all Createx colors that I've tried, even those that seem thicker than you'd think would work well. But with a .02 mm nozzle, you can get clogs if your paint is non-airbrush type, or has thickened due to age, or has formed clumps of dried paint particles as the bottle is used up. So it's player's choice. The main, must-have feature for me is a gravity feed cup. Works better, uses less paint, and is way easier to clean between color shots than a syphon feed brush.
-
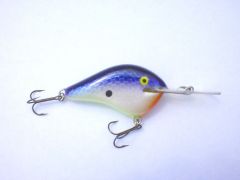 I really like the body shape on this lure. And the execution is outstanding. Very nice work Ernel!
 -
Shoot less paint. Not trying to be a smarta## but shoot a light coating, jet dry it with a hair dryer, then shoot some more if needed. The problem then becomes whether the adhesive frisket will pull paint off your crankbait. I tried several brands and they all did, so I now just use the frisket with the backing left on it. Side benefit, it makes it reusable.
-
I used alot of Apple Barrel and I love its wide color palette and general decent quality. When I switched to an Iwata I had to wean myself off it. You just never know how coarse the pigment will be in a particular bottle because it's not formulated for airbrushes. Some colors like black and flat white are often OK. Browns are usually very coarse. You never know until you try them. If it's the consistency of milk and won't spray, your tip is clogged. If it spits water, the brush is trying to spray it but pigment particles are sticking in the tip and separating from the water carrying them. You could try to filter it but IMO, best choice is usually to give up and buy airbrush paint for the Iwata. Console yourself with the thought that the Iwata has a superfine spray that uses very little paint to apply a color to a crankbait. You save on the amount of paint bought although it costs more.
-
No one on TU has owned and used all brands and models of airbrush so what you get is opinions about airbrushes they own. I think the size of the tip defines how much detail an airbrush is capable of producing. Iwata HP series brushes come standard with a .02 mm tip. It's a high quality factory tuned brush (i.e., the needle and tip are hand adjusted at the factory for spray pattern). But .02 mm is small enough for pigment particle size and viscosity to be an issue, and a HP will clog faster than a larger tip brush if you feed it crappy paint. You want an airbrush that balances ability to do detail versus likelyood of clogging. And that is particular to the user; how you use your airbrush and what paints you use. I like my HP-B. It's a pleasure to use and easy to clean. It's 1/16th oz gravity feed cup is sized perfect for crankbaits and holds plenty of paint. You can drip 2-3 drops of paint in the cup and shoot accents instantly; no waiting for a syphon to suck up a bunch of paint and route it to the mixing chamber (and no wasted paint either). Clean up for the next color? Shoot some water or Windex into the cup and out the brush and you're ready to go in a few seconds. But I still use my Paasche VL or Badger 175 when I need to shoot alot of paint, like for color basecoating. There are plenty of guys on TU who do beautiful work with large tip airbrushes. It's a blend of the airbrush and the skill/experience of the guy who's holding it. No airbrush will make a poor painter into Picasso (I'm an example!). But a better airbrush can make learning to paint a little easier and faster.
-
I've never used enamel but am guessing it didn't dry 100% before you put on the epoxy. I also assume you didn't thin the epoxy with a solvent, which might also cause trouble. There are various enamel chemistries and of course there are different woods. If you use an oily wood like cedar, you need to prime coat the raw wood with a solvent based primer before applying color.
-
I use acrylics and usually paint in the garage, positioning newspaper to catch overspray. You do get some paint that jet dries and deposits as dust but it's non-toxic. I occasionally paint inside using the kitchen sink to catch overspray and haven't gotten any death ray looks from my wife yet but if you do alot of it, you would get more dust. I tried a simple spray booth but found I had to clean it up constantly to keep the dust from blowing around and getting on the baits I was painting. If you do alot of inside painting, it might pay to build a spray booth with air filtration.
-
Have you tried thining the paint and shooting it at a lower pressure? All patterns are conical, how fine a line you get depends on how near the surface you can hold the brush. Shoot at an acute angle to to minimize overspray where you don't want it. For instance, when doing the shoulder of the bait, hold the brush at an up angle so it doesn't bounce paint off the side and down the belly of the bait. I end up shooting MOST of the paint over the top of the lure, but that's OK. Even with fine ground pigment paint (e.g. Createx black ) and using low pressure on an Iwata HP, I still use stencils for most fine line detail, so I can be sure both sides of the bait turn out the same.
-
You'll be able to see the weight cavity in a clear bait, drill a hole and put in some epoxy to fix the rattles. Remember they are also the ballast so if you glue them off center..... I tried it a couple of times but gave it up as a bad job and too much work for the benefit. If you want silent, I say use a wood crankbait.
-
BM1974 - a single coat of Devcon 2 Ton is thicker than most clearcoats. I've never had a toothy critter bite through it so don't see the need for multiple coats. My basic viewpoint is that the more operations you perform while building a bait, the more chance there is for something to go wrong. Think you'll find the D2T easy to use, with a "work time" of at least 5 mins before it begins to get too thick to comfortably brush. You can even use a decent brush, clean and reuse it afterwards WUN36, I read alot of questions on TU about brands of epoxy besides Devcon and Etex Lite but usually no replies because nobody has tried it. Most builders aren't going to experiment much with epoxies because a bad coat can ruin all the work they put in on the bait. ALL epoxies yellow to some extent over time. D2T just does it less and takes longer than most. I have 3-4 yr old D2T coated baits that have very little yellowing. Can't say the same about the few other epoxies I've tried, including the rod thread epoxies like Flexcoat, etc.
-
DEVCON 5 MIN EPOXY cures too fast, won't level properly, yellows, and you'll probably have to strip it and repaint. The stuff to use is the Devcon Two Ton epoxy (30 min). It does everything that the 5 min epoxy will not. Unlike b1974, the only time I tried 5 min was when I grabbed the wrong syringe, and it was a disaster.
-
It may be fairly durable but most polyurethanes also have a reputation for yellowing as they age. If your bait color is compatible, like yellow or chartreuse, it might not be critical, but otherwise....
-
Gaaak! Muskiefool, $190 motor? Must be a nice one. b1974, I like to mount a motor so it has direct drive to the drying axle. The fewer intermediate gizmos, the less to go wrong.
-
Well, I straighten the slot out with a diamond file and then mount the lip using a paste epoxy. I use Rod Bond, a paste epoxy designed for rod building, but other paste epoxies also work. The paste lets you position the lip straight but won't flow out of the slot. If you paint over the slot later, it's undetectable.
-
I thought about trying a hinge pin on my bass baits but it tended to increase the gap between segments. So far, the hand twisted ss screws built one inside the other have worked OK. You can make the screw eyes very small if you want a small gap (use wire bending pliers!), or you can even recess the screw eyes into the bait if you want it REALLY tight, so the segments click together when retrieved. I clean epoxy out of the hinge with a piece of ss wire chucked in a Dremel. It works very well but you need to be careful not to drill through the clearcoat and expose raw wood to water absorption. I don't know if it's important (bass seldom talk to me directly!), but I like to cut the segments at a slight back angle so a following fish doesn't see the gap or the hardware in the hinge.
-
Dick Nite's Fishermun's Lure Coat is a moisture cured polyurethane that produce a tough slick high luster clearcoat. I think dampeoples dips with it and he may be able to provide some details. It has many good properties but can be tricky to use. You must avoid introducing ANY moisture into the container. For instance, drips from a dipped lure will begin to cure the entire container. Dick Nite provides a discount for TU members, click on the banner at the top of the page. I use prop pellets disolved in acetone for waterproofing and reinforcing balsa baits but don't think it is ideal as a clearcoat becuase its clarity and durability are less than other options.
-
Balsa can be bought in various densities/hardness but if you order plain balsa, you will get very soft wood. Screw-in hardware will not hold reliably in soft balsa. Most builders take extra steps to strengthen and reinforce the bait. Thru-wire is a big plus since it combines all the internal hardware into a strong unified whole. Even better, splitting the body and gluing in the thru-wire gives the bait a strong epoxy "backbone". The second build strategy for balsa is to use epoxy or a similar strong substance as a waterproof coating over the raw wood. That creats a durable "shell" that resists dents and cracks. There are various ways to do thru-wire. I shape and sand the body and then split the bait with a single edged razor blade. Pretty easy. Just remember that you need a centerline scribed around the bait as a guide to split the bait, and you need to scribe that line just after you cut out the rough blank, while it's still "square". That's also the time to cut the lip slot, btw.
-
I've used balsa, cedar, basswood, pine and Paulownia. IMO basswood gives the most consistent results if you do freehand sanding and shaping. It's a blonde hardwood with a nominal density of 23 lbs/cu ft. It has grain like all wood but it's so fine that grain effects during shaping and sanding are virtually nil, making it ideal for small objects like crankbaits. Another classic is balsa, nominal density 11.2 lbs/cu ft. It's so soft that you must have discipline when shaping and sanding or your crankbait will turn out to be a lopsided toothpick. However, balsa is the obvious choice for lively, very bouyant shallow crankbaits.