


BobP
-
Posts
5,782 -
Joined
-
Last visited
-
Days Won
193
Content Type
Profiles
Articles
TU Classifieds
Glossary
Website Links
Forums
Gallery
Store
Everything posted by BobP
-
Mark, further to your original post, yes I think using a snap with a split ring does alter the performance of a bait, and sometimes significantly. Like a lot of guys, I like to use something that allows me to change baits quickly without re-tying knots while fishing. I usually remove the line tie split ring from commercial baits and use a quick-change alternative. Crosslock snaps don't do it for me because they just won't fit on some baits, especially ones with cupped lips. What I settled on are the Norman Speed clips that are basically a small split ring with an extension that allows you to open them with finger pressure. I like them because they are small, about 1/2" long, unobtrusive, and symmetrical. And I've never had one break or slip off a crankbait. I fish a lot of small bass crankbaits and how you connect to those can be really important to their performance. That's not to say you'll never catch fish with a split ring plus a snap on the bait. I was throwing a new commercial crank for the first time that still had the split ring on and just used a Norman Speed clip. It caught lots of fish like that and not so many when I removed the split ring. That's just anecdotal testing but I put the split ring back on that bait and have happily used it that way ever since. We must keep the Fishing Gods happy, even if it turns out to be just stupid superstition! But my general rule is that you are better off if you choose a method that works for you and stick with it for consistency's sake. That helps you make rational decisions about what works and what doesn't. That said, I know that tiny little differences in a bait can be the difference in catching fish or just hauling water. So I'm not above a little tweaking here and there to experiment.
-
Joe, you can use multiple coats of DN S81 if you want but personally I don't think it will give you enough extra protection to be worth the effort on a plastic bait. Nothing but a thick coat of epoxy has been enough on saltwater or trolling baits to protect against toothy critters or hook rash in my experience. DN is very tough stuff but it is a pretty thin coating, even 2X. On plastic, DN is as close to a tough factory finish as anything I've found. Just spitballing here, but if the bait is wood, several coats of DN might give you enough thickness to equal one coat of Devcon Two Ton epoxy - if you can get it on the bait without it bubbling.
-
If you are painting plastic baits and want a see-through finish, I recommend painting with Createx acrylic "transparent" colors, with no base coat added, then simply applying a single coat of Dick Nite S81 moisture cured urethane clearcoat (aka Fishermun's Lurecoat). This clear will soak into amd through the acrylic paint and bond to the underlying plastic body to give you a very durable finish. Pretty simple!
-
Bigfish, the solvent in DN S81 is pretty strong. I haven't tried it over enamel but suspect that it might react badly. You can only try and see.
-
I don't know where I got them from but I tried a batch of Griffin KO's and was not happy with their performance. If it were me, I'd go with the Baby 1- or the 1.5 square bill.
-
I think one coat is plenty if you're topcoating a bass bait with D2T. If you're using a different brand of epoxy like Envirotex Lite, you'd probably want several coats but Devcon or other "glue designed" epoxies are thicker.
-
No argument there Dave. But note I said both shape AND DENSITY, the latter of which varies in any piece of wood.
-
Well, maybe I'm thinking in more idealistic than practical terms. Even a lure duplicator can't really make a wood bait that is a perfect symmetrical copy in both shape and density. But to me, trying to get baits as symmetrical as humanly possible is a key to building better baits. It's difficult if you hand shape baits but it's really part of the craft you need to concentrate on. The closer I get to symmetry, the better the baits look and perform. So I have a hard time agreeing with any proposition that implies that hobbyists need not pay attention to that and that their baits will somehow be magic fish catchers no matter how much (or little) effort they put into it. Yeah, occasionally it may happen, but more often I think not.
-
I think you can eyeball a lure shape pretty well if you're working in PVC trim board but if you work in a wood that has any visible grain structure, that's asking for trouble. I painstakingly measure the contours and rounding curves on my wood baits to keep them symmetrical. It's the only sure way to get them straight.
-
 Sweet! Nice pattern on those, Mark.
 -
Just a further note on knock-off baits. It's easy for an Asian company to get an original, make a mold, and turn out KO's for pennies on the dollar of an original bait. But what is almost always missing is the internal structure of the original, its ballasting scheme, and often the type of plastic and wall thickness of the original. No knockoff I've ever tried has been exactly the same as the original bait from which it is derived. That said, there are good performing KO's that are worth buying, painting, and fishing. You just have to try some and decide for yourself if a particular model meets your expectations. It's hit or miss in my experience.
-
Glow Nation paint is strontium aluminate particles suspended in an acrylic gel base. Its particles are large, too large for airbrushes, so it needs to be brushed on the lure. I can't speak about other paints, have only used Glonation, but it has a very intense glow action because it contains more and larger glow particles than glow paints formulated for spraying. In glow paints, it's all about the number and size of the glow particles when talking about intensity. I can literally read a newspaper in a dark room after applying 2-4 heavy coats of Glow Nation green paint to a jigging spoon (it looks white in natural light, glows greenish white in the dark). Is it easy to use? Not especially since it has to be brushed and is a grainy gelatinous paint. But it does level out somewhat and you can topcoat it with MCU or any other topcoat without problems, and it stays very durable in that configuration. I might not use it on baits for customers (I have none) since it doesn't have that slick commercial look of other spray-able glow paints. But it's my go-to finish for 3/4oz jigging spoons that I use in the winter for bass and stripers. Glow paint comes in various colors, and each color has a different glow duration. The greenish white is supposed to glow for 10-12 hrs and though I haven't tested that, I have no reason to doubt it. No need to charge up the paint with any special light when fishing it in daytime, even on a cloudy/rainy day.
-
I don't know what it is about coffin shaped lips, but with them I had to go through more design changes than usual to get a bait that I was happy with. It can be a fine line between getting a tight wiggle and a bait that won't wiggle hardly at all. And it's even more difficult to get a bait that has a tight wiggle and still has some thump, which I always want to feel whatever the style of bait. Good luck with it.
-
In my experience, there are multiple attributes of a tight action crankbait. Some classic tight action baits are the Zoom Tapp and the Tennessee Tuffy T1 coffin billed medium depth cranks. They are minnow shaped, about 3" long, 3/8 to 1/2 oz, with a coffin lip set at a shallow angle. A Tennessee Tuffy T-1 can be seen at http://tn-tuffy.com/tuffyt1.html IMO, the tight action is mostly caused by the lip angle and the length of the flat body. If you are trying to make a bait of this type, those attributes and the ballasting must be spot on to get it to swim properly. The Tuffy has a tight action but with a distinct thump. Nice bait!
-
fishon-son, it comes from predatorbassbaits.com. Predator sent an old Wiggle Wart (pre Rapala) to a mold maker/producer in the Far East to have those blanks made. They have gotten very good performance reviews from several guys here on TU.
-
The 'swirls' on the craw pattern appear to me to be made with netting held on the lure, sprayed, then re-positioned to make the pattern more irregular. I think the details on the gills of the other lure were freehanded. You need to use low pressure (10psi or less), thinned out paint, and remove the spray cone from the front of the brush so you can hold the tip close to the lure surface to do that. It takes finesse and good trigger control, so may take some time to master.
-
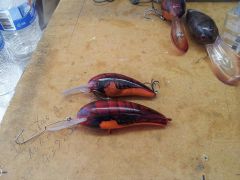
Kudos to Mark! From the distance you took the photo, that Wart looks killer to me. Speaking of the Glo Nation paint, the lakes here are cooling off and it's about time to break out my glow jigging spoons and go after the largemouth bass, white bass, and stripers here in the SE. Probably my favorite time to fish - few boats on the lakes and our highly educated bass are gorging on shad and easy to fool. The only issue I have with Mark is retiring a bait because it caught big fish. I'd keep that Wart wet until it dissolved!
-
Painting/clear Coating Premade Jointed Lure Body Blanks
BobP replied to aulrich's topic in Hard Baits
One trick is to cover the joints with rubber bands to mask them from paint spray. The bands also hold the body rigid while you do the finishing steps so the lure is not flopping around. -
http://www.tackleunderground.com/community/forum/48-hardbait-how-to/ Ryan, a good place to start are the member submitted tutorials, cited above. There's a ton of stuff here on TU about the details of making crankbaits. I suggest you read some of the tutorials, then use the search function here on the hardbaits forum to get more detailed information. There are years of discussions and thousands of topics. Another good source of info is YouTube, where you can find a number of great tutorials on how guys build their baits. As you read along, just remember there is no one way to do anything in crankbait building. It can be as simple or as complicated as you want to make it.
-
I buy inexpensive nylon bristle artist brushes from an art supply store. I clean them thoroughly with lacquer thinner after use - it takes 30 seconds max. They last for several years and I never have to worry about shedding bristles, which is a frequent problem with natural hair bristle brushes. The fine bristles on a nylon brush help to p-o-p and bubbles in epoxy as I brush it on. There are many ways to get a good topcoat. Some guys apply epoxy with their fingers! What works is developing a technique and tool kit that works for you.
-
cm10lber, While there are surely differences among epoxy formulations, it seems to me that it is all similar as long as you are using slow cure "30 minute" epoxy and not quick cure 5 minute epoxy, which uses a different hardener. What counts is the end result. TUers talk about Devcon, BSI, and Etex because they have been around a long long time and are proven products for topcoating - not because they are the only brands that work. Fishnart - I don't have epoxy turn pink and wonder if you are doing something "different" that might cause the problem, like using red sharpies on your baits or somehow introducing a contaminant into the mix while preping the epoxy. Little details can be important.
-
I'm not sure that fading applies to glow in the dark (aka phosphorescent) paint. The grains of strontium aluminate in the paint absorb and store light, then emit it afterwards. I haven't noticed any fading of the glow effect in spoons I painted several years ago. Fluorescent paint looks very bright in daylight and has secondary long wave colors that are perceived as a glow effect. But it is a chemically complex paint and it degrades fairly quickly in sunlight. If covered with a UV filter coating, I'm unsure to what extent fluorescent paint would still 'glow'.
-
Quantum Kvd Pt And Quantum Code
BobP replied to Blacklabelsociety's topic in Rod & Reel building & repair
If they have centrifugal brakes, take a cotton swab with a drop of oil on it and lightly lubricate the brake drum whe the brake blocks contact. -
Run some hot soapy water through the brush. There may or may not be any oil in the air that went through the brush. If you want to continue with the clmpressor, buy an oil trap and attach it in line with the hose. If there is any oil in the hose, blow it out with the compressor at high pressure after you install the trap.
-
$49 for 32 oz and free shipping? That's $1.53 per ounce. I'm paying around $13 for 9 oz of Devcon Two Ton, plus shipping, something like $1.66 per ounce assuming a cheap $2 delivery cost. The real interest is the Art Resin contains UV filters and an anti-yellowing agent. That's available in some other epoxies like Flexcoat and a couple of other brands, but at higher cost than their standard formulation. The FAQ says it cures to a "touchable" state in 8 hours, which to me suggests that it is similar in cure time to Devcon, Bob Smith, and other "30 minute" epoxies. So I think the stuff is pretty interesting. Thanks for the heads up, Joe
