


BobP
-
Posts
5,782 -
Joined
-
Last visited
-
Days Won
193
Content Type
Profiles
Articles
TU Classifieds
Glossary
Website Links
Forums
Gallery
Store
Everything posted by BobP
-
I have a love-hate relationship with MCU's. Love their performance, high gloss, and thin "factory-like" film; hate the storage issues. KBS and Dick Nite S81 prices are just about equal. I've tried less expensive Garco and Famowood MCU (which you can often find on sale a half the price) and didn't like the higher viscosity and the speed at which they began to harden in the container. When I try MCU again, I'll definitely try the "tap the can" method of storage but that will also mean brushing it on instead of dipping it, which is a minus. I'm using D2T and Solarez right now. D2T still makes for a great finish and though it's a little fussy to use, it's second nature after hundreds of crankbaits. Solarez is dead simple and super fast but you have to accept the low gloss, which I don't like. I have no intention of buffing off the wax exterior layer to get to the higher gloss resin underneath. I doubt the fish care either way but it's not the way I want my crankbaits to look when finished. I do like Solarez as an undercoating though.
-
I hate taping lips on a new bait before painting so I worked out how to avoid it and still get a clean slot in which to glue the lip after painting. Before painting, I fit a scrap piece of lip material into the slot, using a little tape if required to get a snug fit. The scrap piece has a hole drilled in the end and I use locking forceps to hold the baits while painting them, then put a little wire hanger into the drilled hole and hang the baits above my work bench on nails. When I'm finished painting and glue in the lip, I switch the wire hanger to the belly hanger while the glue hardens. Everybody eventually works out a scheme to suit their work environment and bait building methods, this is just mine.
-
I always cut the lip slot immediately after cutting out the basic lure shape, while everything is still square. I install the lips after painting the lure, before putting on the topcoat. That way, I don't have to tape off the lip before painting.
-
My thought is the fore-aft position of the ballast may not have as much effect in shallow divers as for deep divers - but I do feel a noticeable effect and in general the more forward the ballast, the more and the sharper the thump in shallow baits. For super deep divers, I've varied the position of the ballast and felt a big difference in how the bait feels and performs. Too far forward, it felt like the bait was staggering and the thump was irregular - not good. The bait felt best when the ballast was at the center of the body's rotation. It also cast better, which is not unimportant for deep divers that need long distance casts without tumbling. I like to feel a sharp regular thump from both shallow and deep baits because in my experience, that gets more bites. A regular thump in deep divers is especially important because otherwise you can often not detect a bite except for the fact that the thump cadence changes or disappears. Is the lip configuration also critical? You bet! I just don't think there is any unimportant design aspect if you want a bait to have the best performance. Little details can have outsize effects.
-
According to a KBS reply to a query in their user's forum, it is in fact a moisture cured urethane.
-
Saltshaker, I looked at the webpage and it doesn't say that KBS is a moisture cured urethane. Can you verify? The reason I ask is because MCU's are universally hard to store without hardening and that is almost the only reason guys don't use them more often. I'm hoping that it ISN'T a MCU!
-
 Thanks guys - I try to put the 'build formula' when I post a pic. No secrets! Forgot to add that the ballast is an integral weight/hanger .073 oz with 2 tungsten BB's behind the hanger, totaling .095oz. The final lure weight with #4 trebles is .42 oz.
 -
Air expanding in a hot wood bait will push just about any type of finish off the surface of the lure, especially if it sits in hot sunlight and the sun softens the topcoat at the same time. A strong undercoat and topcoat both help to prevent this.
-
I think the lower the tail hook is situated, the more it will tend to snag, all things being equal. I think it's a minor thing because snag prevention is mostly about the rest of the bait - the attitude of the bait and the degree to which the lip protects the underside of the bait while it swims.
-
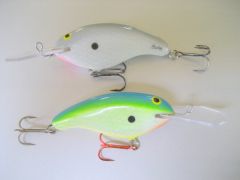
Tapp/Blazer style medium runners. Paulownia, Solarez undercoat, D2T topcoat. Bodies are 80mm long, 28mm tall max. 1/16" thick Lexan coffin shaped lip: 29mm max width, 28mm exposed, line tie at 20mm from tip. These run with good thump and moderate body roll.
-
I use an Iwata Revolution BR with the .3mm tip as my "do everything" brush, reserving my HP .2mm for detail work. I think the Revolution is the next step up from the Neo in the Iwata lineup. It shoots unthinned paint, pearls, and flakes just fine.
-
I tried Bang spray once and it was a lot thinner than KNB, so I think the KNB would last much longer as a lubricant.
-
I think (and this is partly conjecture) that a drooping tail tends to stabilize the bait versus a straight tail because the weight of the tail hanger hardware and the treble/split ring is lower relative to the bait's center line. If you look at successful commercial wood baits of this type, including the Zoom Tapp and many others, most of them have at least moderate tail droop. These baits usually have a tight wobble and some body roll at the same time, which I like. Some guys only fish such baits in early spring but I like them year-round. In my experience, the lip size, angle, and especially the location of the line tie are critical to good performance. But of course there are no unimportant details.
-
I make flat sided baits, both shallow runners with various lip shapes lips and medium runners with coffin shaped lips. Of the two, the medium runners are much more tricky to get to thump properly. I believe that any change, even small, always has an effect - but how a down turned tail versus a more straight tail design affects performance is unclear to me. And that's after hundreds of baits. So unless someone has an opinion based on testing you can believe, it's up to you to draw your own conclusions. Personally, I doubt that anyone can satisfy my idea of what constitutes valid testing on this one design point - but I'd be very happy to be proven wrong. All I can say for sure is that the medium running flat side with coffin lip that I build has a drooping tail and after many experimental batches and years of trying, I got one that works the way I want. So yep, every future batch will have the same drooping tail.
-
If you think slicking up the frog would help, I recommend Kickn' Bass attractant. It's a liquid based on pure fish oil with several scents available. I'd choose the anise flavor because it's a mild attractive scent. The garlic scent is like smelling salts - it will kick you head back! I use KNB on plastic baits both for the scent and for the lubricating effect - it stays on the bait better than anything else I've tried.
-
Wayne, If you're talking about Garco moisture cured urethane, I've tried it and found it begins to harden in storage even faster than Dick Nite S81. It is also a slightly darker amber color and a little higher viscosity than Dick Nite. That said, the price is almost half of Dick Nite and the results look very similar to me. Next time around, I plan on using the "tap the can" method of storage for MCU so that maybe, just maybe, I can use most of it before it goes south.
-
My favorite dippable is Dick Nite S81 moisture cured urethane. One dip, hang it to dry and for the excess to drip off the tail of the bait. Dry to the touch in a couple of hours and the moisture cure happens over several days. It's tough, very glossy, and the closest thing to a factory topcoat I've used. Downside - keeping it from starting to cure hard in the storage container is almost impossible if you're dipping lures in it. Even when I decant it into 2 jars and use Bloxygen finish preserver in the jars to prevent moisture contamination, I've never gotten a quart of DN S81 to last more than about 6 months before forming a skin. The next time I get some, I'm gonna use the "tap the can" method to decant enough for a few lures, brush it on quickly, and then hang them to cure. If we're talking just general ease of use, Solarez UV cured polyester is hard to beat. It goes from application to full hardness in a few minutes of exposure to UV light. Downside - it has less gloss than most topcoats. Mine seems too thick to dip lures and I had sheeting and wax migration into a white blush, but some other guys dip and report no problems. I brush it on, rotate it for a few minutes to level out, then cure it in sunlight for 30 mins. Those are the truly tough topcoats I have used. If just dipping is super important to you and you want no hassles and a good cosmetic appearance, dipping lures in an exterior grade solvent based urethane multiple times may be the best option, though it will not be as durable as the other options and will take multiple dips plus extended drying times. Concrete sealer - solvent based GST and similar products are enjoying a following right now. The extended hardening time and need for multiple coats turns me off. JMHO
-
Yeah, obviously they use some kind of gang replicator to shape the lures. They are cedar so it doesn't really matter if the tail extension is a dowel or not - but I don't think it is - probably the tail left over from the gang replicator operation and they leave it on there because it's a neat way to mount them for painting. I've taken the tail hanger out of a Stanford lure and stripped it down for repainting and didn't see a dowel.
-
I don't want to rain on the parade but it seems to me that the time and expense of this kind of prototyping are prohibitive and the results questionable. Say you spend the hours on writing the model program and then pay to have it printed. What do you end up with and what can you do with it? Use it to make a mold for a poured lure? I understand if you're a technology geek and the process is its own reward but I'm way less sure what practical application this has to making fishing lures. Signed, Old Fuddy Duddy
-
If you're fishing reaction baits like crankbaits and are sure you're in an area where there are bass but you're not getting bit, you have to try something different. The 3 main variables for me are size, depth, and action. Any of those might be causing the failure. As far as size, very experienced bass fishermen say "try larger before you go smaller". Less experienced fishermen (including me) are more likely to just go small. I've read studies that say the optimum size prey fish for a bass is 1/3 its body length. That's pretty large - larger than most bass fishermen throw, most of the time. Knowing all that, I'm as likely as the next guy to try an option or two and then revert to throwing a little 5" dropshot worm. Just lazy I guess since I've seen tiny 6 oz bass hit lures that were as big as they were.
-
If it's over acrylic latex paint, I can usually peel it off with the thin sharp blade of a small Swiss Army knife. I slice off a strip of epoxy, then use the blade to get under the epoxy and pry it off from there.
-
I might try using PVC cement, like used on PVC pipes - if you can compress the cracks so the plastic meets. The primer liquid for the cement comes in 2 forms - either clear or purple depending on state building codes where you live. They're the same except for the dye, which will print through acrylic paint. I shortened a Zara Spook a few years ago with PVC cement and it has lasted quite well. The cement dissolves the plastic at the joint and makes it into a single plastic surface, so you don't have to rely on the holding power of a regular glue. If you go the epoxy route, don't store the lure in a hot environment that can soften epoxy.
-
I fish an Arkie style jig most often because that head style works in most cover situations from rock to wood to moderate grass. If I fish a swim jig through grass all day long, I prefer a jig with a generally conical head that has the line tie hidden in the lead, with a round bend hook (preferably Gamakatsu), stiff weed guard, and a good keeper for the plastic trailer. I've bought so many different jigs through the years that I forget the brands/models! I buy a lot of Dave's Tournament Tackle jigs because they are produced nearby and he offers a wide variety at good prices.
-
http://woodcarvers.com/murphyknives.htm Murphy is a brand and there are many brands/models. I'm no carving expert. This knife was recommended by someone on TU and I bought one. It stays sharp for a long time and carves great, so I'm a happy camper. Get the pre-sharpened version and buy a strop and sharpening compound at the same time to touch up the edge as needed. It comes in a handy plastic tube for storage. There are other online sources for Murphy knives and the company has a website where they sell them too. You might want to check shipping costs to find the best overall deal. The knife is reasonable at around $15
-
White cedar has a nominal density of 23 lbs/cu ft. Basswood is the same. Red cedar is 23 lbs. I try to avoid power sanding, within reason. One way is to use a carving tool like a Murphy knife to do the gross rounding over, followed by a brief session with the Dremel sander and then hand sanding to remove any marks. Cedar is particularly aggravating to people who are allergic to wood dust. If you've tried whittling wood with a regular knife or an Xacto knife, a Murphy knife is a revelation. It goes through wood like butter.
