-
Posts
1,854 -
Joined
-
Last visited
-
Days Won
9
Content Type
Profiles
Articles
TU Classifieds
Glossary
Website Links
Forums
Gallery
Store
Everything posted by fatfingers
-
Sounds like your final top coat (clear) was breached.
-
Very nice! I used to do a lot of pike fishing and that size bait would have been just the right size. Post some pictures of your fish too.
-
-
-
-
If you're interested in trying to achieve a flawless finish (meaning as flawless as possible...lol, seems like theres always a flaw if you look hard enough)...try to slow down when applying the final topcoats. Put down a clean piece of paper for a work area. It can be an old magazine or the backside of something you copied, but its always good to have a clean work area and a clean spot to place the lure before you begin. Wash your hands thoroughly first. Your hands very often contain dust of one type or another which will fall onto the sticky surface and show in the final finish. Clean your brush of all dust particles by fanning it with your finger or thumb till you can no longer see dust flying off the bristles. Also remove any loose bristles so they can't get dragged into the epoxy during the application process. Mix the epoxy on a clean non-porous surface. Some guys like the bottom of a soda can. I like medicine cups because if you buy them by the hundred count, they are cheap and disposable...about 4 cents a piece...for four cents, I don't have to slow down and clean anything when I'm done and if I'm mixing envirotex instead of Devcon 2 ton epoxy, the medicine cups have markings on the side which help you achieve a perfect 50/50 mix every time. I prefer use acid brushes for applying the epoxy. I crimp the tip near the bristles with a pair of pliers to lock down the bristles and fan the brush to remove loose bristles and dust. I do not clean the acid brushes. I toss them when I'm done, because for the cost (about sixteen cents if you buy them in bulk), I don't have to repeatedly expose myself to the toxic solvents required to clean any type of epoxy. For me at least, it is not worth the health hazard, which you will repeatedly encounter if you make baits in any quantity at all...say 50 baits a year times only two coats per bait...you are inhaling highly toxic chemicals 100 times per year...unless you wear a mask and how much trouble is that? I prefer to avoid mixing on paper or any other surface that might have tiny loose particles on it, because the tiniest of particles will usually show in the finish after it dries. Mix thoroughly. I use wooden sticks similar to popsicle sticks and despite the idea that it may throw a few bubbles into the mix, they work great. The heat gun remove all bubbles anyway. I know others prefer plastic mixing sticks of some type but I have easier access to popsicle sticks so I use them and toss them after using both ends several times. 99 times out of a hundred if you have bad patches which are still tacky after 24 hours, you failed to mix properly. Once in a great while, I've gotten a bad tube of Devcon. Devcon seems to have a finite shelf life. Try to buy the tubes that have the least amount of yellow in the one tube. It seems to be the "freshest" stuff and goes on a LOT easier and does not have the abbreviated working time that the very yellow tubes have. I've had no such problems with Envirotex lite. After application of the epoxy, take a moment and turn the bait over as you hold it under a light and carefully examine it for any fish eyes, missed spots or dust boogers. If you find dust, you can at times just remove them by wiping them off with your finger or rolling a toothpick next to them to sort of roll them onto the toothpick. If I find minor dust or epoxy specks in the finish during the first one or two coats, you can usually leave them as they are and just sand them lightly with fine grade sandpaper prior to the application of the next coat. Of course the final coat is the one where you won't have the luxury if ignoring them because you can't sand them out afterward without scuffing the final finish. Once you apply the epoxy LEAVE IT ALONE and put it on the spinner or spin it by hand by holding the bait by the tail with a vice grips. Don't keep brushing it and trying to spread it...It will only get progressively worse and it will almost always flow itself out nice and level after normal brushing. Try to apply the next coat before the previous coat has fully cured...once the first coat has dried to the point where the bait can be carefully handled. By doing this, the next coat will chemically bond to the first giving you the best possible bond between coats. I've had occasion to have to sand out aberrations in a finish and have noticed that allowing the epoxy to fully cure between coats creates a distinct separation between the two, which could create the possibility of delamination of the latter coats, especially with envirotex under certain conditions and most especially if the first coat is applied over foiling. With Devcon, I try to apply the second or next coat after 4 to six hours. With envirotex, which I use almost exclusively these days, I find that leaving it sit with a cover over the medicine cup (to preclude dust settling on the surface...I use a piece of scrap Lexan as a cover) makes it gel slightly. Because it is a bit thicker after allowing it to sit for ten to 15 minutes, it behaves much more like Devcon...goes on evenly, less prone to run, and far less prone to show dust and foreign particles. It will only slightly abbreviate your working time, but it will go on a bit thicker and require less coats to achieve any desired level of protection. By allowing it to thicken just a bit, I find that I can usually get by with three to four coats instead of four to six thin coats and the finishes are clearly superior and have far fewer flaws. It is probably the best tip I can share about envirotex. I've found that applying envirotex immediately after mixing encourages separations and fish eyes. I know there are times when you only want one thin coat, but even then I let it sit for 10 minutes and try to apply it sparingly while still covering the bait completely.
-
Thank you. I enjoyed reading about this method.
-
-
Of course, I missed you, bro. I got so bored in your absence that I sold your company on ebay while you were gone. I have enough cash on hand to retire and feed the monkey big buckets of caviar for the rest of his life. He's growing lethargic and fat. He sleeps all the time and occasionally talks of hooking up with Paris Hilton to Lisa Presley for some party action. But...I won't let him date till he shows more maturity and stops wrecking my Mini Cooper every weekend.
-
The system they use seems pretty simple really. The idea of internal magnets is interesting in a very different way too. InFisherman wrote a bit about polarizing downrigger cables for trolling and raised some interesting questions about possible effects on the fish. Haven't heard much about it since, but I quit reading the magazine years ago.
-
-
-
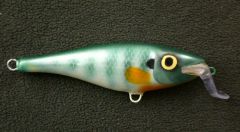
I really like this work. You chose a great bait to repaint. The Super Shad Rap is a real producer and runs great. I would most certainly not use anything but epoxy. I'd choose either Devcon or Envirotex lite. If you're unfamiliar with the application of epoxy go with Devcon...its much less fussy and easier to work with. And no, it will not affect the action of the bait. I've repainted a few of these myself and the bait will run just as it did before once you topcoat it with epoxy. Nice work.
-
If you're interested in trying to achieve a flawless finish (meaning as flawless as possible...lol, seems like theres always a flaw if you look hard enough)...try to slow down when applying the final topcoats. Put down a clean piece of paper for a work area. It can be an old magazine or the backside of something you copied, but its always good to have a clean work area and a clean spot to place the lure before you begin. Wash your hands thoroughly first. Your hands very often contain dust of one type or another which will fall onto the sticky surface and show in the final finish. Clean your brush of all dust particles by fanning it with your finger or thumb till you can no longer see dust flying off the bristles. Also remove any loose bristles so they can't get dragged into the epoxy during the application process. Mix the epoxy on a clean non-porous surface. Some guys like the bottom of a soda can. I like medicine cups because if you buy them by the hundred count, they are cheap and disposable...about 4 cents a piece...for four cents, I don't have to slow down and clean anything when I'm done and if I'm mixing envirotex instead of Devcon 2 ton epoxy, the medicine cups have markings on the side which help you achieve a perfect 50/50 mix every time. I prefer use acid brushes for applying the epoxy. I crimp the tip near the bristles with a pair of pliers to lock down the bristles and fan the brush to remove loose bristles and dust. I do not clean the acid brushes. I toss them when I'm done, because for the cost (about sixteen cents if you buy them in bulk), I don't have to repeatedly expose myself to the toxic solvents required to clean any type of epoxy. For me at least, it is not worth the health hazard, which you will repeatedly encounter if you make baits in any quantity at all...say 50 baits a year times only two coats per bait...you are inhaling highly toxic chemicals 100 times per year...unless you wear a mask and how much trouble is that? I prefer to avoid mixing on paper or any other surface that might have tiny loose particles on it, because the tiniest of particles will usually show in the finish after it dries. Mix thoroughly. I use wooden sticks similar to popsicle sticks and despite the idea that it may throw a few bubbles into the mix, they work great. The heat gun remove all bubbles anyway. I know others prefer plastic mixing sticks of some type but I have easier access to popsicle sticks so I use them and toss them after using both ends several times. 99 times out of a hundred if you have bad patches which are still tacky after 24 hours, you failed to mix properly. Once in a great while, I've gotten a bad tube of Devcon. Devcon seems to have a finite shelf life. Try to buy the tubes that have the least amount of yellow in the one tube. It seems to be the "freshest" stuff and goes on a LOT easier and does not have the abbreviated working time that the very yellow tubes have. I've had no such problems with Envirotex lite. After application of the epoxy, take a moment and turn the bait over as you hold it under a light and carefully examine it for any fish eyes, missed spots or dust boogers. If you find dust, you can at times just remove them by wiping them off with your finger or rolling a toothpick next to them to sort of roll them onto the toothpick. If I find minor dust or epoxy specks in the finish during the first one or two coats, you can usually leave them as they are and just sand them lightly with fine grade sandpaper prior to the application of the next coat. Of course the final coat is the one where you won't have the luxury if ignoring them because you can't sand them out afterward without scuffing the final finish. Once you apply the epoxy LEAVE IT ALONE and put it on the spinner or spin it by hand by holding the bait by the tail with a vice grips. Don't keep brushing it and trying to spread it...It will only get progressively worse and it will almost always flow itself out nice and level after normal brushing. Try to apply the next coat before the previous coat has fully cured...once the first coat has dried to the point where the bait can be carefully handled. By doing this, the next coat will chemically bond to the first giving you the best possible bond between coats. I've had occasion to have to sand out aberrations in a finish and have noticed that allowing the epoxy to fully cure between coats creates a distinct separation between the two, which could create the possibility of delamination of the latter coats, especially with envirotex under certain conditions and most especially if the first coat is applied over foiling. With Devcon, I try to apply the second or next coat after 4 to six hours. With envirotex, which I use almost exclusively these days, I find that leaving it sit with a cover over the medicine cup (to preclude dust settling on the surface...I use a piece of scrap Lexan as a cover) makes it gel slightly. Because it is a bit thicker after allowing it to sit for ten to 15 minutes, it behaves much more like Devcon...goes on evenly, less prone to run, and far less prone to show dust and foreign particles. It will only slightly abbreviate your working time, but it will go on a bit thicker and require less coats to achieve any desired level of protection. By allowing it to thicken just a bit, I find that I can usually get by with three to four coats instead of four to six thin coats and the finishes are clearly superior and have far fewer flaws. It is probably the best tip I can share about envirotex. I've found that applying envirotex immediately after mixing encourages separations and fish eyes. I know there are times when you only want one thin coat, but even then I let it sit for 10 minutes and try to apply it sparingly while still covering the bait completely.
-
-
-
-
-
I can't wait to start throwing jerkbaits at the muskies again this year. Last year I came up two successful prototype jerkbaits. One I decided to call the Slopehead and the other the Shovelhead (I think both are posted in the Gallery). This one is a combination of the features of those two prototypes. Its carved from maple, unweighted, with watercolor stripes and pearl scale accents on the bottom, and twin side-mounted front hooks. Hope you like it.
-
-
I didn't hang any lead in this one, Dean, and it seems to run well, but of course poplar isn't as wiggly and giddy as the cedar stuff. I find poplar to be a really versatile choice for a lot of baits and the stuff is pretty tough yet pretty easy to work with. As to the golden shiner and why mine looks this way...the term "golden shiner" comes from the latin/greek derivative "golden shiner," which translates loosely as "golden shiner." In most year classes, the fish are born from the womb facing east since they are indigenous to the Atlantic slope. However there are within their numbers a precious rare few that are born facing west, as is the one I chose to faithfully emulate in my poplar rendering of 2008 shown above. It was not easy. No, sir. How did I do it?... I captured a herd of pregnant golden shiners and held them hostage at their local aquarium until they gave birth. I kept both mothers and children hostage for several years, until I acquired photos of the sole rare west-facing "golden shiner" born to be my working model. The remaining mothers were shot execution style in front of their children and the children were sold into temporary captivity at local bait shops. Aside from that, no fish were harmed in the making of this bait. Thus, you may naturally not immediately recognize my rendering, as it faces westerly (and it only runs properly when you cast and retrieve facing eas
-
-


