-
Posts
1,854 -
Joined
-
Last visited
-
Days Won
9
Content Type
Profiles
Articles
TU Classifieds
Glossary
Website Links
Forums
Gallery
Store
Everything posted by fatfingers
-
-
-
-
The original question was general in nature from what I read. Generally musky baits are larger than most, but what size is big and what size is small is an all day subject. I pretty much agree with woodie. Guys, if you go to a musky show, where the crowd paying to get in the door are targeting only muskies, you aren't going to find the venue peppered with booths selling 2 inch twister tails. That is not to say that smaller baits never work. Leesville is a lake in Ohio and is famous for muskies. The number one lure for Leesville is a bait called the Sisson. It's about 2 1/2 inches long and is the number one bait used on the lake, year after year. And interestingly, the fish do not inhale the bait, although I can understand how you might think they would. But...on the subject of small baits...not all of them work with any regularity. Only a very few baits smaller than four or five inches work with any regularity at all...generally speaking. The point is that yes, there are those days when you can throw your shoe in the water and a musky will take a swipe at it, but most days, on most waters, woodie is dead nuts on the money. I'll add one other opinion...I am of the opinion that day in, and day out, there is a limit to how big of a bait will produce. Can you catch fish with a big ol' say, 16 inch bait? Yep. But generally speaking, once your start using baits too big, you will probably get out-fished by someone using a more average sized bait. Those 15 inch giant baits are impressive to look at and hold in your hand, but in my opinion, have very limited application. So, generally speaking a musky bait can be too small and even too large, day in and day out.
-
I agree with woodie on the damage in the net. It is pretty much impossible to build a bait that a musky cannot destroy if one of the hook tines is attached to the net and the musky starts twisting and thrashing. For those who don't already know, there are newer musky nets out there that not only almost eliminate the thrashing and twisting, they also pretty much eliminate any possibility of harm to the musky from the net itself. The one I have has a soft rubber coating, a larger "basket" for the fish, and a flat bottom. When we net fish with it (which took some getting used to because it is larger than the average musky net), the fish seem to immediately relax in the bottom. Rarely does one ever thrash like the do in the old nylon hoop nets. A bonus is that the net not only preserves the integrity of the fish, it also pretty much eliminates having lures destroyed in the net. Once you use one you'll throw away your old hoop net with the nylon knotted bag.
-
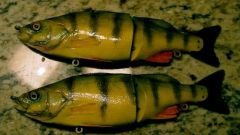
Thanks, Douglas. Yes, that is one of my Flatshads. Actually there are really no flat spots anywhere on the bait, but I do start out with flat stock, which is why I named the Fatfingers Flatshad. And a smaller, immature gizzard shad is somewhat flat actually compard to say a perch of the same size. Joe, that is pearl powder mixed with automotive clear. I also used three other custom mixed pearls for the gill plate detail and it has Mayan Gold pearl along the top of the bait.
-
A cheap a readily available source for rattle tubing is the handle of an acid brush. Simply cut to length and make end caps from a small piece of soda can. I also agree that side to side rattles are louder than rattles with the tubing mounted lengthwise.
-
-
-
-
About New shape for a musky-class jerkbait I will be working with for 2014. It runs great. This one is painted in color-shifiting enamel, which is hands-down, the most expensive paint I have ever used. But it produces a very nice shift from a deep blue to a deep purple when shot over black. I purposedly avoided a 3D eye for the prototype until I can make a few more of the same model to experiement with how the bait runs with 3D versus without. The belly fades from blue/purple to black and is signed in candy red. I was pleased overall with the lines on this one. I may make a mold of it later this spring.
-
-
Lincoya, I would love to have your help with a centerline for your method...which is hands down the best thing I've seen for making perfect diving lips of a consistent size.
-
Your method is particularly well crafted. I have threatened to adapt it but haven't figured out how to incorporate a centerline in the template. What I mean is, my method is slower than yours, but the template I glue to the polycarbonate has a centerline down the middle of the lip... I rough cut the lip then use a bandsaw to shape it down to the template. I leave the template attached, but I peel enough of it off so that the area that is inserted into the bait is exposed. The centerline on the template helps me align the lip perfectly when the lip is installed...not to much to one side or the others when it is glued in. I've considered trying your method but I'm not sure I would get the centerline centered when attaching the template to the jig you use when you cut the polycarbonate with the router bit.
-
-
Base coat color makes a day and night difference when using urethane paints, which is all I use. Shooting pearls which is something I've experimented with for years, yields results that are directly dependent on base coat color. I'll the to post some examples later. To answer your question, black yields the most intense results (which is a choice, as opposed to an effect you always want to employ) when using pearls. Fo example, blue pearl over white yields a pale, sort of pastel blue, whereas blue pearl over black yields a deep, almost navy blue result. Gray base with blue pearl, gives an in between result. The same rules probably apply when using water based paint, but I've not used those in many years. I don't care for the stuff for a variety of reasons. Then there are candies over different color base coats...which takes too many words to go into here, but suffice it to say base coat color is critical to the effects and results at your disposal. Until you've toyed with all the latitude available from the spectrum of base coating, you have not utilized all the results that are available to you from the medium.
-
I've used oak, cherry, poplar, and even cedar. Cedar give you the latitude to favor one end of the bait over the other when you are placing the necessary weights...you can get a certain nose down effect or even a dive and rise affect that is more pronounced than you get from oak or cherry. But, you naturally need more lead. Oak and cherry seem to get consistent results for me when a certain action is desired. I've heard of guys using maple and mahogany too. I've used maple, but I dread working with it. Hope that helps.
-
That is very cool work. Post a picture if you would. I don't use lead in the lip but I like how you went about it and would love to see what it looks like when it's done.
-
If time is a problem, you're probably venturing into the wrong hobby. Truly creating your own hard bait (which is generally always a variation of what can be purchased off the shelf), is an adventure in trial and error. Each trial, win or lose, takes time and a lot of it, no matter what material you work with. Actually, wood is a great place to start because you can test the hydrodynamic properties of your design before committing to the time involved in making a mold. The only other help I might offer is to note that I cannot recall anyone here making a mold of the caliber required for plastic injection unless they were employed somewhere with access to some serious machining equipment. If anyone did that in their basement, I don't recall hearing about it.
-
-
-
Mixing epoxy is not at all complicated. Mixing is often discussed here and elsewhere not because it is hard, but because thorough mixing is important to a fine finish. It is like a lot of things you will read about on this forum and others...describing the process in writing makes it sound more complicated than it really is,
-
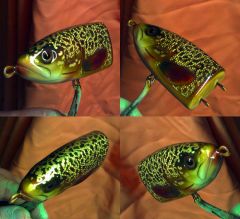
Thanks you guys. The bait is a jerk bait carved from cedar. I used urethane paints for everything. This one has yellow and orange candies and micro scales. I shot pearls on the belly and speckled it with tiny black dots. I make all the eyes with a variety of methods. They are reverse painted. Part of the effects come from the treatment of the eye sockets before the eyes are installed.


