-
Posts
1,854 -
Joined
-
Last visited
-
Days Won
9
Content Type
Profiles
Articles
TU Classifieds
Glossary
Website Links
Forums
Gallery
Store
Everything posted by fatfingers
-

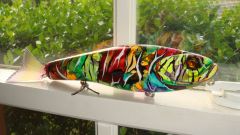
What Holographic Paint Is Being Used Here
fatfingers replied to joshscustomcrankbaits's topic in Hard Baits
That is paint over tape. -
The precision he displays as he carves with a knife blade is really something. It is easy to see that he shows a lot of pride in the work he does. The precision he displays as he carves with a knife blade is really something. It is easy to see that he shows a lot of pride in the work he does.
-
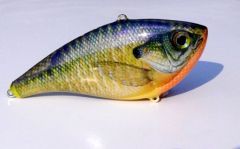
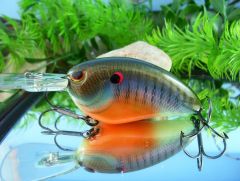
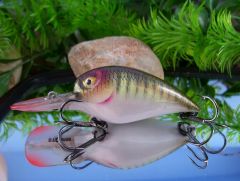
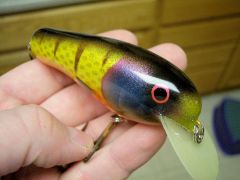
I photograph all my baits right on my workbench. I put down a white background and use two side lights and one overhead light. All three lights have "daylight" bulbs, which are bulbs that reproduce the entire spectrum of light as it is normally seen as sunlight. I use and inexpensive camera, not an SLR, but one of those 10 mega pixel pocket cameras you can buy for about $100. Most of these modern digital pocket cameras have a close-up mode which lends itself quite well to photographing baits. The quality of the pictures these little cameras can produce is nothing short of amazing. Try to keep the picture free of clutter...I usually like to have nothing but the bait in the photo, but sometimes its good to lay something next to the bait to give a sense of scale and size for the viewer. A coin for example, can give the viewer an idea of how big the bait really is. Try to prop up the bait so that the viewer can see its best profile and features. I sometimes use a pencil eraser behind the bait (out of view in the photo) to hold the bait upright for the picture. Position the hooks so that they look somewhat natural for the bait. Lastly pay attention to the glare from whatever light source you are using. Usually moving the camera to the side or up or down with eliminate most of any glare that is created by the appropriate lighting. For the record, I have a background in professional photography.
-
-
-
-
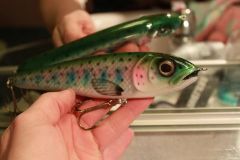
The print may have been applied in two parts.... First the body, and then the gill and head area. As to the need to apply the method to a smooth finish, that's easy. You could simply apply a coat of envirotex, which would smooth out the surface so that the Husky Photofinish Method could be applied, while still allowing all the biat's detail to show right through the clear envirotex coating. Of course, I'm not saying that this is the way this bait was done, but I know that I could duplicate what was done by applying the above steps to one of the baits you buy and then paint.
-
I use oil-based paints only and the best gold I've found so far is Testors. It comes in those little bottles that cost about a $1.50 each (which equals about $6,496,324.00 per gallon). The trade-off is that if you want a true gold, meaning an almost metal-looking gold, you'll have almost no latitude in trying to "feather" the gold onto the area you're painting. It will be either a solid gold, or nothing.
-
I'm glad to read that my tutorial is still helping people tame the Envirotex beast. If you want to try something new, try the EX-74 from Envirotex. Now hold on a minute...there's a catch...the stuff is expensive and can only be bought in gallons. But, if you're willing to lay out about $115, you'll get an epoxy that I feel is even better than Envirotex Lite. You might consider get a buddy or two to split a gallon with you to lower the cost. A gallon is an awful lot and the stuff has a shelf life of about one year, so splitting the cost with others can be a good move. The EX-74 has several advantages in my opinion. It is slightly harder, but not at all brittle. It also goes on thicker. You will still need to use a drying wheel. Disadvantages? Price, but only because you must buy the stuff a gallon at a time (1/2 gallon of resin, and 1/2 gallon of hardener = the gallon "kit" you purchase for about $115 or so). The only other minor disadvantage is that it seems to be just slightly more prone to dust boogers in the finish than Envirotex Lite, but all in the all, the difference between the two as far as dust is negligible.
-
The majority of my photos have been removed. There are perhaps a dozen left out of all that I loaded up in the last 5 years or so.
-
-
-
Hi Phil. If you are talking about using fluorocarbon as a material for a leader, I and a lot of others have used it for musky fishing. It works great. We usually use 80 to 100 lb test.
-
-
-
Very innovative design. Have you considered trying a larger lip?
-
Diemai, I understand. The only reason I mentioned that some lures need no weight added is because many, many threads on TU and other sites discuss weighting as a matter of course. Therefore, it is easy for the newer guys to get the impression that when you build a bait, you must add weight every time. Of course, some times you truly won't get the bait to run without the ballast. But I throw that out there because a number of the newer guys found Hubert's excellent video to be informative and I also wanted to share that little tip. I have to tell you, you KNOW he made a great tutorial when you can learn from it, even though the first one was in another language! Very cool stuff!
-
That was an excellent video. He spent a lot of his time setting that up to help others learn. I would only add one tip: The table top belt sander can do a lot of the sanding that was done with the file. In other words, in the video, he makes the basic pattern from wood using a paper template for the side and one for the top view also. He then uses the belt sand to shape the bait. The he goes to the file...it is at that point that the belt sander can remove 95% of the material if you simply lay the sharp edge (the part he filed off) on the belt sander and either roll it side to side or make long strokes on the rounded part of the belt sander. You count the strokes and make the same number of strokes on the opposite side of the bait on that sides sharp edge. Counting the strokes and repeating the process on the other side of the bait assure that you remove the same amount of material from each side of the bait. Its easier to do than it is to explain and it works great. Super fast way to do most of the shaping of any wooden bait. The belt sander is your friend. Someone asked about adding ballast to the bait. I would also like to add that not every bait needs weight added. Some baits run better without it. Some require it. You need to build a given model of bait with and without to see the difference in action and then see what the fish have to save about it. Again, I mean to take nothing away from the excellent video he made. I salute him for a contribution to all who are trying to learn the many steps involved in the process. As Jed said, when a lot of us started there was nothing like this stuff.
-
-
-
-


