


borderbasser
-
Posts
270 -
Joined
-
Last visited
Content Type
Profiles
Articles
TU Classifieds
Glossary
Website Links
Forums
Gallery
Store
Everything posted by borderbasser
-
I'm sure I can figure out a way to clamp but it seems like it would be difficult. So far I have used Devcon 5min. since it sets fast. I can use hand pressure to "clamp" the pieces long enough for that stuff to set up. Can anyone give me any reason why any of the other glues previously mentioned would be stronger than the Devcon? If not, I will probably stick with it. Might even try some of the faster setting stuff. I just figured that there might be some glues out there that were made especially for wood that might be better. Thanks again. TJ
-
Thanks guys. TJ
-
Thanks for the comments guys. As for the Titebond, I have heard that the Titebond III is a waterproof version and have thought of trying it, but was wondering what type of glue it is and if it tacks up fast so that the pieces can be handled. As I said before, it would be a pain (not impossible) to clamp the pieces so a fast setting glue would be better. Thanks again. TJ
-
Thanks for the advice guys. What would be some examples of water proof or at least resistant glues? I have heard that Titebond III is one, but I have no experience with it. It would really be nice to have something that sets up quick too like Devcon 5min because it is difficult to clamp the pieces in place. Anyway, does it really even matter what the water resistance is once the bait has been topcoated? I will post pics ASAP. Thanks. TJ
-
Right now I am using epoxy, but due to the nature of things, I wan't something stronger if it is available.
-
Can anyone tell me what is the strongest glue for a wood to wood connection. I am experimenting with a different type of hinge on my swimbaits (similar to a 3:16) and the hinges are made of wood and have to be glued to the body. Thanks. TJ
-
Mark, they will last a long time. If you want, you can clean them with denatured alcohol after each set of bottles if you want. Also, when you do get a new set of bottles, don't drill holes in the new ones, just replace them with the old caps that already have the hole. TJ
-
I posted this to the "etex set hard..." thread below, but I wanted to start a new one here 'cause I wanted to make sure everyone saw it. I don't know if this has been posted here before or not. I learned it off a rodbuilding site. This really only applies to anyone using bottles of epoxy like etex that have a screw on cap. Anyway, get yourself some syringes. DO NOT get them from a medical supply store...the kind with the rubber plungers. Most of these are lubricated with silicone and will cause all sorts of problems. The ones you need, you can get from Flexcoat, a rodbuilding finish company and don't have a rubber plunger. You may be able to get them directly from flexcoat, or you can order them from Mudhole.com. Anyway, drill a hole in the cap that the syringe tip (nipple) will fit into snugly. Then, the syringe itself becomes the cap because you will never have to take the cap off again. Just turn the bottle upside down and draw out what you need. Just make sure that you don't share syringes between bottles. I promise you guys, this method is the absolute fastest and best thing since sliced bread for mixing epoxy from a bottle. You will never weigh it out or pour it out in puddles again. I hope this helps some of you. TJ
-
I'll give you guys a little tip for measuring out your epoxy. Get yourself some syringes. DO NOT get them from a medical supply store...the kind with the rubber plungers. Most of these are lubricated with silicone and will cause all sorts of problems. The ones you need, you can get from Flexcoat, a rodbuilding finish company. You may be able to get them directly from flexcoat, or you can order them from Mudhole.com. Anyway, drill a hole in the cap that the syringe tip (nipple) will fit into snugly. Then, the syringe itself becomes the cap because you will never have to take the cap off again. Just turn the bottle upside down and draw out what you need. Just make sure that you don't share syringes between bottles. I promise you guys, this method is the absolute fastest and best thing since sliced bread for mixing epoxy from a bottle. You will never weigh it out or pour it out in puddles again.
-
Thanks for the input guys. TJ
-
I am begining to get frustrated with D2T chipping were the joints on my swimbaits clack together. How does DN hold up to this abuse? I have tried Etex lite as well and I don't like how long it takes turn the bait. Any ideas? Thanks. TJ
-
Pfluger President question
borderbasser replied to borderbasser's topic in Rod & Reel building & repair
I appreciate it. I guess I'll have to try it again. I torqued down on it pretty hard this morning and it didn't budge. Thanks again. TJ -
Pfluger President question
borderbasser replied to borderbasser's topic in Rod & Reel building & repair
So are you saying that you just turn the handle in reverse and it will unscrew? I tried that but it didn't come off and was afraid of breaking something. Maybe it is a little tighter than I thought. Thanks. TJ -
Does anyone know what the trick is to get the handle and handle-side side plate off of a Pfluger President? I need to service mine and I can't seem to get that side off. Thanks. TJ
-
I was just wanting a little feed back on the Polytranspar, Wildlife, and Lifetone brand paints. I am fixing to place an order for some and was just wondering if one brand was better than another. Thanks. TJ
-
 very nice!
 -
Thanks for all the compliments fellas. Riverman, I actually do all the shaping on a benchtop beltsander and a flap wheel chucked up in my drill press after rough cutting with the band saw. Then I finish it off by hand with sand paper. The detail work I do with the Dremel. I couldn't imagine trying to do all that shaping with just a dremel...yikes! Thanks again. TJ
-
Hey guys, I really appreciate the compliments. Mark the fins are made of plexiglass that I have cut grooves in with a dremel and a small cut-off tool. Then I take a small drill bit and use it like a router bit to cut a groove in the bait to insert and epoxy the fins in with. As far as the carving goes, I wish I can say I'm really talented, but the truth is I have more time than talent. You may not believe this, but I do all the rough out carving with that small drill bit in my dremel tool LOL! Then I use what I think is a small chain saw sharpening bit, small drum sander in the dremel, and some small pieces of sandpaper to kinda finish it out and clean up the edges. As far as the action goes, it really doesn't have as strong a kcik as I had hoped since I built it to throw when the wind is really gettin' it, but I think it will do just fine. I really appreciate the kudos on the paint job too. That is something I have really struggled with. All it is, is a light coat of Createx Trans yellow, then some kinda trans green I have mixed up, and a light coat of Createx trans. dark brown over the back...all over Createx Pearl. Then of course the black splatter. Oh yeah Mark, I DO intend to sore-mouth a few of the local Amistad bass with it! Thanks guys. TJ
-
Oops! I didn't mean for the pics to come out that large!
-
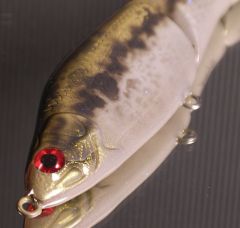
Well, I finally made one that is a winner. It is 9.5" long and is made out of cedar. Now it is time to see what the fish think. I really appreciate all the help and advice that is shared here. TJ
-
For me, I use MF regular and add a little softner to it. I have found that it really depends on the size of bait your making. For the smaller stuff, regular with no softner works fine. But, for the bigger stuff, I found that just plain 'ol regular was way too firm. One thing that has to be considered (mainly with the bigger stuff like a California Swimbabes Hot Momma) is hook-up percentage. If you have a bait that will fold up easily in the fishes mouth, your chances go way up. This is even more important on baits with a single worm hook type riggin' like a Mission Fish and Basstrix type baits. I make a bait like the mission fish that is 7" long and poured some with regular without softner, and I couldn't get a hook set to save my life. Soffened them up a bit on the next pours and all my troubles went away. Basicly, the bigger, and more importantly thicker the bait is, the softer it needs to be. TJ
-
do a search under my user name. I posted a pic a few months ago on how I do it and it is very effective. I can't recal if I attached it to a post or put it in the gallery...thinking it is attached to a post. I would call it up and post it again here on this one if I knew how.
-
Thanks guys for the input on the hi-lite powder. Does anyone out there have any experience with running the LC paint in an airbrush? Is reducer or thinner necessary. Does anyone know what can be used to clean the gun besides the $4 per ounce thinner? Thanks.
-
So for those of you who have used it, what is the verdict? I am thinking about getting some, but I am concerned about the shelf life since I really won't go through a bunch. Any special considerations for running through an airbrush like using retarder or thinner? While we are on the subject of paint, is there any other paint readily available that can be airbrushed that will stick well enough to get the bait dipped and sealed? I tried some Bastrix knock-offs yesterday and painted a scaled look over the back and shoulders with Createx grey. Problem was, when I dipped and rolled them horizontaly in my pan, it rubbed some of the paint off. If I can't find a reasonable priced paint that won't rub off while dipping horizontaly (to save on plastic), I think I'm just gonna buy these baits off the shelf. By the way, what I am using is a mold I made of a 6" money minnow with the split belly, painting the bait and then re-dipping horizontaly to seal. I am not dipping from scratch. Thanks guys for your input.
-
One word of caution when making your own waterslides. The ink you normaly use in your printer doesn't have any UV inhibitors in it. In other words they will fade from sun exposure so you'll want to keep them put up in dark place when not in use. I know this from trying to do the same thing for rod decals on the custom rods I build. TJ