


rock
-
Posts
31 -
Joined
-
Last visited
Content Type
Profiles
Articles
TU Classifieds
Glossary
Website Links
Forums
Gallery
Store
Everything posted by rock
-
Dye and alumidust will work with these rubber urethanes just fine. The bottles should have come with mixing directions, but Alumilite has good customer service . Give them a call and they will help you..
-
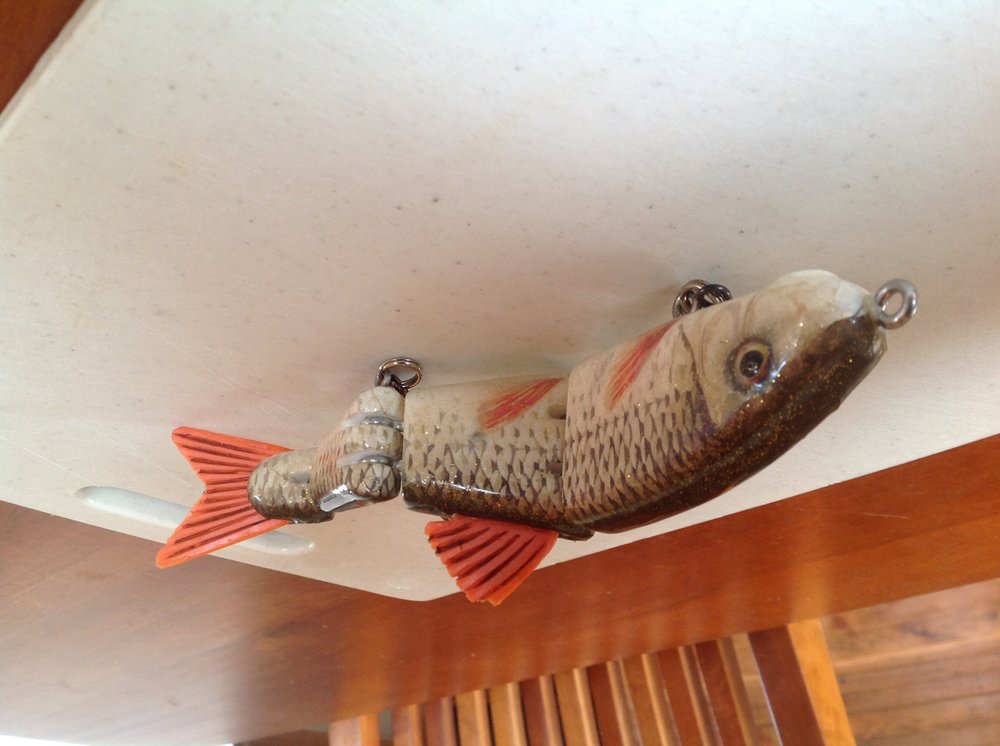
Sorry for the upside down pics. We used waterslide decals for these. Patterned the shape of the lure to coordinate with the decal. Airbrushed the tops and bottoms. Good thread on this on TU, and we followed it closely. Thanks for the compliments! Lots to be learned here on the site. http://www.tackleunderground.com/community/topic/23137-photo-finishing-with-waterslide-decal-paper/
-
I agree with Pete. My guess is you will be very disappointed trying to get the pieces out of the mold and the mold won't last long. RTV is definitely you best option. Here's one we've just completed with a silicone mold. Even have the joint slots molded and the screwy eyes location so it's ready to go with just a little tweaking after it comes out.
-
I always add some denatured alcohol to the epoxy. Really helps thinning it a bit and helping it flow. Cleans up the brush too. You have to experiment a bit on how much to use. A little goes a long way.
-
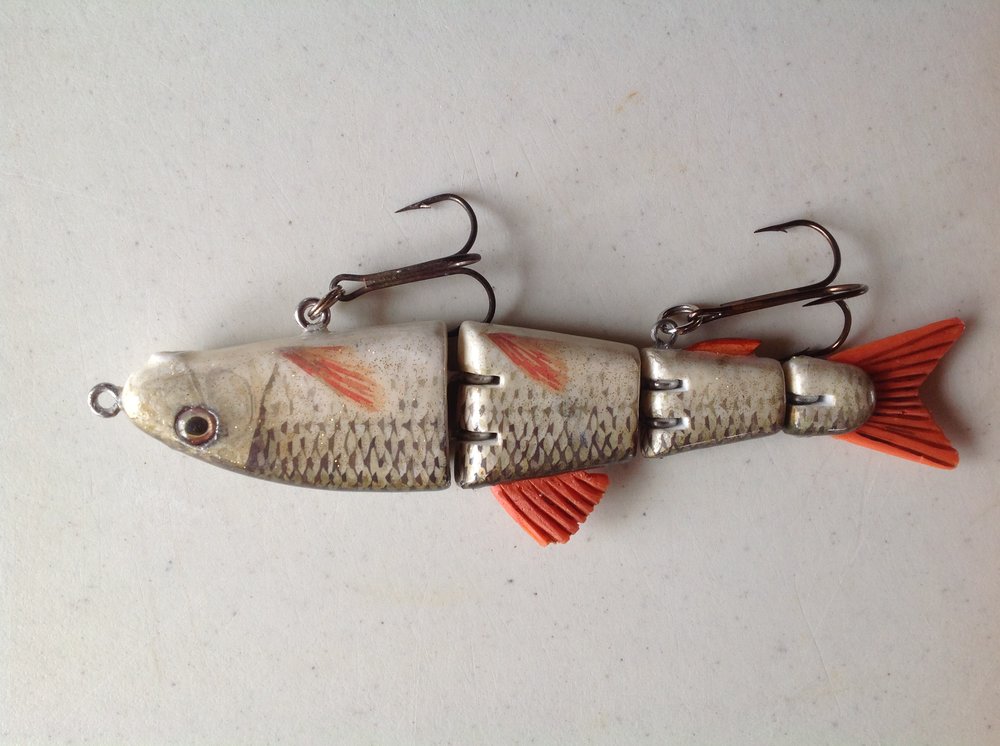
 Rocky's Redhorse is a 4 piece hard swimbait made of urethane resin from a mold we made. A waterslide decal was used for the sides and handpainted tops and bottoms to finish.
 -
I made a few for myself. Traced a few Colorado blades on a brass sheet, and cut it out, smoothed the edges and drilled a hole in the middle. Bend the edges a bit, and it spins just dandy.
-
Scottymac, I just started double making my large spinnerbait heads. A very noticeable difference in its hardness after the second round. It can take away a little luster, but I add a coat of epoxy after that, so no worries.
-
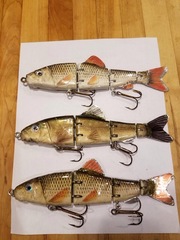 Sucker swimbaits with photo sticker finish.
 -
Double, If you have any Suicks, or Reef Hawgs, you can see how they use the cotter pins. Drill a hole for the pin to slide through snugly. Cut one side of the pin to the depth of the bait. The other side ends up sticking above the bait when you push it through. Bend an "L"'shape at the tip of it and bend it over and pound the tip into the top of the bait so it is flush.
-
This is a product that was recommended in a previous thread on the topic. http://www.caneycreekmolds.com/HD-Sinking-Additive_p_386.html I am going to give it a try this year, but have no personal experience.
-
Lots of options with the plastics. Alumilite shells with lightweight foams inside, alumilite with microballoons, or just closed cell polyurethane foams. I have made a few out of 15 lbs closed cell foam and like the density and toughness. Do your research on the vendors sites and decide what buoyancy you want. You can usually buy smaller amounts to experiment with. Rock
-
I used both. For screw eyes, I wrap thin brass wire around the ends into a ball before putting it in the mold. It resembles a chicken leg, but it's not coming out after the foam hardens over it. One bait has through wire, but is a rotating head topwater bait. I have no qualms recommending the screw eyes if you reinforce them a bit with the extra ball of wire.
-
Wayne, Another option for you is rigid foam. http://www.smooth-on.com/Rigid-and-Flexible/c10/index.html I just cast a few muskie lures with the 15 lbs foam and am anxious to paint them up. Solid stuff and just the right density I was looking for with a floating lure. I used to slush mold with alumilite shell and 6 lbs foam, which worked well enough, but this new single stage process is going to get a try for simplicity. I have tried alumilite with micro balloons, but felt it was a bit harder to mold. The mix ends up thicker and doesn't pour as well into the mold. Baits turned out ok, but the pour hole needs to be bigger to account for the thicker goop. I have no experience with feather lite. Good luck with your project. Rocko
-
A couple of tips with the silicone. I have had better results mixing it with acrylic paint instead of water. It cures better and you can tell it is mixed better with a colored paint. Cheap acrylic craft paint in a bottle works good and is cheap. You don't need a lot and and sorry but I don't have an exact amount to use but a little goes a long ways. To get better detail, do it in stages. Make a small batch and coat the master with a butter knife or similar tool. Just spread it on in a thin coat and let it cure. Then you can make a bigger batch for the mold, and the silicone will adhere to itself and you will get excellent details. Give these a try and you will be very surprised at the quality of molds that you can make. Rock
-
Check out the way Mepps makes there H210 double tens. I have been making them the same way for a number of years. They simply add the first treble to the split ring on the hinge, and the extra lead is added to the wire between or after the flashabou. I like the hinge a lot for keeping fish from getting leverage when shaking their heads and they don't bend up as bad. Second tip is to add a small sleeve of shrink tube on the that first treble and fix it towards the bottom of the shank. It really helps to keep the flash from sticking between the hooks in the bottom of the treble. Good luck, it's fun to make them, Rocko
-
finesse, I would recommend using a dab of artist's acrylic paint instead of water. Get a cheap tube of acrylic paint and add a bead to the top of your silicone pile and mix thoroughly until the color is consistent. Do it in layers with just a small layer at first to spread over the master. The next layers will stick fine over the first and it dries pretty quick so the second layer can usually go on in a couple of hours. Fantastik spray works great to spray over this silicone after you spread it so you can smooth it out. It seems to have enough "soapyness" so that you can work the silicone well before it sets. Just wipe it off a bit before the next layer. The acrylic paint works much better than water or glycerin. I learned this from taxidermy web-sites when Googling one night and have used it to make some decent molds for prototyping. But, nothing will compare to RTV when you finally get the bait where you wanti it. Rock
-
Mark, I would guess that would work well too, but haven't tried that....yet. Any additional resistance, besides the threads will only help, and that should also do the trick. The additional tidbit is too make sure the foam is expanding under pressure so that it is as dense as possible. A cork in the pour hole, or a gloved finger (it's sticky stuff) is important. Give it a try! Rocko
-
Lobina, The detail is excellent, using an RTV silicone mold. Just go to Makealure.com and watch the videos from Larry Dahlberg, they will explain the process better than my reply. For my screw eyes, I wrap some thin brass wire around the end of the tip of the screw, creating a "chicken leg" lump that will prevent it from ever coming out. The wire is wrapped into the threads, and the lump of wire creates a ball that will be encased in the foam and resin. It is very strong, and eliminates the need for wire through construction. The durability of this type of bait and ease of duplicating your lures over and over is a big advantage. Let the lure cure for a day and it is rock hard and ready for painting.
-
I used to make balsa crankbaits for muskies, but switched over to Alumilite. I am doing the Dahlberg "slush" mold method with an alumilite shell, filled with the expanding foam. The bait is about 4 inches long (body length), and only very slightly heavier. I could back off a bit on the shell and it would be fine, but the action is similar, so no worries. The baits are tough to toothie critters, and highly recommend you give it a try. It wasn't too hard to learn, just watch Larry's video and follow it. A couple of experiments on the shell thickness, and you will be very pleased on how quickly you can duplicate your lures. A good scale helps here. My buddie used them on big redfish in Lousiana, and no failures. I have my molds set up to mold the lip directly into the bait (drill a few holes in the lip before molding to get the goop in there). The screw yes get molded in also. I would have no concerns doing smaller lures with the same methodology. Rocko
-
AeroMarine Products has a good product that worked well recently for me: http://www.aeromarineproducts.com/silicone-mold-making.htm I bought the AM28. Prices were a lttle better than the others I searched out.
-
Dick Moore should have what you are looking for: http://www.mooreslures.com/Catalog/ Download his catalog and give him a call. He is great to talk to and has excellent service. He might be in Arizona for a spell, however... Stamina also might be worth a look, as is Thorne Bros.
-
Walleye4 Check out the Tutorial Section where I posted a primer on aluminum mold making. Hopefully it will give you some answers and guidance. You can use a double sided tape, or cut out two identical sillouhettes and place them on the mold with glue stick on the outsides. I also showed the various cutting heads I used with the Dremel tool that worked well for me. If you have any questions after reading, give another post here and I will check in with you. Good Luck! Rock
-
MuskyGary, Take a look at the tutorial I submitted. Last year I experimented with building my own aluminum mold and it turned out pretty well to my standards. It isn't that daunting, and if you have some bait making experience and basic skills, you can do it. I bought my own aluminum from Metal Express, cut my own blanks, built my own handles and it will cost you less than you might think. I bought a Black & Decker rotary tool, bits, and aluminum blanks for what you will pay for the Do-It blank. A little practice and maybe a few failures might happen, but there is a lot of room on the blank to make a good one. If you have any questions, post a reply on the tutorial and I will help you along. Rock
-
Greg, I bought my aluminum from Metal Express. Follow this link:Metal Express - Catalog - Category List - Aluminum They have a plant close to me in Waukesha, so I was able to go pick up my order. They will ship to you and the price was very reasonable. My blanks were 2" x 6" x 5/8" thick. Good luck! Rock
-
Please see the attached PDF for the tutorial on aluminum mold making. AluminumMoldMaking.pdf AluminumMoldMaking.pdf AluminumMoldMaking.pdf AluminumMoldMaking.pdf AluminumMoldMaking.pdf AluminumMoldMaking.pdf AluminumMoldMaking.pdf AluminumMoldMaking.pdf AluminumMoldMaking.pdf


