rofish
TU Member-
Posts
564 -
Joined
-
Last visited
-
Days Won
1
Content Type
Profiles
Articles
TU Classifieds
Glossary
Website Links
Forums
Gallery
Store
Everything posted by rofish
-
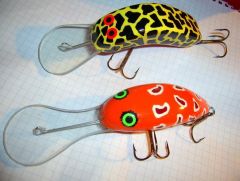
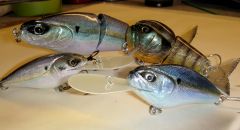
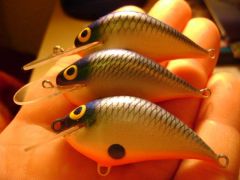
Diemai, It seems you cannot stop amazing me. So many types of lures, and each of them is different. You know what some people say - "Each Lure Will Catch On Its Day". If this rule would apply to only 10% of the lures you make, you wouldn't be able to take pictures to all the fish you catch, using only one camera Really nice job.
-
If you use an ink jet printer, you do not have to worry about the ink running in case you use solvent based clearcoats, because the ink is water based, so you have to take care not to drop water on the image, because water will make the ink run. I have used epoxy thinned with solvent, also propionate solution as clearcoats. No problem at all. I have also printed some images with a color laser printer, and after clearcoating the image was very sharp. I do not speak about decal paper here, which I have not used yet, and as far as I could get from the information here on TU, spraying a sealer on the image is part of the technological process.
-
Check this: http://www.devcon.com/prodfiles/pdfs/fam_tds_179.pdf
-
-
Ben, here is what the search feature came out with, for "sealing wood". http://www.tackleunderground.com/community/index.php?app=core&module=search&do=search&andor_type=and&sid=f507d6a02aa1966767020de4994d9efd&search_term=sealing+wood&search_app=forums&st=0 Can you believe that I have put the wooden blanks in the oven, and when they reached about 200 degrees Celsius or more, I dipped them one by one in propionate solution? Leaving each one to dry at room temperature for about 15-20 min, then putting them back in the oven? By doing this, the propionate solution sprang out of the wood places. After sanding the surface, I repeated the same process with the second coat of propionate, including sanding. Now I,m done with such experiments. I'm happy the solvent did not explode in the oven. By preheating the wood before sealing, you do not only make the air expand, but you also lower the water contents of the wood. So I think preheating the wood is good for the lure. There are many aspects that could be discussed here, but I won't, because they have already been discussed.
-
I think it was BobP who helped you out. Now, what would you do if it happens to be true? Don't know anything about that stuff, but for me, thicker aluminum foil works great. I like the fact that I can conform it to any round shape, and once I bend it (with glue underneath) it will stay bent.
-
-
Didn't know how to cancel a double post
-
No way! I am staying home tonight and read some technical manuals. Dave I thought vodka and reading technical manuals had the same effect on brain cells Now let's see what we can all learn from this thread. Riverman is perfectly right when he says there no substitution for experimenting. But at the same time you have to know how to experiment, and the knowledge to experiment comes mainly from theory. I think we are lucky to have Vodkaman here, to guide us with his knowledge. I, for myself, have always taken into consideration his theories about a lure's action, and found out they are useful.
-
I'm not a bald person, but I'm sure I'll become so if I tried to understand all these calculations: http://en.wikipedia.org/wiki/Specific_gravity I have used trial and error. Less time consuming.
-
You are perfectly right Gunnie. It seems to me that these lures have not met a clear coat yet. http://www.tackleunderground.com/community/index.php?app=core&module=search&do=user_activity&search_app=gallery&mid=12411&search_app=gallery
-
I use a wrap paper to print fish images created in Photoshop. It is a white and very thin paper, in a large format (about 1 x .7 m)which I cut out in the size I need for printing. One side of this paper is very smooth, and I print on this side. I think this paper is very similar to what you use, or gift tissue. I had very few cases of bleeding, when the printer was set on "high", but some detail is lost through printing. I think there will always be a difference in resolution between what you see on the screen and what you see on the printed paper. But you have the possibility to set up how much ink the printer will use to print an image (high, medium, low, if I remember well). Try to use this function, until you are satisfied with the image. What is really important for me about the inkjet is that the ink is water based, and will not run if you use solvent based clearcoats, or epoxies thinned with acetone or thinner. I found out by accident that the ink was water based, when a drop of water on the freshly applied image on a crank bait created a nice spot on the image.
-
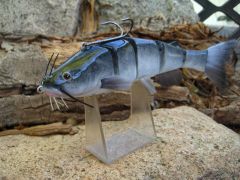
The hook on the back concept is not new for me. I first saw it on a Diemai's lure. Maybe not even Diemai couldn't claim to be the first to have such an idea, I don't know. But the way this swimbait turned out shows once again the talent of it's builder, and we are all used already to admire his work.
-
Better ask Rookie http://www.tackleunderground.com/community/gallery/image/6596-more-new-stuff/
-
I think that everyone would agree they are many factors that will make a lure wobble, but not all variables have the same degree of influence on the action of a crankbait. To some of my crankbaits I have installed 2 tow points, which I made out of a single twisted wire. The 2 tow points are on top of each other, so they are about 3 mm apart (and the lip is under the tow points). The 2 tow points have a totally different action. The one at the top gives the lure a tight wobble, while the other makes the crankbait run with a large, sometimes almost uncontrollable action. What would be the difference here? It is the difference between the tow point and the lip, and that's a most critical factor. Actually, I think in terms of levers to try to explain explain to myself the lure's action, and the most important lever in a crankbait is the lever between the tow point and the lip, and this is also the factor which will trigger the wobble in a crankbait. The same lever exists when the tow point is situated on the lip. In this case, the lever is formed by the tow point and the part of the lip which is in front of the tow point. But the part of the lure which is behind the tow point is also important (shape, weight, buoyancy, etc) So this is a variable which can be easily tested. Another critical variable is the lip shape and angle. I test several lip shapes and angles for almost all the crankbaits I make, so I have a little experience in this respect. What I have found out is that lip shape has little effect on the action, whether it is round, square, or coffin, provided they have about the same surface, but the action could change a lot if I put in an unusual shape of lip, such as a half moon (about) lip. Also, I have found out that lip shape affects the action more or less, depending on the lure shape. The angle of the lip is also important. I can change the angle of the lip by using bent lips. Sometimes I can save a crankbait which doesn't want to wobble, or doesn't wobble the way I would like to, by just using a bent lip. Surely, this will make the crankbait run higher up in the water column, but shallow runners are also a "must have" for fishermen (and I do not find too many deep waters around my house... So once you have tested a "system" (well said, LaPala) that works for you, next step is to make another system that could also work well.
-
In my country (Romania) there is no acetone available in shops, and I hear that's because the acetone can be used to make dope. Factories which use acetone in their technological process (shoe factories, for instance) have strict regulations concerning the use of the product, and they are controlled in this respect by the police (that's what I heard). So I'm happier to use virgin lacquer thinner to dissolve plastic, and for my needs, the product is better than acetone (so I could get a little acetone anyway, to compare )
-
Never tried these, but I guess Owner brand name rings a bell to every fisherman. Very pricey. I think other brand names, less expensive, can be trusted too. See them on Cabelas: http://www.cabelas.com/cabelas/en/common/search/search-results1.jsp?_dyncharset=ISO-8859-1&selectedPerPage=&hasJS=true&_D%3AhasJS=+&_D%3Asort=+&sort=all&Ntt=split+rings&Go.x=9&Go.y=5&_DARGS=%2Fcabelas%2Fen%2Fcommon%2Fsearch%2Fsearch-box.jsp.form1
-
Mark & others, I have saved the tutorial on my computer in word format. If you need it, send me a PM with your email address.
-
-
Glad to hear somebody did that.
-
Vman, Thanks, but I would not go that far with the rpm. 120 rpm is rather scary for me. I think Mark had a good reason to mention this:
-
Mark, It seems to me that you had good marks at maths in school, after all I am afraid I could not have explained too well my idea, so I am trying to correct this. I never said one should actually make a lure turner for just one bait, situated on the rotation axis, because this would not be practical at all. But I did say that this would be the ideal rotator, and it would be suited for practically any type of clearcoat, because this rotator depends the least on the viscosity of the topcoat and the forces the topcoat are subject to. For practical reasons, I made a drying wheel in which I can put on 4 lures at a time, which can be easily attached or detached (the lureholder’s short handle is pushed into a hole made in a rubber material) . I also said that one should avoid a very big wheel. If you need to turn many baits at once, I think it is better to have several small wheels (or pairs of wheels, depending on the attaching system) on the rotation axis. The same traveling speed of the lure could be achieved by varying the ratio between the rpm and the radius to the lure. But the leveling out process of the topcoat does not depend on the traveling speed only. It also depends on gravity and centrifugal force. A liquid has some forces in it, that keep part of the liquid on the surface of the container the liquid is kept in. That force has a specific name that I do not remember now. If you pour out the water from a glass, some drops will still remain in the glass. In the case of an epoxy, that force is much stronger than in the case of water. Still, if you put on too much epoxy on a lure, you will find out that it will sag, meaning that those forces I was talking about, will retain as much epoxy on the surface of the lure as they can, leaving the excess to gravity (and sagging or dripping is a process in time). When rotating, the epoxy on the lure is subject to gravity and the centrifugal force. You and others have already found out that if you put on too much epoxy on a lure at a slow rpm and a big wheel, the epoxy might sag (gravity takes its toll, in this case). Others have found out that a big wheel, at a high rpm, will make the epoxy clump up in areas (and that’s because of that nasty centrifugal force). I think that these findings only confirm what I was talking about. So both forces (gravity and centrifugal) have a negative impact on the leveling out process of the epoxy. How can you reduce to a minimum the action of those forces? There is only one way to do it, and this is to reduce the radius to the lure to zero (well, almost, because the radius to the epoxy on the back and belly of the lure, which really matters, cannot be reduced to zero). And in this case you will not be able to, but you will NEED to increase the rotation speed to combat gravity (or more accurately its action on the epoxy). And believe me, epoxy will love a higher rpm, without having to bother about gravity (whose action on the epoxy is practically counteracted by a high rpm) or centrifugal force (which is almost zero). If not convinced, make an experiment. Put a lure to turn at about 20 – 25 rpm (my guess, never did that, but I would love that someone could confirm my theory ), on a system that could suspend the lure on the very axis of rotation – head to tail axis of rotation. Put on deliberately too much epoxy on it, as much as you would be sure that the epoxy will sag, if you had put the lure to rotate on your drying wheel. See the results and post them to TU community. But I have to repeat myself. The fact that the epoxy does not flow like milk, for instance, is very good for us, because in order to have good results in topcoating, one may chose from many ratios between radius to the lure and rpm.
-
Mark, I didn't know that a rotisserie motor can reverse its direction of rotation. But I do the same with my microwave motor. Shut it off and restart it to change direction of rotation. Need to do several trials until the motor understands what I want from it. Now just imagine the epoxy would be much thinner that it actually is. How could it level out smoothly on the lure, if you had a big wheel ? You would need to increase the rotation speed, to prevent the epoxy from dripping off the lure. But in such a case you could have the surprise to do a nice work on the ceiling with epoxy. Contrary, if the lure would be situated on the rotation axis, you could increase the rotation speed so as not to lose epoxy by dripping, and at the same time you won't fear that epoxy could escape from the lure as a result of centrifugal forces. But we have luck. The viscosity of the epoxy leaves us many alternatives as to the ratio between the radius to the lure and the rotation speed.
-
Vman, this is a very interesting post, and I agree with what you say. I cannot understand your calculations, but I am sure they are right. What you are telling us here seems to confirm what I have been guessing about how to make a drying wheel as close to the ideal one as possible. In my opinion, the ideal rotator should have only one lure to rotate, and the lure should be situated on the very rotation axis. The centrifugal force would be minimum in this case, allowing the topcoat to level out in the best possible way. The rotation speed could go up to about 20 - 25 rpm in such a case, without any fear for a badly topcoated lure. My first rotator had a speed of 15 rpm, but the disc was very small in diameter (a CD). Never saw a problem in the topcoat. After that motor died, I replaced it by a microwave motor with a 5 rpm speed. The results are perfect too, as far as I can notice. The radius of a CD is about 59 mm, and the radius to the lure is about 47 mm (1.85"). Enough space in the disc to put on 4 lures at a time. More than enough for me. When I need to attach a new lure, I stop the motor for 3-4 seconds. So my opinion is that instead of using a large diameter wheel, which can hold many lures (some even use 2 rows of lures on the same wheel), one should better have several pairs of small wheels on the same axis, if the number of lures is an issue.
-
I have no experience at all with a moisture cured polyurethane, because I cannot find a similar stuff where I am. Everything I know about DN topcoat comes from what I have been reading here. But I cannot understand the way some people come to a verdict. Don't waste your money on the stuff, which seems to be the ideal topcoat (very hard and very flexible) because one cannot get rid of the air bubbles that appear in the topcoat. This approach is too harsh, I think. So if I had the chance to test such a topcoat, and notice a problem (air bubbles in the topcoat)I would try to find out first where the bubbles come from. I think there are 4 possibilities: 1) The bubbles come from the lure (either from the paint or from the wood) 2) The bubbles form when you pour the stuff from the can into something smaller (a jar, for instance) 3) The bubbles form when you brush on the stuff on the lure (if this is the case) 4) The stuff itself forms bubbles when curing, but this is a chance that few people would believe in. Now how could I eliminate any of these possibilities? If the bubbles come from the lure, I think there is a simple way to eliminate this possibility. Let the lure dry completely (wood and paint), then raise the temperature of the lure before applying the topcoat (many ways to do that). This way, any tiny air bubbles in the paint or underneath it will expand, and after applying the topcoat the temperature of the lure will gradually come back to the temperature of the place you are working in. If there is still some air in the paint or under it, the cooling of the lure will suck the remaining air into the lure, (vacuum forces), so the air will not even try to come to the surface. If you think this is not a good way to eliminate the first mentioned possibility, there is an even better one to do this. Just apply your usual topcoat you are familiar with (epoxy or DN), then put on a second topcoat of KBS to see if the bubbles still appear. 2) If the bubbles appear when you pour the stuff out of the can (and this might be the case, as I can deduct from what happened when KBS was poured into a dish), then I would ask myself why the bubbles do not come to the surface to disappear there. For many years now, I use honey in the house (my son likes it), and I could notice that even the air bubbles in thick type of honey will find their way to the surface, even if it would take days for that. So is this stuff thicker than honey, so that the air bubbles could not escape from it? If this would be the case, I would definitely choose to brush the stuff on the lure, because this way I could put on a thinner coat than by just dipping, and therefore the bubbles could escape from the topcoat much easier. But if I could not still get the results I want, I would surely contact the manufacturer, to see if the stuff could be thinned, so that the air bubbles could be eliminated. 3) If the air bubbles do form on the lure when you brush it on, I would try to brush on as thin a coat as possible, to "help" the air bubbles to go out. So if you have already bought this stuff which seems to be the dream of lure builders,except for a minor bubble problem, I think you might some day regret to have thrown some "diamonds" to the garbage.


