rofish
TU Member-
Posts
564 -
Joined
-
Last visited
-
Days Won
1
Content Type
Profiles
Articles
TU Classifieds
Glossary
Website Links
Forums
Gallery
Store
Everything posted by rofish
-
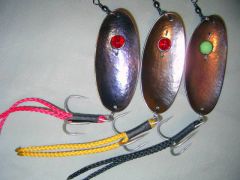
I have also used epoxy for the blades of my spinners, but haven't experienced any peeling yet. True, I don't fish for steelheads, but I don't think the type of fish you are after has anything (or much) to do with chipping. I lay the spinner blades on a flat surface, and I apply thinned epoxy on the outside surface of the blade using a small paint brush. You have to apply just the right amount of epoxy, to prevent it to sag towards the edge of the blade. Also, the blades I use (copper or brass) have been sanded and cleaned before applying the epoxy, for better adhesion. I do not use an epoxy with UV protection in it, since I think that chances are that I will loose the spinner before it would start yellowing. After the epoxy is fully cured, I would sand the edge of the blade at an angle, because this way the epoxy will have less chances to peel off. So I think that the key to succes is to use a thin layer of epoxy, on a surface to which it will adhere very well, and also to sand the edge of the blade afterwards. I see no reason why I shoud cover the other side of the blade with epoxy, but I did it sometimes, and the epoxy has not peeled off as yet.
-
-
-
-
-
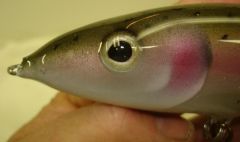
Indeed, the eyes you make look very cool. I tried making the eyes the same way, using epoxy, or plastic dissolved in acetone, but the results are not satisfactory to me. Can you explain what "realistic water" is? What is it made of? A brand name would not help me much, since I live on the other side of planet Earth. But maybe some links where I could read the composition of the material?
-
-
Just curious. If, by mistake, you would pass me the information about how to make such eyes, then how do you intend to kill me? http://www.tackleunderground.com/pho...milies/hmm.gifThere are some thousands of miles between us, but should I be affraid anyway? It seems that people here do get bored when they realize you are not able to make anything less than masterpieces.http://www.tackleunderground.com/pho...lies/smile.gif
-
When I saw the picture, I thought the same way as BobP did. One way to avoid possible problems with the stability of the lure would be to lower the upper part of the wire, but still, you cannot be sure that the lure will be stable. This depends very much on the flotability of your PVC material. Also, you may have some problems when pressing the 2 parts together, because the wire would need some deeper grooves into the material so as the 2 parts fit together. This depends on how tough the material is. I think that the old way of making the wire frame for through wirering is better ( pieces of nails hammered into hard wood, around which you build the wire frame).
-
-
Dima, I live in Romania, same situation here, there are no screw eyes available in shops. But I would strongly recommend that you use stainless steel wire for the eylets, as most lure builders do. Even those who make big jerk baits (15 cm or longer) use SS wire rather than screw eyes. Now the SS wire could also be a problem. Here it is not impossible, but rather difficult to find such wire. So with the help of my friends I could get some wire from the US, Italy and Spain I use 0.8 mm wire for my crankbaits and jerkbaits, which are mostly between 5 and 8 cm long. Some others use thicker wire, usually for bigger lures. Some friends here use even 0.5 mm wire for mini crankbaits.
-
Balls, I make the eyes and rattle chambers in a similar way. For the eyes I use aluminium foil, thicker than the type for kitchen use, instead of aluminium cans, and for rattles I use metal tube which I close at both ends with thin metal sheet. Try using super glue instead of epoxy to close the plastic tube for rattles with punched out aluminium discs. Easier, faster, cheaper. Once the discs are in place, you can add epoxy if you want, for improved strength. Take care not to glue the BB to the chamber wall or to the aluminium discs.
-
-
-
As I said, my lure holders are very powerful. They can clamp a crankbait very strongly, by the wire eye. So my lures won't tilt in my lure holders. True, for bigger lures, a dryer with 2 discs to attach the lures between would be a more convinient setup. My lures are no longer than 8 cm, and I think my dryer could handle lures up to 10 cm (4"). http://i84.photobucket.com/albums/k5/rofish_2006/rofish_2006-4/photo6.jpg http://i84.photobucket.com/albums/k5/rofish_2006/rofish_2006-4/photo5.jpg http://i84.photobucket.com/albums/k5/rofish_2006/rofish_2006-4/photo7.jpg
-
I always try to heat up the lures, not only before clearcoating, but before sealing as well. If you use wood for your lures, you need the wood to be as dry as possible, and the air inside the wood need to expand. Vodkaman has shown some benefits in case you heat up your lures. But there are others as well. Say you leave a lure in the sun on a hot summer day. The air inside the wood will expand, and you may end up with a crack in the clearcoat. But if you apply the clearcoat at a higher temperature, your chances to ruin the lure this way are low. In case you fish a lure which was clearcoated at a higher temperature in cold water, the chances for cracks in the clearcoat are lower, because any clearcoat can withstand higher pressure from the outside, than it can from the inside. Of course, if your lures are clearcoated at room temperature and they are going to be fished, or will always stay at about the same temperature, you do not need to think about such problems.
-
LaPala, thanks for your ideas. I'll have to think them over As to the problems you had with your previous dryer, I can assure you they do not have a chance to show up in mine. Exacto handles are long and heavy, while my lure holders are short, light and very powerful. They would not tend to fall out or tilt, even in case of a big earthquake, because the handles of the lureholders are pressed into holes I made in rubber gasket material.
-
LaPala, when you first mentioned your
-
If my memory serves me right, someone said, long ago, that the way to go to solve this problem is to apply 5 min. epoxy first, on the edges only, then coat the lure with Devcon 2T. After the 5 min. epoxy sets up, you can correct the thickness of the epoxy with sanding paper glued on a smooth surface, and you leave it thick on the very edges you want to apply it to. The problem you might run into, is that 5 min epoxy may change color in time, becoming darker. You may try using Devcon 2 ton for the first coat on the edges only, but since it needs longer time to set, you may have some surprises - it may run. Anyway, Vodkaman is right, you need to coat the edges first, correct the thickness of the epoxy, if you think it necessary, then go with the final coat of epoxy.
-
-
-
-
Mark, I had the same translation problem before as my conational, so I can tell you that what he mentions as "linden tree" is in fact basswood. I thought the tree was called "lime tree". I even asked Vodkaman in a thread if the tree which is known under the latin name of "tilia" is called lime tree or basswood in England. He answered he had never heard about basswood before joining TU. The tree is called lime in England. adrignat, The shape of your lures is very nice indeed. I'll have to try it too.
-


