rofish
TU Member-
Posts
564 -
Joined
-
Last visited
-
Days Won
1
Content Type
Profiles
Articles
TU Classifieds
Glossary
Website Links
Forums
Gallery
Store
Everything posted by rofish
-
-
-
-
How To Make Hardbait Stencils Using Plastic Milk Cartons
rofish replied to Birdman's topic in Hard Baits
Nice job, Birdman. I do not use stencils yet, but I will have in mind your idea when I will. Maybe you can improve the process. Why do you need to use such an expensive mold material, since Plaster of Paris may do the same job? At least I have made such molds to pour lead, and they worked OK. I think you can avoid the wood sticking to the mold, by using some grease, or oil. Never tried this out, but I think it will work. Also, you can put some screws, or something else in the wood, for a better handling. -
-
-
-
Yes, you are right (again ! ) I just looked at one picture instead of looking at the whole story!.
-
Diemai, You and others say it is quite simple to understand the process by just looking at the pictures, with one single exception - the eyes. Well, it seems that my small wheels in my head would need a little greasing. Can you explain how he passes from step 10 to the next? So let's suppose he screwed in both screw eyes in one section. What would he do next to come to the result in picture 11? To my understanding, there are only 2 ways to get the result you see. 1) He does not screw in the opposite screws of the interlocked screw eyes, he just pushes them into the holes, using epoxy. 2) He unbends the eyes of the opposite screw eyes, so as to be able to free them from being linked to the others, then he can srew them into the premade holes, and then he uses some small pliers, I guess, to interlock the screw eyes again. Or he could screw in just one screw (the "third") and then when he comes to the "fourth" he would have to unbend it first. Is there a better explanation? Maybe yes. I would very much like to hear it.
-
Quick Tips...take em all, but leave one of your own!
rofish replied to fatfingers's topic in Hard Baits
OK, thanks. BobP. Hopefully I got it right this time. -
Jwags, I think you have answered your own question. In my oppinion, he uses a hacksaw blade (a saw blade for metal). And I think he uses just an ordinary one, not a thin one as you intend to use. Just think: in case he would have used a thin one, would he been able to press the led sheet you see in that slot for the through wire? And would a very thin lead sheet be enough to ballast a balsa lure? But best would be that you try different thickness blades, to see which is best for your needs. I would be concerned about other things, such as the fragility of such a lure. For instance, I do not know what kind of glue he uses for the wire, but obviously it is not a 2 component epoxy. So what will happen in case of a big strike (and fish)? The more so as the tail section is very thin. Or is this lure designed as a one fish lure? Anyway, one must try this method to see for himself.
-
Quick Tips...take em all, but leave one of your own!
rofish replied to fatfingers's topic in Hard Baits
BobP, Good to know that slow cure epoxy on top of 5 min. epoxy will prevent the latter to become brownish. This tip is good in case you clearcoat the lure after you have glued the lip in. But what if someones glues the lip in after clearcoating the lure? I make the lures this way because I want to chose the best lip for each individual lure. So I try several lips before I chose one. Do you have a corresponding tip for such a case? -
Diemai, I have watched the videos without sound. Maybe the answer of my question is already there. Anyway, do you know what type of wood he uses? It looks more like cheese to me. I wonder what we would need things like scroll saws, band saws, disc/belt/drum sanders for? I liked the way he made the lipslot. There's lot of literature on this forum about how to cut the lip slot, how to make jigs to this end, etc.
-
Vodkaman, I found one of the lure holders while looking for something else ... Put it on the wheel. The wire frame was too thin in diameter for the holes in the rubber material which I glued between the 2 discs, so to avoid the frame to rotate in the hole while the disc rotates (no one would like that, I think) I just added some insulating tape to the diameter of the wire. Now it works perfectly. I know the pictures you are going to see are a little bit weird, but don't laugh. This is some kind of Mighty Mouse rotator. It can rotate bigger lures for more than 2 hours (the maximum I have tried yet). http://i84.photobucket.com/albums/k5/rofish_2006/rofish_2006-4/lureholder001.jpg http://i84.photobucket.com/albums/k5/rofish_2006/rofish_2006-4/lureholder002.jpg For bigger lures, the ends of the wire frame could go into some grooves you could make on the 2 discs. Many people put their lures to rotate between 2 discs. I hope you understand my childish design. One could easily attach screws at the 2 ends of the wire frame (wraping copper wire and soldiering, or using epoxy), but there are many other ways one could think of. Then, you could use a nut and washer at the interior of each disc, and a wing nut at the outside of each disc: http://i84.photobucket.com/albums/k5/rofish_2006/rofish_2006-4/lureholder3.jpg
-
Vodkaman, I am so well organized with my things, that I cannot find them. Right now, I cannot find the few lure holders I made. It seems I'll have to go to where the steel wire is, bring some at home, and make new ones. I don't know when I will go there, (few days perhaps), but I will surely post a picture or 2, after making new ones.
-
Vodkaman, I designed this lure holder with the intention to put a swimbait on a drying wheel, after applying the epoxy clearcoat. This tool is to be used on my drying wheel, for swimbaits. But it can also be used for airbrushing a lure (you can put it in a vise, if you need it).
-
How much money would we spend on a simple tool we need for airbrushing? If you have some steel wire around the house, about 0.1" in diameter, you could have a tool for free. Just bend it to fit your lures, so that the lure is kept tight at the ends. This tool is versatile, since you can make several "S" shape wires, different lengths, to fit different lure lengths. This tool is also good to airbrush a swimbait, because it keeps the segments in line. I have wraped copper wire at the ends, leaving a coil larger than the rest of them, (the wire hanger will go there), then I soldiered the copper wire: http://i84.photobucket.com/albums/k5/rofish_2006/rofish_2006-4/wirelureholder003.jpg
-
-
Being new here does not mean you cannot come up with new ideas. In fact, I love the shape of your lure, I have not seen yet something like this yet. I would say this is something between a fish and a frog. Yes, it seems you have to learn alot about crankbait making. Buy yourself tons of pacience, if you do not have it, and read as much as you can on this forum. If you read half of the information you find here, you will become a master of crankbait making. Diemai is right, the bigger the lip is compared to the body, the more difficult it is to tune the lure. So start making lures with relatively smaller lips. Wellcome:)
-
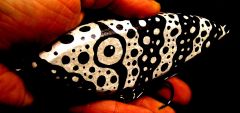
What happened to your fingers? Have they become thinner? Don't you fish muskies anymore? Now this is a paint scheme I would very much like to do myself (somewhere in the future). But I have no idea about how it could be done. A few hints perhaps? I think this lure can catch fish anywhere on the globe.
-
Pikeman, In my knoledge, they are 2 ways to make a crankbait run deeper: 1) Long lip (for a floater) 2) Sinking crankbait I don't follow you quite right about your requirements for such a lure. Maybe you want the lure to swim at a certain depth in a current of water, so as to swim without any need to reel in the line. I think it is difficult to achieve what you have in mind, and the best method would be the trial and error one. Also, you want to reduce the wiggle of a certain lure. Have you ever seen that lure in action at the depth of 16 ft? (4.87 m). At such a depth, I think that the pressure of the water takes it's toll on the lure's action, reducing the wiggle. You also say you intend to lessen the lure's action by adding some lead to the tail. I neved did such things, but if I were to try, my first choice woold be to add some lead somewhere under the tow eye, or under the nose.
-
I see you have an account with photobucket.com where your pics are posted. Well, photobucket.com can edit your pictures. After logging in, you click on one of your pictures, so that it will appear in full size, then you click on the "edit" button, then you have several options. You can resize the picture in predefined sizes, or the size you choose. You have the "keep proportions" button if you need it, or you can crop the image, etc. Then you can copy them in your computer (I guess it can be done, never tried it yet, but I see no reason why it could not work) and then you upload the pictures in the gallery, observing the rules for their sizes. Judging by your lures, I think you are on the right track, I mean on the wrong one by one's family standards
-
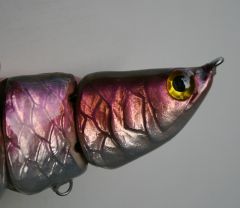
Surely, it is a very nice swimbait. But there is something about it that my head would not understand. Tell me, is it on purpose that you made the segments taller and taller towards the tail? And if so, did you had in mind that water flowing over one segment will have a larger surface to hit on, when going to the next one, and thus making the action more powerful? All swimbaits I've seen so far have their segments smaller and smaller towards the tail.
-
I wanted to see my lures again, this is happening every 2-3 months, so by chance I read your message. The lip is 1/16" polycarbonate (Lexan). I make and bend the lips myself, using hot vegetable oil. I have made several "lip benders" out of SS metal sheet. I put the lips in such a bender, only the lower part of the lip goes in, then I plunge the lip and bender in hot oil for 15-20 seconds, take it out, then with a piece of plywood I conform the lip to the rest of the bender. If you are interested in details, PM your e-mail address, and I will send you pictures of the process. I am sure I still have those pictures somewhere.
-
Hazmail, have you ever considered removing all your spots but one, on each side?


