


Arkie
-
Posts
47 -
Joined
-
Last visited
-
Days Won
2
Content Type
Profiles
Articles
TU Classifieds
Glossary
Website Links
Forums
Gallery
Store
Everything posted by Arkie
-
-
Have you tried Devcon 2 Ton Epoxy? It's one of the most common clears you'll find here, inexpensive compared to auto clears, and you can find it at most ACE Hardware stores.
-
I agree with Bob and Skeeter. Experience and trial and error will guide you best. I, too, have been using D2T for several years and still do them one (maybe two) at a time...that to me is what makes it custom. The package may say 30 minute working time, but that probably doesn't take into account those of us who use a "glue" as a brushed on finish coat. A little denatured alcohol does help. I keep some in a syringe so that I can control the drops (4-6 for nickel/quarter size pools of D2T). Too thin can be as much of a problem as too thick. Keep everything clean and dust free, and always mix well. Best of luck.
-
Excellent! Just visited paint with pearls. What is your mix ratio? I see that they sell 25 gram bags. Is your Createx clear a 2 oz. bottle? I see that they have a chamelion blue purple that looks like it might work as well. Ratio hints?
-
Has anyone successfully duplicated the color-shift on the back of a Vision 110 Elegy Bone? I have Flair Teal/Purple color shift as well as Highlight interference in Blue and purple. Elegy Bone appears Turquoise on direct look and Purple on side cast. Any help?
-
I'm looking to build-up and reshape a few older wooden baits. I need to know what you guys recommend using to do this. Also, any pointers would be welcome. Wood filler? Bondo? Epoxy?
-
Thanks. I'll give it a go.
-
I'm sure you've done this...just trying to help. From the TU Homepage click Photo Gallery-Hard Baits. In the upper right of that page click Upload. Now browse for your pic and click upload. After the upload click Review and Publish. If your pic is visible click Finish and Publish. If you have done this, as well as make sure the pic you are trying to upload is within the parameters, I don't know what to tell you. Sorry.
-
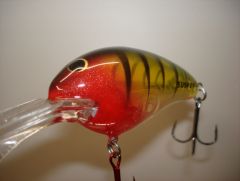
Chartreuse Natural Shad Rapala DT by Custom Bass Tackle
-
Are you attempting to upload from the Photo Gallery?
-
Are your pics at or below 400x600 pix in size? You should be able to click on Attach File after Browsing and selecting.
-
Searched the cookbook to no avail. I'm wondering if anyone has attempted a Chartreuse Shad like the one by... (is it okay to mention a website where I found the bait I'd like to try?) I believe I'm close, but many of you know how just one step in the wrong order with these type schemes can make all the difference. Any help would be appreciated.
-
Sand down? Are you using water based paints? If so, just a good scrub brush and warm, soapy water at the kitchen sink and you're ready to repaint in no time.
-
My two cents: If you don't have a "bone pile", it's time to start one. There is no substitute for experience. Try anything and everything on some old lures. If something works well, give it a go on a good plug when you're ready. If it doesn't work, wash it off and try again, or throw it in the pile for another day. Lincoya and BobP give good advice...there are so many variations and ways to achieve different looks. Find a recipe in the hard-bait cookbook (a good source for what colors to use in somewhat of an order) that interests you and give it it a try until you develop some confidence in the process.
-
-
-
-
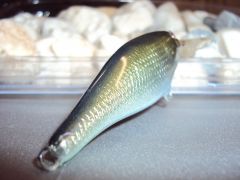
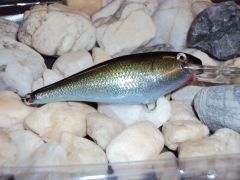
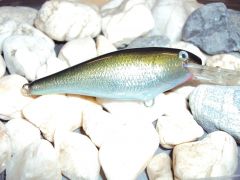
Not sure if this is where I should post this or not, but for those of you who are foiling with aluminum tape, here's a neat trick for shad raps if it hasn't already been done. Wrap and burnish the bait (time consuming and not very fun). Next, take a piece of Active Wire Mesh (Hobby Lobby) and lay across the bait. Now, using a small craft roller, work from head to tail following the contour of the bait. Be careful to keep the mesh isolated once you begin to maintain the uniformity of the pattern. This process allows you to achieve a somewhat 3D look. Add your favorite transparent colors and see what you think. I will try to post a few pics of one in the gallery. One final note: aluminum tape serves a dual purpose on a shad rap by adding some much needed weight for my uses.
-
I also use denatured alcohol, and have been for years. 1 small to medium size bait = dime to nickel size epoxy parts and 4 - 6 drops of d.a. One thing I like about d.a. besides extending working time is that I can thin a mixed batch to achieve a thinner finish coat, which I prefer on many of the newer jerk baits that have molded scales, fins, etc. Not quite as durable but lighter in weight for such finely tuned (neutral buoyancy) out of the package baits.
-
Great tutorial...built one yesterday. For the last 2 years I have been saving old packaging plastic and heating with a gun and shaping over my bait halves. This will be a nice change BUT, can you or someone please tell me where you get your plastic sheeting? I am having trouble locating some.
-
I use "Monoject" syringes...you can get them from your dentist. I rotate 3 airbrushes (3 different tip sizes) all the time. I also use Createx 2 oz. bottles with adapters. Remove the bottle, invert the airbrush, spray residual paint into a towel (hanging at my bench into a bucket). Fill the syringe with clean water and simply squirt it into the airbrush as you spray. Squirt until water sprays and overflows clean. The tip of the syringe reaches down inside the airbrush to flush out residual paint quickly. I also have an old "Mean Green" bottle filled with a mixture of 2 parts water and 1 part cleaning solution. An old airbrush bottle cap with nipple, screws on perfectly...you will just need to find a piece of tubing to reach the bottom of the bottle. I use this after 3 or 4 color changes. Place the airbrush on the bottle with the bottle between your legs. Loosen the needle in your airbrush, and gently move the needle in and out, and rotate it with one hand while you spray with the other hand. I will always use the bottle method on a gun when I am finished with it for a while - NOTE: leave the last shot of water/cleaner in the gun during storage. This may sound silly, but it works well for me.
-
I use a white base coat. In extreme cases where the original paint (fire tiger) is easier to leave on the bait, and weight is not an issue, I will use black, which covers better with fewer coats. Keep in mind, a consistent base coat yields better results. In other words, if you always use white, you will learn better how to blend your other colors onto the bait. I believe this is the true form of mixing and achieving desired tones...not pre-mixing.
