


Vodkaman
-
Posts
7,423 -
Joined
-
Last visited
-
Days Won
237
Content Type
Profiles
Articles
TU Classifieds
Glossary
Website Links
Forums
Gallery
Store
Everything posted by Vodkaman
-
Vic - thanks, exactly what I needed. I'll build one today, to add to the test. LP - Thanks for your input. You are right, I should have been doing the line thing all along. I have done it to a few proto's, but then got lazy. I will add some lines and see if it shows up any differences. Dave
-
Vic – very interesting articles, thanks for posting. They should generate some discussion. The reason I shot the video of the two lures together, is that after I shot video of them separately, I could not see any difference. The problem was watching one video, remembering the action, then flipping to the second video for a comparison. The differences were so slight that I could not tell. My editing software is not sophisticated enough to allow me to superimpose videos unfortunately. I can post the individual videos, if you would like to see them. But, now having video of the two baits side by side, I still cannot see any differences. After reading your post, I went back and watched the video several more times, nada. I do however feel that the two baits are affecting each others action, as I stated earlier. With such a significant difference in lip profile, I did expect to see at least a slight difference. Even before reading your article, I was considering a ‘rock test’, to test out the bouncing attributes of each lip, I actually posted this intention on another forum. But I feel that the short tow line that I am limited to, is not going to give realistic results. Still, may be worth trying, as this ‘bouncing off cover’ thing has been discussed here on TU many times in the past. You have aroused my interest in at least building one coffin, to add to the comparison. If you could give me some dimensions or a photograph looking straight on to the lip, I can reproduce it to the size I need for the direct comparison. Sbaits – interesting point. The round lip definitely does seem to have a larger surface area in the lower half of the lip. So I fired up the CAD, measured the exposed lip length and trimmed the CAD model back to suit. Threw a ‘fill’ surface on the profiles and measured the areas: the round lip area = 3.481cm², the square lip area = 3.626 cm², so actually, the square lip has a larger area by about 4%, so not much difference, but not the expected result. My theory is that it is more to do with the lip edge length than area. Dave
-
I have searched the web for an example of what I am proposing, but could not find anything, which makes me slightly nervous. The second thing that concerns me is the thermostats and how they might affect things. It is possible that by lowering the temperature setting on pot 1, will divert more voltage to pot 2. I cannot say for sure, it depends on the design of the thermostat electronics. If you pm me your email address, I will email the document to you. Dave
-
Mark - The making of this video was just as difficult as those old adult videos (how did you know?). Spectators are always a problem, wanting to get in on the action. Trying to come up with a new camera angle to capture the detailed action is always a challenge. The subjects never seem to wiggle exactly how you want, never follow direction commands and were always getting tangled up. Deep diving is always a problem, but as long as you use rubbers on the pointy bits, no damage is done. Littleriver – I have not tried a coffin bill. I would not expect much difference, as a coffin is basically half way between the round and square bills. Seeing as depth actually registers in my shallow tank, I thought I might compare square and sharp lip edges next. We know that sharp edges have more action and dive deeper, at least in theory, but how significant is the difference? Glad you all liked the vid. Dave
-
I had already constructed two identical prototypes for another project, one with a square lip, the other round. Both lips have the same maximum width, length and root width. I thought it would be interesting to video a comparison between the two. The action of both lures was pretty much the same. The round lipped lure definitely wanted to swim deeper than the square lipped lure. I found it interesting how both lures always swam in sync or 180 degrees out of sync, except when they got too close to each other. Even though both lures are hitting 'clean' water, the water disturbances act as a system, so even though the lures appear to be independent of each other, they are not. there are plenty of reasons for using different shaped lips, action, it seems, is not one of them. Dave
-
This is my opinion only, so you might want to talk to an electrician for confirmation, rather than taking my word for things. It would certainly make me feel more comfortable. You should never take electrical advice without confirmation from an expert. The two pots can be wired in series on the European supply and work. The power supply will have to be rated at 2.6KW as will the cables that supply the units. The first time you switch on, make sure the thermostats are turned down. I have actually written a full explanation with calculations. I chose not to post it, as some people seem to get distressed by technical talk. If you want the explanation, I will post it. Dave
-
You should write a thread with pics of the lathe construction and post it in homebrew tools. I am sure a lot of members would be interested. Welcome to TU. Dave
-
when I am starting out with a block of wood, I print off a profile template and glue to the block. The first operation is to roughly cut the profile, using the bandsaw. The lip slot is also drawn on the glued template, so the second operation, while I am still at the bandsaw, is to make two cuts and clean out the lip slot. This guarantees the position and cross alignment, well at least as accurate as the alignment of the blade. From here, I drill all the holes, again, marked on the glued template, and finally shape. As for jointed swimbaits starting out from a block. I cut the joints half way through, at 90 degrees. Any shaping of joints, V cuts etc, I do later. Again, I drill all holes, including joint pin holes, before shaping. All the hole positions and joint cut locations are marked on the template print. Dave
-
 That's my job, I do the CAD Good job Mark. I've tried skulpy before and I much prefer wood. Dave
 -
Dave
-
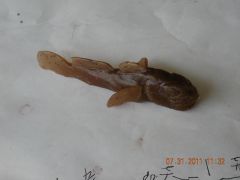
You have more of a chance than with an aluminium mold, as PoP is an insulator, allowing the plastic to flow longer and further. But incomplete pours are still going to be a problem. It is not a question of vents (although they are important), it is the plastic cooling. I remember that Jim (ghostbaits) successfully hand poured curly tails, that others thought was impossible. Injection is no doubt the best route. There is no reason why you cannot build your PoP mold so that the injector will fit. There have been a few posts about this. Is there a reason that you do not want to inject? Another method is vacuum pouring. I did some testing of this method four years ago, with a lot of success. I used RTV, but see no reason why the method would not work with PoP. It is a poor mans alternative to injection, were the plastic is ‘sucked’ through the mold, rather than forced through (injected). I have no doubt that it would work for a ribbon tail. Here is a pic of an early test. It is very rough (modeled from plasticine), but adequately demonstrates the vacuum capabilities for difficult pours. I would post a link, but it is useless without the pictures, which are lost. Dave
-
Welcome back. What was your old username? Dave
-
I agree, looking at the different thicknesses between the belly eye and the wire form, the belly is a screw eye. The problem is that if you drill in the direction of the wire form, you will obviously hit the screw eye, leaving insufficient length for a good anchor. I try to have at least 25mm (1”) glued length of twisted wire within the body, always longer if possible. In the pic, I show how I would drill for the wire, with the belly eye in its current position. But there is no reason why the belly eye cannot be screwed in at an angle, leaving more room, but I guess straight in is stronger. At the angle that I have drawn, I would probably have to cut a notch in the root of the lip to make room for the wire. Both the lip and the wire would have to be epoxied in, for a strong bond. If the lip comes loose, the wire anchor will be compromised, so the lip needs to be scored and small holes drilled to help the epoxy do its job. Do a search on haywire and barrel, for types of wire twist, a lot has been written on the subject recently. This is not a great construction, I would rather through wire than mess about with this, especially as you are dealing with powerful muskies. Dave
-
The picture that you posted did not appear. Have another go. I tried a few searches using your information, but had no idea if I was viewing the correct information. Try posting a link, to show us. When the shop owner told you balsa, this may be just an assumption and not necessarily fact. I would think a balsa musky lure with screw eyes would be an unnecessary risk, but there is no doubt that heavier balsas can hold a screw eye. There is quite a lot of information about screw eyes, twisted eyes and through wiring on this site, so you should be able to find what you are looking for. No secrets here Dave
-
Good question. In the video, at 48 secs, you can see the cover panels. These remove temptation and prevent the tank from turning green with algae, also keeps the mosquitos out. I was expecting to have a few problems with the local kids, but they are scared of me. They call mr Mr Botak (bald). I am the only white guy living around these parts. It is quite embarrassing, everyone comes around when I take the covers off, to see what I am testing today. Dave
-
Thanks Pete and Patrick. I shot and posted the video to show how visible lures are from below. I am sure many people believe that only a shape or shadow is visible. At night, this would be true, but in daylight, apparently not. Someone needs to get wet and video something from a lake for a more definitive answer. Interesting point Pete, about the reflection. All that time in my youth spent creeping about in camo, to blend in, was all a waste of time. The fish cannot see you, they have a window of 97 degrees above only. Here is a link to an explanation. I am going to modify my under water camera box, to take a steeper view. The box has sprung a leak, so needs work anyway. Dave
-
I have only had a little play with Husky's caulk molding method. What I found was that you could apply a thickish layer to the master first, before preparing the mold mix. Rub a wet finger into the layer, to speed up the curing process. This eliminated all the surface bubbles and the rest of the mold adhered to the cured layer. Worth an experiment at least. Dave
-
I have just built a bunch of flat sided prototypes for another here is the link. Lip alignment is something that I also struggle with. The problem is that you are dealing with compound curves and there are optical illusions happening, especially if your carving is not exactly balanced and symmetrical. It should be easy to at least make the lip symmetrical, using patterns and/or templates. My method, when I am not being lazy, is to draw three parallel lines, full length of a sheet of A4 paper, about ¾” spacing. Place the paper on your table. Close one eye and hold the lure half way between the paper and your eye. Align the body on the middle line and adjust the distance so that the edges of the lip align with the outer lines. This will help you see any errors. Dave
-
I don't think the snap ring is causing your problem, but I do not see the point of the split ring if you are using a snap ring. I like the snap ring, so that I can change baits in a couple of seconds, but I have to force myself to tie a fresh knot on the snap ring occasionally. It would really help if you posted a few pics of your lure, side view, view of the lip and a view of the belly. Your problem is almost certainly going to be tow eye position. Dave
-
I spoke to Mark and he raised the question of how visible lures are from beneath. I was only able to angle the camera slightly upwards, to investigate a fishes eye view of the lure. Although not representative of an open lake, the tank is in the shade and the side walls and shallow bottom provide some reflection, I feel that the colors are very visible for a surface lure in daylight. Just for a laugh, I have included a tour of my man cave. Dave
-
KB – here are just a few thoughts on the subject. If you are selling enough product, that you cannot keep up with demand and the demand is ongoing, not just a temporary peak, then I would say that you need help and could afford it from the profits too. If you cannot meet customer demands and they have to wait, then you will lose the customers. Your employee is going to want regular work, full time or part time. Occasional work during peaks is just going to be problematic, irregular practice could lead to mistakes and even accidents. I am sure there is legislation that employers must follow, do a few searches and seek proper professional advice. At the very least, you should take out insurance for your employee and make sure that he is provided with the correct protective clothing and equipment. If he/she gets hurt and sues, it is game over for you. Dave
-
You know I love watching your videos. I don't own a single lure book, or any book for that matter. Because I don't live in one place for very long, I have to pack my life into a suitcase. Eventually I will have to leave Indonesia and everything that I have bought, collected, built etc. all gets scrapped. I would sooner scrap rather than sell for next to nothing, which is all I would get here. Dave
-
Very interesting selection of books. Thanks for showing me. Dave
-
The fridge thing I think is not necessary, but the coke can works, that is all I ever use. Cooling the epoxy before use is counter productive, because it becomes thicker and more difficult to apply. I live in a very humid climate, 90%+ most of the time. I don't have any problems with epoxy. The room temperature as I type is 85F, which is about normal here. A sealer has to be thin enough to at least soak into the surface (wood bodies), so Bobs thinning method is preferred. I don't have the patience to seal with epoxy, so I use CA glue. Dave
-
The heat is a problem. Heat speeds up the reaction, the faster reaction generates more heat and a vicious circle starts turning. You are probably mixing in a cup or container, which confines the mix and just makes things worse. After the initial mix, pour the epoxy onto a flat sheet of aluminium foil. Ally is a very good conductor of heat and will help prevent heat build up. It will also help with bubble removal. Dave
