


Vodkaman
-
Posts
7,423 -
Joined
-
Last visited
-
Days Won
237
Content Type
Profiles
Articles
TU Classifieds
Glossary
Website Links
Forums
Gallery
Store
Everything posted by Vodkaman
-

Clear Coats For Custom Painted Crankbaits
Vodkaman replied to smallmouthchaser's topic in Hard Baits
I have turned lures using a drill. You have to keep an eye on the drill though. Some drills just cannot take the strain of slow turning and over heat. With the body inline with the chuck, you can allow it to spin faster than you would with a wheel. I turned mine at 60 - 100rpm and they turned out just fine. Setting up the drill can be a bit fiddly, especially starting the drill. It can take a lot of adjusting to get the slow revs. I found the best way was to set it up without the lure, using tape or clamps or what ever it takes, then unplug from the wall socket. This way, when you plug in, the revs are already set. You may have to turn the chuck by hand to get it started, it all depends on your drill, these are my experiences with a cheap drill. Also, if you set it too slow, it can stall on you, so never leave it alone until you have confidence in the setup. In the mean time, keep your eyes open for a cheap, slow motor. Building a turner is very easy, can be done from scraps and can be built in an hour or less, depending on the design. There must be 50 designs posted on this site. Dave -
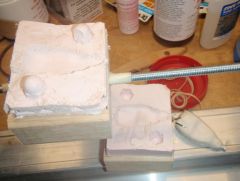
The only lead mold I have made was with a mix of the filler and the resin, so I cannot answer on the pure resin. Like MKV stated above, the mold will not suck up the heat as it is an insulating material, just like RTV. If you pour a lot of jigs in succession, the mold will get hot and take longer before you can de-mold. Also with the mix that I used, the mold starts to soften and becomes pliable. If you have even clamping, then this is not a big problem, but it is probably time to take a break and allow the mold to cool down. I am not sure if the pure resin mold will go soft, but I am sure someone will jump in with that information. Polyester resins and fillers make very good temporary molds for short runs, but if you want to make thousands, then either you gear up for making lots of molds or get an aluminium mold cut. You stated in your first post that this was a prototype exercise. Poly molds will serve you well for this purpose. Dave
-
Pete, I understand your problem. I did a quick google search and found nothing, other than advice to mix a small batch in the proportions you intend to use in the big batch. This is good advice, but you will need an accurate digital scale for the job. You may be better using polyester resin. This is basically bondo filler, but without the filler. It is also supplied by Bondo, which is only a trade name, not a product. The catalyst for the resin is MEKP, supplied in a small bottle from which you dispense drops. So many drops per ounce. I cannot remember the numbers, but there is a ton of information on the subject if you Google it. The actual number of drops is not critical, but just affects the setting time. Advice is given on various web sites about varying the mix according to how thick your part is. This because the chemical reaction is exothermic. If you mix too many drops, the part will overheat and crack. You can even mix the filler product with the liquid resin product. If you mix, use the MEKP drops as the sole catalyst. A word about safety. MEKP is an extremely nasty substance that needs treating with a lot of respect. Wear gloves and work in a well ventilated area. If you get any of these products on your skin, wash off immediately with soapy water. Dave
-
Free hand sanding the flats on is a very tricky operation to eyeball. Is this a one off or are you going to make more? Are the flats parallel? Does the body have a through drilled hole? What sanding tool are you using? If you are going to make several of these, then my solution would be to build some kind of jig, utilising the centre hole. It may have been better to start with a flat stock and add the curves. Do you have a photograph of what you are trying to achieve? Dave
-
 Ha, I love these stories of doom and disaster. Makes me feel content that I am not the only one that goofs up. What speed would you say is ideal for this process? The material sounds like latex rubber. I think the speed has to be fast enough for it not to have a chance to run. I am thinking 60 to 120rpm. This is just an opinion. Do you have a link to the Larry D site, I would like to have a read. I tried a Google, but nothing obvious came up. Dave
 -
If you email or PM Jerry (Redg8r), I am sure he will be able to fix it for you. Dave
-
That is funny, I have never built anything that big. The lure in front of me at this minute is 2" long, lol. I am thinking 3/32" lexan and 18SWG soft SS wire (0.048"). Take a body with you when you go shopping for the supplies. If it looks right next to the body, then it IS right. Dave
-
I like it. Definately worth a try. Dave
-
The cavities do not all fill at the same rate. When you inject, the inlet tube fills. Once the plastic hits the bottom of the tube, the top cavity fills to completion, with a little plastic entering the bottom cavity and less into the other two. Once the top cavity fills, the bottom cavity fills next. Only when this is full do the two centre cavities fill. Maybe the bottom fills first, then the top, but that is not important. There could be a number of reasons that your centre cavities are not filling. The plastic may not be upto temperature or you simply need to keep the pressure for a second longer. You should feel a measure of resistance when the plastic has filled the bottom cavity, but you must maintain the pressure to fill the middle two, then the resistance will increase to maximum. I have never used an injector. I am just applying engineering principles and what I have seen when vacuum pouring with a clear plate over a one sided mold. Dave
-
This post is not a ‘how to’, but rather a picture of what is happening in relation to how the lure sits in the water. The issue of weighting a lure in practice is fairly simple, you trim and move the weight around until it floats and swims how you want it to. Even the first estimate of position is usually fairly close with experience. However, from a theory point of view the subject is quite complex. You have to ask yourself the question, “do I need to concern myself about this”? The answer is quite simply, NO. From here on into this post, content is technical. Every single component that you add to the lure, changes the centre of gravity or centre of weight. This includes the paint and top coat. Some components affect the centre very little, such as the paint and top coat, because they are uniformly covering the body. The through wire harness has very little effect also, again, the harness is fairly central, but even so, I was surprised how little effect it had on the centre of gravity. The components that really affect things are the ballast weight, hook assemblies and the lip. In the pictures, I have numbered and color coded the centre of gravities accordingly. The first picture shows the lure. It is 4” long and based on the ‘bigbandit’ lure (see post No1). I set the wood density at 0.35gm/cm3 (18.7Lb/cu ft), which is the wood that I use. The section view shows the construction of the lure. The second picture shows the movement of the centre of gravity at each stage of the build, showing how each component in turn affects the centre of gravity. I have included a 0.5” square box for scale. Color codes 1 – Body - red 2 - Harness - orange 3 - First seal coat - brown 4 - Ballast - light green 5 - Second seal coat - dark green 6 - Lip - light blue 7 - Epoxy coat - dark blue 8 - Hook assemblies size 4 – violet The final centre of gravity position is only 0.07” forward and 0.15” lower than the original wood centre of gravity, as the effect of the lip and the hooks tended to cancel each other out. But still, the line through the final centre of gravity and the buoyancy centre, indicates that the lure will rest nose down by 26 degrees. The reason for this, is that the buoyancy of the wood is pulling the lure upward from its centre and the weight of the lure is pulling down from a different centre. The lure will rotate until they are directly inline with each other vertically. By moving the rear weight aft by 7mm (0.27”), I was able to reduce this to 10 degrees slightly nose down. This is quite a large movement to achieve a small adjustment in the centre of gravity position. This is all well and good and could be used as a guide, I could even write a spread sheet, but it would be a total waste of time, because once the lure hits the water, everything changes. All the densities of all the components are subtracted by the value of the density of water. For example, the density of the lip reduces from 1.2gm/cm3 to 0.2gm/cm3, lead from 11.385gm/cm3 to 10.385gm/cm3 and the wood from 0.35gm/cm3 to -0.65gm/cm3 (buoyancy). It is just like someone just moved the goal posts. Once the lure starts moving, everything changes again. The water forces on the lip and the body are far stronger than the effects of the ballast. These water forces, with a minor input from the ballast, will determine at what angle the lure swims. The swim angle is controlled by the tow eye position. This enters a completely different discussion and so I will stop there. However, the ballast takes on a new function once the lure is moving, by determining how the movement or action behaves. The wiggle or ‘X’ing action is a rotation about the final centre of gravity of the lure. If the weights are clumped together, you get a wide action, if the weights are fitted nose and tail, the action is reduced, but in both cases, the centre of gravity is in the same place and not necessarily where the lead is. In reality, nothing can beat practice, experience, common sense and lots of testing to determine where to place the ballast. JPEG pictures are not very clear for this exercise. If anyone wants PDF files of the pictures for a closer look, pm me your email address. Dave
-
Sounds like you poured too slow and/or your plastic was not hot enough. Never read about this problem before. Dave
-
There are two or three home kits around. If you google 'rapid prototype kit' you will find them. But the resolution is not good enough for molds yet. You could maybe 3D print a master, but you would still have to work on it with filler and sand paper, to get the finish that you need. There are companies that offer a 3D rapid prototype service, using top of the range equipment, but the service is not cheap. I cannot remember the pricing exactly, but it was more than $100 for part of a turbo charger housing, which was quite small. If I had $50,000 to spare, I would buy one in an instant. The home build kits are around $1000. Dave
-
The software that I think that you are talking about is called 'computational fluid dynamics' or CFD. It will give a graphic representation of how the water will flow around a fixed object. The computations are massive and complex. Last time I checked, it takes many hours to achieve the result. It could be used to show the flow around a lure, but it will not show how the lure will move. Also the software is very expensive and very complex to use. The success or failure of a lure is a fine balance of lip (size and shape), ballast (hooks and weight), and most of all tow eye position. I list the tow eye position as the most significant adjustment, because the water flow around the body will be consistant given a particular body shape, lip shape and ballast, but tweak the tow eye position and the action changes dramatically. CFD software, as far as I am aware, only deals with shapes, it does not take into account weight distribution, buoyancy or movement. The best tool that you have available for determining whether a lure will swim or not, and as an engineer who likes to calculate things it really pains me to say this, is experience. Build your prototypes, fit the hooks and top coat (very important) and swim it. Then make one change at a time and keep notes. Dave
-
The problem with polyester resin is that the surface will not be smooth, once it hardens. It does not level as well as D2T or other epoxies. This is because the liquid to gel phase/transition happens in a few seconds. Also it does yellow over time. I use poly to seal my wooden baits. It is very hard and ready to work in an hour. It fixes the grain so I can do the final sanding operation and achieve a smooth finish without disturbing the end grain on soft wood. But even this application for poly is not recommended, as polyester resin is not water proof, but I only make baits for my own entertainment. Stick with D2T and take your time. Dave
-
Not true Ben, 50:50. Mark Poulsen provided good input too. Now I see that it was not necessary to keep the descriptions so short, due to the format that Jerry has used. Maybe they can be expanded and elaborated, for more clarity. Dave
-
Nicely done Jerry, very impressive. Dave
