


Vodkaman
-
Posts
7,423 -
Joined
-
Last visited
-
Days Won
237
Content Type
Profiles
Articles
TU Classifieds
Glossary
Website Links
Forums
Gallery
Store
Everything posted by Vodkaman
-
OK, sounds good. Dave
-
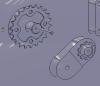
Here is a pic of the tensioner that I built on the rocking beam duplicator. It is very simple, bolted to a plate just ticht enough that it can be moved, but friction stops it slipping. It works really well. Jerry. I was going to post a link to the dup, but post No1 seems to have been deleted. Can you check for me. If required, I have the original text in a word doc. Dave
-
Yes, I got the formulas out and went straight to spreadsheet and was embarrassed to discover that it was a straight ratio between the two diameters, as Pete correctly stated. I used pi x d, same thing: Circumference = pi x D = 5 x pi x d cancel pi both sides D = 5 x d I like the easy ones, but prefer the harder ones. Dave
-
10 rpm and radius 3", gives a centrifugal force percentage of 0.85, which is a very low number and should give good results. As for the belt length, shorter is better, but cannot see this as being a big issue. You may have to adjust the tension of the belt, to get it to run right. As long as you can do this by altering the length of the belt to suit, then you do not need to get involved with a tensioner. But tensioners are not a big problem, but why complicate the design. Dave
-
Marks idea of a pulley system is a good one. Faced with the same problem, I would make the wheels myself. A 1" diameter wheel driven by the motor and a 5" diameter wheel attached to the wheel spindle. This gives a 5:1 reduction in speed. I would make the wheels out of three pieces of 1/8" ply. Glue them in a 'sandwich', the outer two pieces slightly larger in diameter. Try to find a source of rubber, try model aircraft shops. Knicker elastic is also available by the length. Try to get the rubber type, for better grip. A rubber coating on the wheels would help to prevent slip, if indeed this was a problem. This is a very do-able project. Dave
-
I would really like to know how much was quoted for the work, so I have something to compare and expect when I go to the provider. Probably not a good idea to post the numbers here, as it is skirting the boarders of the site rules. I would appreciate a PM though. Dave
-
I too am considering this. Rapid prototype would produce a perfect master for my duplicator machine, even down to the spindle hole. All I would have to do is give it a coat of D2T, to prolong the life of the master against wear of the stylus. I have sourced a company locally, but have not contacted them as yet. I am expecting the prices to be a bit more reasonable than you guys will have to put up with, but I am not expecting it to be cheap. Can't believe I haven't mentioned it before. I wasn't keeping it a secret, honest! Dave
-
You need to post some pics of what it is you want to mold. Dave
-
At 40 rpm, the epoxy forces are 13.5% and at 50 rpm 21%. 100% being the force equal to the weight of the epoxy. Yes, the numbers are high compared to the 1% - 2% of the speeds traditionally used for drying wheels. Also you are using Etex, which is thinner with a lower viscosity, so could stand a higher speed. The equivalent speed on a wheel with a 10" distance to the spindle is 27 rpm. This is slightly less than one revolution every two seconds, not an unreasonable or outrageous speed. I would just suggest that you examine the resulting finish closely after a few more lures and report back to me, either pm or better still post, because lots of people will be interested in your result. Post some pics of the wheel and more importantly, the top coated body. The object of the thread is to try and find the limits of what will work. Thanks for your input and look forward to further feedback. Dave
-
I can email you a CAD file of a lure body solid. Here is a list of file types that I can save to: catpart, stl, igs, model, stp, 3dmap, cgr, hcg, vps, wrl. I can make the model any size you want, just let me know. I have included a side and end view. No charge, Just pm your email addy. Dave
-
I have a couple of loofa's in my bathroom, haven't tried using one for scales as yet. I just examined one and it is very flexible and stretchy, no way will it break, in fact it seems perfect for making fine scale lines. I suggest you find another source. I have included a picture, so we are talking about the same product. Dave

-
I use the same brush all the time. Fold some tissue and squeeze out as much epoxy as you can between finger and thumb. I put a small splash of acetone in the concave bottom of a fizzy drinks can. Dab several times in the acetone, then dab on clean tissue, repeat this several times. NEVER touch the brush with your bare hands, not even to test if dry or to test if the bristles are good, oil from your fingers can transfer from the brush to the epoxy and cause the 'fish eye' effect. If you have handled the jig bodies, or you suspect others may have, then they should all be cleaned/degreased. Clean one in acetone, to test that no problem occurs with the coating, allow to evaporate dry. If acetone is a problem, use soapy water and rinse thoroughly with clean water a few times and drip dry. Epoxy just a few, to check if the new method is working. If the 'fish eyes' occur again, report back here and the TU members will explore further. Dave
-
They worked ok. Feels good when you open the mold and a lure pops out. Try another coat or two of sealing, this will get the baits more shiny. You could reduce the size of the vents next time, to reduce trimming. If you start off with too small, you can always widen them, even start off with no vents. This is the beauty of PoP, it is very easy to make post production modifications. This makes me want to go down to my shop and make a mold, except I cannot get plastic here in Indonesia. Great start, can't wait to see the next. Dave
-
Nice going Mick. Post some pics, so we can share your progress. Dave
-
Thanks BBK. I figured out what I did wrong. I thought it cropped my picture, but the picture was already cropped, DUH! Pity it does not have a pixel reduction option, but it does work well. Dave
-
I had a look at paint for reducing pics, but could not get it to work. Many members have mentioned Picasa2, a freebee. Dave
-
You really should resize your pics before posting. The rules state 600 x 400 pixels is the size limit. Personally I use photoshop. This allows me not only to get the 600 x 400 limit, but also reduce the file size, by reducing the jpeg number. With this I can get from 3Mb down to 50Kb with no visible degradation, which would allow me to upload 20 pics. If you do not have photoshop, their are other free pic editors online, but you will also find editors on your own computer system, included when you bought it. I just did a test on my computer, to see what could be done and found Microsoft office picture manager. I was quickly able to edit a picture from 3Mb down to 179Kb and achieved 640 x 480 pixels, close enough. Method: 1. right click on the jpeg file - a menu appears. 2. hold your cursor over 'open with' (about third way down the list). Select 'Microsoft office picture manager'. 3. click picture (top of page). 4. click resize (in drop down menu). 5. a window opens to the right of the screen. Click the 'predefined width x height' down arrow. 6. select '640 x 480' from the drop down menu. 7. Click OK 8. 'File' - 'save as' and rename the copy, so as not to change your original pic. Their are probably other programs on your computer that will do a similar job, with a little exploration. Dave
-
You can clear the pics yourself very quickly. 1. Hit the drop down menu next to your user name, top right. 2. select 'my settings'. 3. select 'manage attachments'. 4. tick the boxes next to the pics you want to remove or tick the top box to select all. 5. hit the 'delete selected' button, bottom right. This only clears your space, it does not delete pics from the posts that you have made. Dave
-
This exact subject was discussed just over a year ago: http://www.tackleunderground.com/community/topic/16547-blades-not-spinning-frustration/page__p__125553__hl__blade__fromsearch__1#entry125553 Worth reading. Dave
-
I would have agreed with you, except that beautiful pattern was only a couple of millimeters deep. It is nothing to do with the wood itself, but is a funghal infiltration. I have seen it before on a piece of beech that my brother used for a sculpture. He had a yard full of this stuff. Dave
-
I would like to see the pics. I would also like to see pics of the mold and RTV adapter too. Always nice to see an idea come to life. Thanks Jim. Dave
-
Welcome to TU john. Sounds like an interesting solution. Certainly different than anything that has been done before. You should post a picture or two. Always room for another drying wheel design. You could post it here, but it would be easier to find in the future if you started a new thread with it. Dave
-
Are you talking about molding resin bodies or injected hollow plastic bodies like the mass produced lures? We can help you with the resin idea, but I do not know of anyone who has gone the mass production route, or at least they haven’t talked about it here on TU, certainly no one who actually does it themselves. Dave
-
Usually the problem is blue flake turning green, blue flake viewed through yellow burnt plastic appears green. I guess this is a different problem then. Dave
-
This thread is what you are looking for: http://www.tackleunderground.com/community/topic/1408-diy-fluid-bed/page__st__40__p__126748__hl__%22fluid+bed%22__fromsearch__1#entry126748 Dave


