-
Posts
1,300 -
Joined
-
Last visited
-
Days Won
8
Content Type
Profiles
Articles
TU Classifieds
Glossary
Website Links
Forums
Gallery
Store
Everything posted by JBlaze
-
-
Vic, I like your bait. one end to the other. I think the 035 wire will do fine. I build spinner baits with it and they stand up very well. John
-
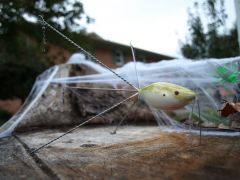
This thread is intriguing, Here is another Tennessee boys version, attached to the rear of a crank bait with a heavy split ring. No snaps on this one. .035 wire twisted up on a Hagens G-Lock style hooks, no weights on anything except the belly of the crank bait. May have to add weight to middle wire to keep it from tumbling. Belly hook removed from the crank bait. Haven't tried it yet but will let you know if it works. John
-
Allen, I appreciate the offer, but now that I know where to get them, I will order some. Making lures is an addictive hobby of mine, I have some ideas for this hook. As a bait maker, you would know that most times, it takes more than a few prototypes to achieve what you are trying to make. At a dollar a hook, it gets expensive rather quickly. Thanks again for the offer and sharing the link to the hook. John
-
-
I have not been able to find those long necked hooks. I have other ideas for this hook but the only way I can get them is to buy the perfect finesse worm rig at BPS and they are expensive, $3.99 for a four pk. Can anyone tell me where I can get this hook. I don't know the style or the #s for it. But according to the pkg. these rigs come in, it is a Gamakatsu hook. Thanks John
-
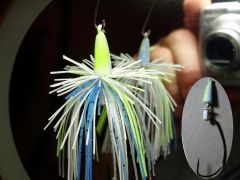
Now we are getting somewhere. I enlarged the picture and If I am looking at this picture correctly, the snap is not right. What will happen is that when a fish tugs on this thing, the top of the blade will move forward and downward and the face of the blade will apply a downward force on the snap and could cause it to open. Turning the snap upside down eliminates this possibility. Thanks for posting the pic. John
-
ING, I don't know much about physics rules or how you seem to be applying them and No one said anything about applying forces equally to the front and back of the snap. I will try to make you understand what we are talking about. When an angler pulls on one end of this lure and a fish is pulling on the other end of the lure, depending on which way the locking side of the snap was installed up or down, the pressure, force, leverage or what ever you want to call it is applied to only one side of the snap either the locking side which could and sometimes does cause it to open or the straight or non-locking side of the snap which will not open when the pressure or leverage is applied to it. The proper way to install the locking snap to keep this from happening is with the locking side down. I suppose that there is equal force at each end front and back of the snap where the line is tied and the lure blade is attached if that is what you are thinking. As I said in my original reply, I'm not sure that I made myself clear when explaining and I don't know how to put a pic in this reply so I hope this helps.
-
-
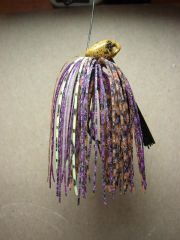
As you can see in the picture, I used the "Perfect Finesse Worm Rig" to make this swim jig. I re-coated the head with powder paint and added a skirt spreader which is made of the cap that covers the small needle of my insulin pens. I cut off the enclosed end of the cap, then pushed it up onto the hook shank, wedged a tooth pick in it to make it tight then epoxied it. Next I hand tied a skirt and Presto you have a swim jig. The design of the hook acts as a keel and keeps the point up. John
-
I may have the solution to this. It was brought to my attention by a friend that this same thing was happening to my clatter blades (my version of chatterbait) This friend suggested that I turn the duo-lock snap upside down and the pressure would not be put on the locking part of the snap. You can check this out by tying one on and then pulling on the line while holding on to the bait. You will see that the pressure is put on the hooking side of the snap and could possibly force it open when a big fish is surging against it. Remove the snap and start it in the other hole firstthis will turn the snap upside down and force the pressure of the blade against the solid side of the snap which will eliminate the possibility of the snap being forced open when a big bass is pulling on it. Not sure that I explained this correctly or well enough to be understoodif not, I will post a picture later.
-
I will give it a try and report back as to the results. Thanks John
-
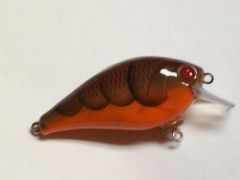
Was trying to get a snag-less deep running bait. This thing only runs about 6 to 8 ft deep. It sits in the water with the bib pointing down. The top of the body is fairly flat and wide. When retrieved, it looks like the body is catching so much water that the lure is changing its angle to an almost flat trajectory. I am thinking that the line tie should be moved closer to the body so that the forward section of the bib will have enough pressure on it to counter balance the pressure that is on the rear of the lure. Opinions appreciated. It has plenty of thump and tracks straight and true. I will try to attach pics to this post if it doesn't allow me to do that, I will put them in the gallery. The lure is made of 3/4 inch PVC trim board and has a single 5/0 VMC spinnerbait hook the whiskers are sinker peg stops.
-
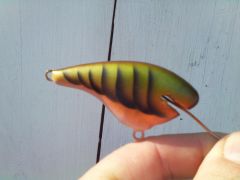
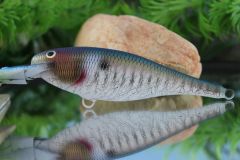
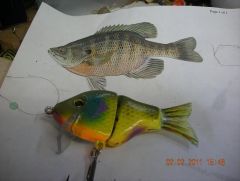
This is my second attempt at foiling, the first one was a disaster . On this one I caught the warmouth and took its picture then resized it two times one of them being slightly larger than the other. I used the larger picture for my template. After cutting it out and rounding the edges the smaller foiled pic fit the sides quite well. The lure is made of 1/4 inch PVC Trim Board.
-
When I push the upload button, I get the upload page. Step 1 is dark black. I hit the browse button and select my picture and I can't get it to do anything else. I have hit enter and it does nothing. I have hit the step 2 button and it doesn't do anything. What am I doing Wrong?
-
Hey Small Jaw, thanks for the compliment. I use a heat gun to powder coat after dipping in the pumpkin I immediatly reheat and touch the tip of a small paint brush in the black powder hold it over the reheated jig about 6 or 8 inches and tap the brush with your finger it will take several dips ot the brush to get enough splatters on the head and when you bake it, the edges will blend nicely with the first coat
-
-
-
-
-
-
-
-

Looking For The Bait Keeper That Is Used In The Title Shot Jigs.
JBlaze replied to Andy5014's topic in Wire Baits
Here is the short cut to the tutorial. easy to make and easy to use. I have used it on a jig in place of a weed guard. http://www.tackleunderground.com/community/topic/12037-making-consistent-screw-locks-rev-1-0/ http://www.tackleunderground.com/community/gallery/image/5496-jigs-shakeys-or-both/ -

Looking For The Bait Keeper That Is Used In The Title Shot Jigs.
JBlaze replied to Andy5014's topic in Wire Baits
Andy, I too would love to find that bait keeper or figure out a way to make it. So far it has eluded me. My best solution so far is to use a Twist Lock Coil. It is a screw lock bait keeper with a centering pin. It is made by Owner and is available at Bass Pro Shops. The other solution is to make your own screw locks. there is a tutorial by Kelly here on TU. It is called making consistant screwlocks. it is easy to do and works very well. Hope this helps. John


