


mark poulson
-
Posts
14,726 -
Joined
-
Last visited
-
Days Won
364
Content Type
Profiles
Articles
TU Classifieds
Glossary
Website Links
Forums
Gallery
Store
Everything posted by mark poulson
-
I find that solvent-based sharpies will bleed unless I really heat set them, or spray a coat of gloss Createx clear over them as a barrier. Once the sharpie has been well set, so all the solvent has off gassed, it's not a problem. Solvent-based paints might be a problem. I would shoot a sealing coat of the Createx over it first, just to play safe. On a tangent, I fished an Orbit 80 jerkbait, coated in "In The Spotlight" nail polish and then dipped once in AC1315, hard for the last three weeks. I noticed, when I was cleaning up the boat, that the single coat had become scarred and opaque in places, due to bumping crap on the retrieve, and being slammed by stripers. I also noticed that the #2 split rings holding the trebles had been ovaled. So I took off the hooks and split rings, including the one on the line tie, and, without doing any other prep, I dipped the bait in the AC again. It came out perfect, with all scaring and clouding gone.
-
I'm jealous....I think
-
Damn rocks! Of course, with my local lake, Castaic, down 130', there's very little rock left to grind. We're down to the mud that eroded off the upper layers over the years, and now covers almost everything, so I'm jealous. Do you find the circuit board makes the baits perform differently than 1/16" lexan?
-
I find that keeping the tail section much shorter than the head results in lots more action.
-
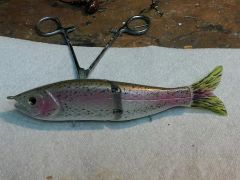
It's beautiful!
-
Vodkadave posted a jig for doing multiple baits at one time using a table saw. It's probably still here, somewhere, if you use the search feature.
-
I do the same with my PVC swimbaits if I'm making a bunch of baits and joints. For one bait, I use a dovetail saw, and cut them by hand while the blank is still rectangular. If you use a try square to mark the joint lines on both sides and the top and bottom, and then mark the angles of the joint on top and bottom, using a centerline to be sure they're symetrical, it's not hard to do. I find I have much more control with a sharp, fine handsaw, and the kerf is so thin I can easily use an exacto knife to finish the joint after shaping. Once the joints have been cut apart, you can deepen the V on the leading edge of the following section as you need to with a sander to get more clearance and movement in the joint. I posted a "4 hours of sleep", run on description of how I made my successful glider on the Hard Baits forum. http://www.tackleunderground.com/community/gallery/image/13859-7-s-waver-copy-glide-bait/
-
Nice!!!! Is that birds eye maple?
-
Years ago I did a series of angles bill baits, to simulate a bluegill struggling to swim upright. Nate's right, unless you use a jerk/pause retrieve, the bait just rolls over and over.
-
I wish I could do it either way! The overspray is just to soften the joint lines, without making them blurred. That bait looks really good!
-
Thanks Bob. I'll try those options. I had tried nail polish, and that was a huge failure, at least the red. Over a month the red had turned the entire 6" swimbait red!
-
Where can I find that kind of additive?
-
I guess the only question left to answer is whose car is it for?
-
Thanks guys. It is satisfying when something actually works!
-
Thanks Bob. I was concerned about the effect of thicker sealers and top coats on small balsa cranks, like the 1.0 size square bills.
-
Check the hard baits gallery. Someone posted nice pike jointed lures there.
-
 Man, I just looked at that post, which I made at 3:30 this morning after four hours sleep. I must be crazy!
 -
i use a rattle can clear acrylic to seal my wood mold forms and it works. Maybe you need to do two coats.
-
Bob, Does the Solarez add enough weight to a balsa crank to affect it's performance?
-
Curt, It is made from Azek PVC trimboard that I bought from a local lumber yard. I drew the same on a rectangular blank that was 1 1/4"X7"X3/4", and located where I wanted the joint. I marked the hinge location on both sides with a try square, so they aligned, and then Icut the joint almost half way through from each side with a dovetail saw, leaving approx. 1/8" in the middle uncut to hold the two sections together while I shaped the lure. I cut the lure profile out with a bandsaw, sanded the perimeter smooth on an oscillating belt sander and 80 grit belt, and marked a center line around the perimeter of the blank to help me keep my shaping symmetrical. I also marked the locations of the hook hangers and line tie, and used an awl to make dents at those locations, in case the pencil marks got sanded off during shaping. Moving back to the belt sander, I tapered the head and tail sections, and the rounded and softened the shape, using one of the original S Wavers as a guide. Once I had the blank shaped to close to the finished shape, I finished shaping it with a vibrator sander and 80 grit paper. I marked the eye hole locations, gills, and mouth cut out. I drilled the eye holes on a drill press, carved the gills with a dremel sanding drum, and cut the mouth out with the dove tail saw. I also refined the shape a little more, so the belly curve met the ramp at the underside of the mouth more cleanly. I drilled out the line tie locations on the drill press with a small pilot bit, and then finished cutting the joints with an exacto knife, cutting a little deeper from each side until the two cuts met. At that point I final sanded the parts using a vibrator sander and 180 grit paper, and also by hand. I laid out the screw eye hinge locations and drilled pilot holes for them, and I installed the .072X1" screw eyes temporarily. I also installed the same size screw eye for the line tie, and for the two hook hangers. I transferred the hinge screw location to the face of the rear section, for the slots. I cut the hinge slots out on the bandsaw, trying to keep the slot small, but testing to make sure I had clearance for the screw eye half of the hinges. I marked the location of the hinge pin, a piece of bicycle spoke, on both the top and bottom of the rear section, and drilled that hole out on the drill press, using a centering pin on the base in line with the bit for the pin to keep the holes aligned while I drilled 1/2 way from each side. Once the two holes met, I ran the bit all the way through, just in case the alignment wasn't perfect. I assembled the sections, adjusted the screw eyes to give me hinge clearance, and further sanded the front of the rear section, deepening the V for more joint clearance. Once I had the joint moving freely with the right amount of side to side movement, I added the trebles and split rings, and float test ed each section independently, adding 1/8 oz egg sinker and split shots to the hook tines until I got each section to sink horizontally, and at the same rate as each other. I then removed the line tie screw eyes, and weighed both the screw eyes, and the ballast I had added on my digital scale the show weights to 1/10th of a gram. I took two 3 gram hook hangers, and weighed them each. I subtracted that weight from the ballast weight I needed for each section, and cut lenghts of 1/4" lead wire to reach the final ballast weight needed. At that point, I drilled out the line tie locations on the drill press with a 1/4" Forstner bit, and I also drilled several more 1/4" holes for possible ballast locations. I pressed the 3 gram hook hangers into their holes dry. I split the 9+ gram lead wire for the front section, and pushed the into the ballast holes. I did the same with the 3+ gram rear section lead wire. I added the trebles back onto the sections, and again test floated them. Once I was sure they sank at the same rate and horizontal, I removed the hook hangers and ballast wire, dried out the sections, and reinstalled the hook hangers with brush on crazy glue, to give me time to rotate them to their final orientation. I pressed the ballast wire back into the holes, a little past flush, and used crazy glue to lock them in. I filled the depressions left in the ballast holes with bondo, and sanded it smooth once it had set. One final hand sanding with 180 grit, just to remove any sharp edges, and it was ready to paint. Typing this took almost as long as making the lure! Hahaha
-
Confusion. Just one of the many services I offer.
-
From my experience with Etex, the epoxy will run down and off because it is so thin. I would think another, less runny material, would be easier to work with. You might consider Solarez, or two dips in AC1315.
-
Hahaha
-
I haven't tried it at all on any wood, so I don't know.
-
When I go out to the garage to work, I want to complete as much as I can in the time I have. Heating the paint so it dries faster let's me recoat more quickly, and gives me a shot at finishing my painting in one session. I find that, if I don't heat set my paint, it stays gummie feeling, like it hasn't really dried. I don't know how I could be sure one coat is dry enough before I put on another without hitting it with a hair dryer. Trapped moisture is a death sentence for any lure's top coat. It will fail. It is just a question of when, because the paint film is never truly hard, and exposure to sun or heat will cause trapped moisture to vaporize, and expand, lifting the top coat. Hair dryers are cheap (free, if your wife isn't looking). I don't think my paint gets hot enough to truly change into a waterproof state, like when you iron it onto a T shirt, but it does get dry, quickly, and that's what I'm looking for.

