


mark poulson
-
Posts
14,726 -
Joined
-
Last visited
-
Days Won
364
Content Type
Profiles
Articles
TU Classifieds
Glossary
Website Links
Forums
Gallery
Store
Everything posted by mark poulson
-
I think you might be able to cut a notch with a dremel to fit around your line tie, like Matt said above.
-
I would suggest you go to some of the sites that sell air brushes and supplies, and see what's available. For myself, I've found the videos on those sites, and on Youtube, much more helpful than books.
-
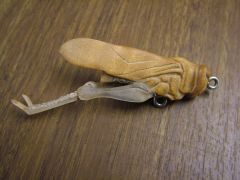
I just checked your lures out. They are beautiful. Thinking outside the box.
-
 X2!!
X2!! -
 Really nice job!
 -
Pat, If you're going to use a fiberglass resin, you might want to try Solarez, which is a UV cure resin that hardens in 3 minutes. No catalyst is needed, although you can add a couple of drops of MEK to speed the curing. It cures hard and clear. I find I can dip it in my garage with the big door open, let it drip back into the open container, wipe off any drips, and take it outside to cure. The stuff in the container doesn't get contaminated or begin curing as long as I have it inside, not out in the sun. I also have a UV nail light box for curing, when I'm working at night. Bob P has a thread about it below this one. http://www.solarez.com/productsnew/gloss.html
-
50 lashes with a wet noodle, and no Sheriff John for you, buster! Hahaha
-
Check out both Cabela's and Bass Pro Shops. They both should have cheap, sturdy vises. I bought mine from one of them (can't remember which) many years ago and it's held up find. I did have to super glue the nuts/knobs on the ends of the rods they use. That's my only complaint. But I'm a hobby tier, not a pro.
-
Since the gloss indicates a stronger coating, from longer molecules, I'd suggest you stick with gloss, and try just dulling the gloss with a green Scotch pad, or some other really mild abrasive. Maybe some polishing compound on a soft rag.
-
Stephen, Folk Art is a water based acrylic paint, so it is not usable as a top coat. I mist it over the back and shoulders of my crappie patterns, to give them a warm golden glow, but I use a regular top coat over that. If you put a thin top coat, like urethane or concrete sealer, over your finished paint scheme first, to seal and protect it, you can play around with misting different metallics and pearls over your bait to see how they look, and just wash it off afterwards if you don't like it. That's what I do when I want to see how something new will look.
-

Paint Receipe For Walleye, Smallmouth, And Lagemouth
mark poulson replied to tommegna's topic in Hard Baits
If I were painting a walleye, I'd look at using the glo paint white for the eyes. -
Folk Art makes some great metallic colors that work for light overspray effects, too. Their Peridot is a green with a gold metallic sheen. Another choice for an interesting effect.
-
Keeping Plastic Clear Thru A Few Heat Cycles
mark poulson replied to Ed_White's topic in Soft Plastics
I find that, for me, NorPro silicone cups hold the heat a little longer, especially if you pinch the mouth shut with a big chip clip to form a small pour spout. Google norpro silicone measuring cups and you'll find a bunch of choices -
For shallow 1 to 2.5 square bills I install the bill, and then drill a hole for the line tie after the epoxy has set. I mark my location with an awl, drill a small pilot hole through the bait, the bill, and the bait again, and then enlarge the hole as needed for either my screw eye or my twist wire. I use lexan bills, which drill without cracking. I don't know if circuit board bills or acrylic bills will drill as easily without cracking.
-
One thing that might help is to dip your clear plastic bait quickly in clean acetone, holding it by the bill so that doesn't get dipped. A quick dip will clean and open the surface of the plastic, so you can spray your Createx or other air brush paint directly onto the clear plastic, and it will bond without a primer. That opens up all kinds of transparent color schemes, since you're not starting with an opaque prime coat. For me, ghost means hard for the fish to see clearly, so I try to use really light coats of transparent paint, no matter which scheme I'm painting. I want to be able to still see through the bait when I'm done. I try and visualize what the lure will look like from below, and from the side. In really clear water, the movement of the bait will catch their attention, and the less that's visible means they have fewer negative cues. So a clear belly, a hint of silver sides, trans. violet on the shoulders, and one mist of black on the back are my shad colors. The same idea goes for other paint schemes. I want the sun to show through the bait from above, and just give a hint that there's something edible swimming away.
-
Great idea and explanation! Thanks for sharing.
-
I just hope you didn't have to ask one of the sales people for help in choosing which color was right for you!
-
That question used to come up often in my family, since my mother's side came from a town that went from Russian to Polish, and then back again, quite often. The general consensus was it was a nail with no head.
-
Know your colors before you go, so they won't think you're totally fashion-challenged.
-
Glo paint needs to be charged/loaded with a light source to begin glowing. If you mix you will cover some of the glow with the other paint, so it can't be charged with a light. Take a little of each, mix them, and coat a jig, or part of one. Do another jig with just the glo paint. Compare. That should tell you pretty quickly how it works.
-
Thanks.
-
You can also use one coat of a clear nail polish. It is light, thin, and strong.
-
When I use Etex I use the flexcoat syringes and mix really well, and never have a problem. Once I switched from weighing to syringes, I never had a bad batch again, and I can make up more quickly and accurately, if I need it. I drilled a small hole in the top of each bottle of the Etex, and leave the syringes stuck upside down in their respective bottles. Their tips are slightly tapered, so a hole just larger than the tip will make a snug seat for the syringe. When I want to mix, I hold the syringe and turn the bottle over, so I can fill the syringe without air getting trapped, like filling an insulin syringe. Once I have the amount I want, I turn the bottle back over and remove the syringe. It is as close to idiot proof as any method I've ever used. Etex is a decoupage epoxy, meaning it is designed to go over large wooden surfaces that can expand and contract, like bar and table tops, so it remains more flexible than glue epoxies like D2T, which are designed to be rigid. Measuring by volume, not weighing, is the only sure way to get exactly the same volume of the two parts. I spoke to the Etex technician and that's what she said. After I mix the snot out of it in a small solo cup, I hit the bottom of the cup with a hairdryer, so make the epoxy more runny and help the bubbles come up to the surface, where they are easier to break. It is a great material, so I hope you figure out a method that works for you.
-
Most online air brush sites, like Coast Air, have how-to videos. http://www.coastairbrushtv.com/ Youtube is full of them, too. https://www.google.com/search?q=youtube+air+brush+painting&oq=youtube+air+brush+paint&aqs=chrome.1.69i57j0.19098j0j4&sourceid=chrome&espv=210&es_sm=122&ie=UTF-8
-
What ever happened to just spreading your weedguard by hand when you're fishing?
