


mark poulson
-
Posts
14,726 -
Joined
-
Last visited
-
Days Won
364
Content Type
Profiles
Articles
TU Classifieds
Glossary
Website Links
Forums
Gallery
Store
Everything posted by mark poulson
-
Don't termites eat wood?
-
I'm guessing that the kind of hard plastic used for those beads is a high pressure injection system, with nasty chemicals involved. How about making some out of a hard grade of plastisol?
-
Neat!!!!
-
I've found, for me, any shallow running crank wiggles (X's) the most if I use a weighted hook hanger in the belly. Splitting the ballast to just before and just behind the belly hanger also works. When I make a deep diver, like Ben, I like it to hang down pretty steeply to get it diving right away. Try using a lure that you like as a model. That's how I started making cranks. Float it and see how it sits in the water, and add spit shots or egg sinkers to the front treble's tines until your lure floats the same. That's a pretty good starting point. Depending on what kind of sealer, paint, and top coat you use, you'll probably find you have to adjust the ballast for any added or lost buoyancy from the paint scheme, but that all depends on how you finish your lures. Smaller lures are MUCH more sensitive to slight weight changes and positions, so start with a good sized lure to make the learning curve a little flatter at first. You'll have plenty of time to drive yourself nuts with small stuff later, once you've gotten a good handle on the building process. And use the search feature here. Most topics have been covered numerous times, and each time something new or different is usually learned. Good luck.
-
I'm no CNC machinist, just a carpenter, but my guess is that it's easier to program in the sprue hole on one half, and then just reverse the instructions for the other half. Also, having the fill sprue in both halves allows mold maker to connect multiple cavities and inject them all at once. And having the fill sprue in the edge allows you to clamp a bunch of molds together to pour quantities of the same colored baits. Lastly, I think it is far easier to strip a plastic bait out of a mold with the sprue in both halves, so it comes out with the bait, instead of have to be pulled through a separate hole that might damage the bait itself. I only have one aluminum mold (thank you Bob L) but I have lots of two part POP molds in wooden boxes, and they are all edge filled, both the hand pour and the injection. For me, it was a lot easier to make the POP molds and then cut in the fill sprue through the edges afterward.
-
Talk about jinxing myself. I wanted to install some lips in cranks today, but, when I got back from picking up my daughter from school, the power in our neighborhood was out. So I moved outside onto my driveway, where there is plenty of light. Of course, I damn near ruptured myself trying to sqeeze the epoxy out of the bottles, with no hair dryer to heat it. I finally got all three lips installed, and, wouldn't you know, the power came back on, just in time for me to go inside and make a cup of hot coffee, and try and defrost. Hahaha Sometimes you just have to laugh at life's little jokes.
-
I hit the two parts of the epoxy with my hair dryer while they are still in their separate plastic bottles to warm them enough to get them, especially the resin, to flow out well. The hardener usually flows okay without heating, but I work in an unheated garage, and sometimes I do need to heat both parts. Once I've mixed them I don't heat the mixture any more or the epoxy sets really fast.
-
Rather than heating the resin, how about heating the lure before you dip it, so the heated lure body thins the resin and helps it drip off more quickly? That way, you wouldn't have to heat a whole batch of resin.
-
Do you use the polyester gloss or the low VOC?
-
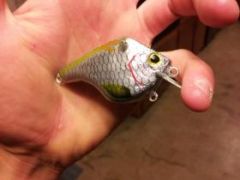 I really like that shape. It says shad to me. And that's a great paint scheme and paint job! I stole that rattle idea from Strike King, so share the credit, and the blame if it doesn't work for you!
 -
Have you guys tried the Zman plastics, the ones that are super stretchy, and super buoyant, and that melt regular plastics when they come in contact with them?
-
That's a great read! Thanks for finding and posting it
-
That's it Ed! It's on the second page, half way down.
-
X2 Really neat!
-
If you're going to make a lot of baits, and want to do it fast, a few years back Hazmail (Pete) posted pictures of his rounding wheels. They are plywood discs mounted to a motor shaft, like a grinding wheel, but with a concave edge cut into the perimeter that he lined with sand paper. So he had a consistent curve he worked with. If you finish sand the profile of your bait and mark a centerline, you can do as Ben suggested and sand until the line is gone, and you'll have a symmetrical bait, or pretty darn close.
-
All I can add it that it pays to clean your brush after each coat of paint, if you've emptied the cup. If there's still a good amount of paint in the cup, you can let it sit while you dry the fresh coat of paint, but don't let it sit for more than a minute. If my paint is taking longer to dry for some reason, I'll pick up the air brush and shoot a little more paint through it to keep the tip wet. But backflushing with lots of clean water between coats is really the key for me to keep my brush working.
-
I would suggest you focus on getting your lip and hardware installed correctly, and not try to get the lure body perfectly symetrical. I don't worry about getting my cranks exactly symmetrical. I cut my lip slot after I cut out the profile, while the blank is still flat, all on a bandsaw. Like Bassguy, I mark a centerline around the perimeter of the bait, and work to that, sanding on an oscillating belt sander until the shape looks good to me. Of far greater importance to me is that the lip goes in square to the blank, and centered, and that the line tie, hook hangers, and ballast holes are centered, too. If you think about it, only the top of the head and the back are really disturbing the way the water passes over the crank, and I can get them even enough by eye. If the belly is even to my eye, it's close enough, too. Your eye will tell you if it's too far off. Trust it.
-
That's a question you should probably ask the Solarez people directly. I know that fiberglass with resin will absorb water, so it's sealed with gelcoat. Maybe the molecules in whatever is offgassing from your baits is smaller than a water molecule, so it passes through the Solarez.
-
Turns out it's a great action for swimbaits. Who knew???!!! Butch Brown is now sponsored by Deps, and they're making an S swimmer for him that he modifies and sells on his own website. He sticks big fish wherever he fishes.
-
I think you may be remembering Wicked Paint's 4011 reducer. It helps with tip drying. You can also try just thinning your paint a little with water, until it's like skim milk.
-
I found that one joint swimbaits move in a lazy S motion, like the S-waver. The only way to get them to have more action is to add a lip.
-
Famous last words! Hahaha
-

Powder Paint - Base Coat And "tapping" Additional Colors?
mark poulson replied to gonfishn's topic in Wire Baits
I powder coat the base colors for my football jigs, and then use clear nail polish with glitter in it for accents. -
If you want good knockoffs, Predator Bass has them. He won't sell junk.
-
I remove the paint on my repaint lures by hand, so I can save the eyes if I want to. If you use a blast cabinet, I doubt they are savable. If you are doing it by hand, and you're worried about messing up the bait, use the blue tape disc method. Cut a small piece of blue painters tape that will cover the eye completely, press it down over the eye and use something with a dull tip to press it into the little gap around the eye. If the eye is big enough, I use my fingernail. For smaller eyes, I use a fine older screwdriver with a rounded edge, not a sharp edge. After I've got it pressed into the gap really well, I use an exacto knife to trace the perimeter a few time. Keep going around the perimeter with the blade, and it will cut the tape. That blue tape is not that strong. You will be able to lift off the excess and have the eye covered. The tape is easy to remove after you've finished your painting. Just go slow. I do that when I am worried that the eye is on too tightly, or it's an eye that I like and can't duplicate.
