


mark poulson
-
Posts
14,726 -
Joined
-
Last visited
-
Days Won
364
Content Type
Profiles
Articles
TU Classifieds
Glossary
Website Links
Forums
Gallery
Store
Everything posted by mark poulson
-
In my experience, oily woods, like teak, mahogany, and the Malaysian hardwoods like Epe are the least likely to be affected by water intrusion, because their cells are already full of oil. Redwood and cedar are used for exterior woodwork on houses because they, too, have some kind of oils in them, but not as much, so they are water-resistant and rot-resistant, but not waterproof or rotproof. I was able to make a wood lure that was very water resistant out of vertical grain douglas fir by using only oil-based sealers, paints, and topcoats for the entire finishing process. It was a one piece lure, so there were very few vulnerable spots for water to enter, and those were well sealed by the glue that I used to lock in the line tie and hook hangers. I could never keep water out of jointed wooden lures. Paint schemes that fail due to water intrusion first show bubbling and delamination. Eventually, the wood swells, and then shrinks and cracks as it dries. Wood's cells are shaped like honey combs, with flat sided walls. When wood absorbs water, the walls of the cells are stretched and belly out, forcing them away from the adjacent cells. When the wood dries, the cell walls collapse inward instead of just staying flat, and that's why wood shrinks and cracks once it's been soaked and then dried out. Kiln drying is a slow process of removing water from wood without collapsing the cell walls. Because it's done slowly, the cell walls retain their flat geometric shape without collapsing. If it's done too fast, you get what's called case hardening, and the wood cracks. Even properly dried wood may still crack at the ends of the board, unless the end grain is sealed first with some kind of waxy sealer, because end grain has been opened by the act of cutting the board to length. Short story long, water swollen lures are ugly, and no one wants to show them off! Hahaha
-
Seems logical. Thanks.
-
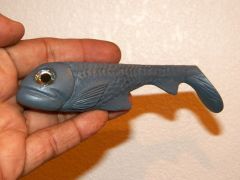
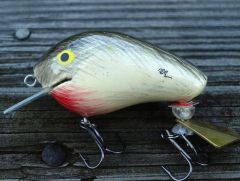
Those are some beautiful baits!
-
Pop, I have no idea why some use flat eye hooks, and some use the other. Maybe it has to do with how the hook is held when the offset bend is made. Another of life's mysteries, I guess. Hahaha
-
I don't pour spinnerbaits, and I've never seen that Do-It mold, but is there some kind of a way to silicone permanent magnets to the outside of the mold to hold the hook assembly in place?
-
If you use a true Forstner bit to drill your eye seats, you'll wind up with a flat surface that self-adhesive eyes sit on with no trapped air bubbles, or, at least, not enough to cause bubbles. Look for them here: http://woodworking.rockler.com/search?asug=&w=forstner%20drill%20bit&pcrid=181290855&utm_campaign=Tools&ne_key_id=bXNRkTbGt&utm_medium=cpc&utm_source=bing&mkwid=bucH8TsZk&ne_ppc_id=bing&utm_term=forstner%20drill%20bit You still have to check that no bubbles appear after you've coated the lure, but you'd need to check it anyway once it's on the turner. With a flat seat, there's nowhere for air to get trapped. You can also put a drop of super glue onto the eye seat first, before you place the eye, to seal the wood, and close any tiny recesses that might trap air.
-
I've done that using a drill press. With the bit inserted in the chuck and locked down tight, and with the drill press OFF, I lower the bit down to the depth I want the eye socket to be, and then lock it in with my depth adjustment. Not all drill presses have these, but it keeps the bit from grabbing and going too deep. Drill bits like to grab aluminum. Then I raise the bit back up with the spindle handle, turn the drill press ON, put the mold back in position, and SLOWLY lower the bit down until it begins to remove material. Don't rush, and use a sharp drill bit. Do a test hole first to make sure your depth is right. You can do it on a part of the mold that is smooth and away from the actual jig location. The depth adjustment is critical, so, if your drill press has one, use it. If not, figure out how to stop the bit from going too deep. You can build up the bed under the mold with layers of wood, plywood, and shims. That works, too. Take your time, and get it right the first time. Molds are expensive.
-
Thanks go to JR for sharing his "secret" with me and the rest of TU.
-
Wood is unstable, and swells with any water intrusion. That's what makes sealing the wood completely before you paint so important. Once water gets in anywhere your paint scheme, and maybe your lure, are doomed. I never found a method of sealing my wood baits that was foolproof, so, when JR Hopkins recommended switching to AZEK PVC decking and trimboard, I made the switch and have never looked back. The only wood I consider using now is balsa for small cranks, since I haven't found anything that matches it's buoyancy, and the action it gives crankbaits.
-
Man, that wire has more kinks and twists than my first girlfriend. Boy, I miss her!
-
I have not tried this, but would heating one color hotter make it blend into the other color more at the seam, and make it more pronounced/dominant?
-
Glad to hear your "repipe" went well and that you're on the mend. Welcome back!
-
Everything I know about making lures I learned here on TU from other members, so I'm happy to "recycle".
-
If you add white first, and then mix your brown, it will make your color opaque.
-
When I mix bondo, I add the red hardener a little at a time. The darker red the bondo mix, the faster it sets up. Also, the more hardener you add, the more brittle the mix becomes. I don't mix up a lot at a time, because it sets too quickly for that. I shoot for a light pink color. I try and leave it to set for at least half an hour to be sure it's hardened, and then I sand it down and add a drop of runny super glue to make it stronger. I leave the wooden toothpick that I use to mix the two parts lying in the unused portion. When it's hard I know the bait is ready, too. One thing that helps me in mixing is I do my mixing on a piece of tape on my work bench. I put the first part in one spot, and the hardener next to it, and then add hardener until the mix looks right. Once I'm done, I peel the tape off and throw it away. I do that for mixing D2T too. Someone here, I think it was Riverman, suggested mixing that way years ago, and it's made mixing and cleanup a snap for me.
-
It's been so long since I used Famowood that I didn't think of using it for lures. I seem to recall that drying time depended on thickness, since it dries by solvent loss, not by a chemical reaction like with bondo, and that deep depressions tended to shrink and need a second coat, and take a longer time to dry. Certainly longer than 15 minutes. I'm sure Famowood will work for filling wood for sanding, and shallow dents or depressions, but I doubt that it would have the same strength as bondo, especially for larger areas. I know bondo is both strong and totally waterproof, since it's used for auto body work, too. Plus we use bondo a lot in exterior and interior wood restoration, so I have easy access to it.
-
RTV stand for room temperature vulcanization. The 100% silicone caulk you buy in tubes is an RTV. It is just not as soft and flexible as the Alumilite stuff. Depending on how thick you make it, it takes at least 24 hours to set, straight from the tube. Adding a few drops of water to the 100% silicone makes it set up faster. It can set up in as little as ten minutes if you mix in the water well. Husky posted a tutorial here on RTV silcone molds. Use the Search feature, and you'll find it.
-
I premix my glitter into my salt, and stir them both in at the same time. The salt keeps the glitter separate.
-
I used solvent based Famowood for years when I built cabinets. It was great because it didn't shrink, and took stain well, and it came in lots of colors. If you're using it as a filler only, but want it to be stronger, you can try adding a drop of runny super glue to it after you've sanded it to shape. I do that with Bondo and it makes it much harder and stronger.
-
Whichever brush you pick, I'd recommend getting the C cup instead. The larger cup lets you put in more paint if you want to, so you can do bigger paint schemes, or multiple baits with the same color. You can still shoot just a drop or two with it, but you have much more versatility with the C cup.
-
 I second that motion!
 -
 What did you pour them out of?
 -
 Really nice!
 -
Bill, Do Hilites migrate to the outside of the bait when they're poured, or is it just a sheen, and the Hilite is distributed throughout the whole bait, not just on the outside?
-
Wow, you're good! There's a stencil making company that comes on here and posts from time to time. I think it's Stencil Momma. Use the search feature and look for stencils.

