


mark poulson
-
Posts
14,726 -
Joined
-
Last visited
-
Days Won
364
Content Type
Profiles
Articles
TU Classifieds
Glossary
Website Links
Forums
Gallery
Store
Everything posted by mark poulson
-
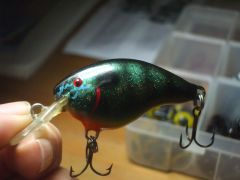
Look up Jeep's photos in the gallery. He's nailed pike colors.
-
I use 1/4" lead wire, glued into drilled holes, to ballast my baits. For me, it's fast, easy, and clean. The wire weighs approx. 1 gram per 1/8", so it's pretty easy to get the right amount of ballast once I've done a test float. I put different weight split shot or egg sinkers on the tines of my lure's trebles, until I get the bait to float and/or sink at the angle and rate I want, and then measure out the same weight in the lead wire. If it's a lot of wire, I cut it with a drywall knife into smaller lengths, and drill multiple ballast holes in approx the same position that the test weights were located. I glue the weights in with a drop of crazy glue over the top after they've been inserted into the lure. I drill 1/4" holes, slightly reamed, so the weights fit snug, and I've never had one come loose. I have to drill the lead out if I want to remove it.
-
-
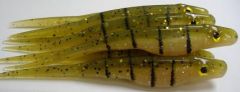
 It should get hammered. Fishing the same lure side by side with my buddy, but mine having fine multicolored flake, I outfished him 6-0 before he made me give up my secret!
 -
Beautiful. You do really nice work.
-
Solvent based sharpies will dye soft plastics, but they do bleed. I was told that there are soft plastic paints available. I'd look at Lureworks, Lurecraft, and some of the other online suppliers, to see what they offer.
-
I would think that it would be pretty simple to make a test piece, and put it in the microwave multiple times. Given the problems with metal dividers, I would sure try other alternatives. I don't use a divided cup, and, in fact, since I found NuPor silicone cups, I don't even use pyrex any more, but I have made silicone molds. They stand up to heat, even the heat of a soldering iron, with no sagging. I would think the silicone would hold up to a microwave, especially if it were sandwiched between two pieces of margarine tub top plastic.
-
I also buy scale fabric (I think it's called tulle), the stuff that's used for wedding veils, from a fabric store. I don't wash it. I find it actually gets softer and easier to use when it has been used once and has a coat of heat-set airbrush paint on it. I use it until the openings start to get too small from paint buildup, and then I change to a new piece. I haven't tried fabric softener yet, but I will, now that it's been suggested.
-
I hope your health insurance covers that.
-
Great! Now we have two mad scientists colluding! Since you guys are both overseas, I would expect Homeland Security to get involved soon.
-
No, you're hysterical!
-
Just what we need here, someone who actually knows what they're talking about! Welcome back.
-
Could you use clear silicone to make a divider? I'm thinking of maybe making a template out of smooth plastic, like a piece of milk jug, coating it with the clear seal, and covering it with another piece of smooth plastic to get two smooth faces. Once the silicone is set, trim the silicone to the shape of the template, remove the template and backing, and seat the silicone divider in the pyrex with more silicone? Or maybe even leave the milk jug faces on it, if they will take the heat, so the melted plastic is easier to clean between pours. You could make it as thick as you wanted it, but, as long as there are equal amounts+- of liquid plastic on each side when you fill it, wouldn't that hold and work?
-
 Thanks Jim. Too bad about your son needing more baits. Those are some thoughtless fish where he fishes!
 -
Since you're repainting store bought baits, if they're plastic, I'm thinking you don't need to prime them again. I just scuff them with a scotch brite pad, or dip them in acetone, and put on my airbrush paint base coat and scheme. If they're wood, I'd probably do the same. But if you think you need a primer, here are my suggestions. I wonder if you'r putting it on too thick? The primer I use, a rattle can Rustoleum primer, says light coats, and recoat anytime in the first hour. I do three coats, letting them dry for ten minutes between coats, and then hit them with my hair dryer to accelerate the drying of the paint. Since it's a solvent-based paint, I want all the solvent driven off before I start my paint scheme. The can says wet sand when dry to the touch, so I wet sand them between the second and third coat, and hit them with the dryer again. Then I let the hang overnight, and paint the next day. If I try to paint the same day, I sometimes get blisters where the solvent hasn't been completely driven off. If the primer is going to do something funny, like crack, it will do it when I hit it with the hair dryer, but, so far, that hasn't happened. Every paint manuf. has a slightly different formula for their primer, so this might not work for you, but it's how I do it. Another thing that may be happening is that the original paint and top coat are what's cracking. Maybe they react to your primer, or to the heat of your airbrush paint drying process. The only baits I've had crack like that are some older Poe's cranks, that had an epoxy of some kind on them already that cracked when I heated it with a hair dryer.
-
Thanks Dave. That's a good thread. I'll be looking for some 304 wire to try.
-
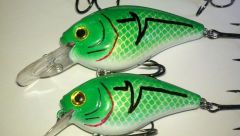
Dieter, That bait looks great! It should be a blast to fish. I just caught my first frog fish of the year a couple of weeks ago on the one local lake that has emergent grass. It is, by far the most explosive, exciting strike there is. A more durable bait that can be fished over the grass is a smart idea. I can only imagine what my soft plastic frog would look like after a pike ate it! Good luck with your new designs. I can't wait to hear how they finally turn out. Mark
-
A left handed engineer! That explains a lot! That's a neat wire twist setup. What kind of wire are you using? All the sst wire I get still has some temper, so it's a bear to twist.
-
What kind of material are you using to make your baits?
-
 +1 If the "superhuman" fishes it, it must work. Good job.
 -
 Outside the box, for sure. I like how you think. Now someone has to come out with portable defib. unit for bass boats!
 -
I've used both sst twist wire and sst screw eyes. For me, if the lure body material is strong enough, I use the screw eyes, because they are faster and easier. I drill a pilot hole that's the same diameter as the screw shank that's left after the threads have been cut. I run the screw eye in, to cut the threads in the wood or PVC, and then run it back out again almost all the way. I coat the threads with brush on crazy glue, and run the screw eye back in, using any glue that has built up around the entry point to "seat" the eye, so it is locked in whatever orientation I want. I've never had a screw eye turn, or back out, using this method. For balsa baits, I run the screw eye in and back out again completely. I use a drop of runny crazy glue to reinforce the wood threads in the hole that the screw eye cuts before I run it back in with the brush on glue, which is thicker and takes longer to set. When I use twist wire, I use the regular twist like in Hillbilly's video. The only time I had one "unscrew" was when I used 5 min. epoxy to seat it. After I switched to D2T I never had another failure. I have to admit I have never done the kind of pull testing that Vodkaman and Diemai have done. I'm too lazy. I know that the screw eye, once I've installed it, requires a pair of pliers to break it loose so it can be unscrewed. So I know that the connection is solid. Even with balsa baits, by reinforcing the wood with crazy glue, my eyes are locked in. I don't have muskie or pike in my SoCal lakes, so I can't say if my method would work for them. But I suspect that my line would break before a screw eye or twist wire would pull out.
-
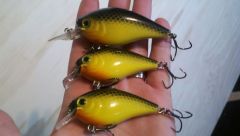
Those look great. Good enough to eat! What do you use to make your stripes and dots?
-
I leave my basic paint pressure at 35psi. It would be helpful to know what model Iwata you have. Assuming you have a dual action gun, it comes with trigger control of both air flow and paint flow. Moving the trigger back will allow more air flow, and pushing the trigger down as you move it back will allow more paint flow. If your brush also has a valve under the nozzle, that's for additional air pressure control, so you can turn the pressure down there at the gun for fine detail work. The knob at the ass end of the brush is to control the amount of paint by limiting how far the needle can be withdrawn, so you can reduce the amount of paint if you're doing detail work. It's no Graco gun, for sure. But it's a lot more fun. Fill the cup with water, and practice spraying on a piece of newspaper, so you can see how it works without wasting paint, or having to clean the gun afterwards. Once you feel relatively comfortable with the mechanics of the air brush, you can move to trying some test painting with real air brush paints, like Createx, to see how the paint covers, how heavy a coat you get before it runs, and how to actually clean the gun afterwards to get the paint out. Learn how to heat set your paint, and keep the coats light. And set up a cleaning station next to where you paint, so you'll incorporate a cleaning routine between colors, and a thorough cleaning after each paint session. There are a ton of threads here with "how to airbrush" as the subject. Try the search feature. There are also some good free "how to" videos on some of the sites that sell air brush products. Good luck
-
Jeff, I taught my three boys to drive, and my older daughter, so I should be used to this by now. But it never gets any easier. Especially with this child, who is strong willed and stuborn. I wonder where she got that from? She's a careful driver so far, and pays attention, so I am sure she'll make a good driver eventually. I just hope I live to see it.
