


mark poulson
-
Posts
14,726 -
Joined
-
Last visited
-
Days Won
364
Content Type
Profiles
Articles
TU Classifieds
Glossary
Website Links
Forums
Gallery
Store
Everything posted by mark poulson
-
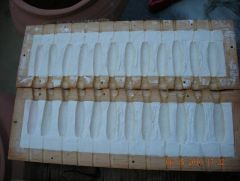 I made this two years ago from POP. It pours really well.
 -
I would guess that the fish eyes are from some kind of contamination, like finger prints, and the lumpy finish is from applying it too thick. The soft surface sounds like you either didn't measure your ingredients right, or you didn't mix them well enough. You can try wearing cheap latex gloves to handle you lures while you're painting, and after you've painted them. Brushing out the epoxy, and cleaning your brush back into the mixing cup, will help to thin your coats. I usually measure my two parts by laying down two parallel lines onto some tape I put onto my workbench for mixing when I'm mixing D2T for gluing. For top coating, I do the same in the bottom of a small salsa cup, and mix it with a paper clip wire, being sure to get into all the edges of the cup so the material is really well mixed. I use a hair dryer to get rid of any bubbles that occur when I mix. All of the stuff I just mentioned I learned here from other TU members, and from making a shload of mistakes. And I
-
I think it's fine the way it is. It's very well done. I find that craw cranks, like most of the cranks out there, are "impressionist" at best. They don't have all the legs and claws that the real craws have, and most are retrieved in a direction opposite a real craw's actual swimming direction. Think reaction lures, not dead stick representations. My favorite prespawn crank is a square bill wiggle wort that's in a reddish craw pattern, that dives to 4' max. It doesn't have much detail, but it gets bit all the time.
-
All the unfinished blanks I've used from Predator Baits work well.
-
I just hit the lure with the hair dryer on low first, for about 10 seconds, to "dry" the paint, and then for another 10 seconds on high, to create the cross link bonds. I don't really know what temps. are needed to achieve the cross link, but this works for me. Just be sure to use thin coats, and dry and set each coat, before you add another. Thin coats dry more thoroughly, and you'll have less problems with uncured paint and delaminating down the line.
-
I replaced one of the broken DT16 bills with one I made from 1/8" lexan, and anchored with D2T epoxy. It feels very solid. I traced the original bill, cut it out on the bandsaw, shaped it with the occilating belt sander, and also used the sander to thin the leading edge. I use sst welding wire for the line tie. This was my first time putting a line tie in a bill, and I used the dowel hole from the original bill to anchor the wire back into the bait. All of the ideas came from here, so thank you all. I just finished it, so I don't know how it swims yet. I'm taking it out Thursday for a test drive. I posted pictures in the hardbaits gallery. I checked some new DT16s that I have, and they also have strange looking clouding around the line ties. I suspect whatever process they use to either manuf. the bills themselves, or to anchor them, heats the metal line tie, and results in stress in the plastic bill, since that's the point where they all break. Is it designed obsolescence, or just arrogance, that keeps Rapala from correcting this obvious defect?
-
 Sorry for the multiple downloads, but I can't figure out how to load them as a group.
 -

-

-
 I used 1/8" lexan and D2T, with a sst welding wire line tie that runs back into the dowel hole of the original bill.
 -

-

School Of Foiled Bluegill_1.JPG
mark poulson commented on Big Bass Man's gallery image in Hard Baits
 They all look great! Kind of makes me want to heat up the frier.
 -
I use a meat injector. It works for me because I only pour for myself, and only pour four ounces of plastic at a time. It gets hot, so I wear leather work gloves. It has an O ring on the end of the plunger, so I use spray pam to lube the cylinder before each pour. I made my own injection molds from POP, and made the spru holes fit the needle of the injector. I also cut off over half of the needle, so it's about 1/2" long, and that's plenty for me. My POP molds are cast in wood box frames, so I use the wood to make the spru as big as I like. Having extra plastic in the spru is important so there is a reservoir of hot plastic to be sucked down into the bait as it cools and shrinks. If I were starting over, I'd buy one of the hand injectors from Basstackle or Bears, and adapt my molds for them.
-
152 is right. You need to be sure and use oil based scents if you're soaking your salted baits. Water based scents will cause the baits to swell if you've poured them with salt.
-
I made a turner like Rotorhead described. Here's a lin to a picture of it from my gallery photos. I hope it comes out. If not, it's on page six of my gallery. http://www.tackleunderground.com/community/media/3651/med_1_shop1.jpg
-
"Abandon hope, all ye who enter here". "One foot in the grave, and the other on a banana peel". I could go on, but I think you get my drift. I hope you have a really good prenupt!
-
Like the old lymric goes: "In days of old, when knights were bold, and condums weren't invented, they stuck a sock upon their ____, and babies were prevented". Old socks do come in handy.
-
Hahaha!
-
I've caught fish on both. Good baits.
-
What temperature do you set the oven to cure them, and for how long?
-
I found that, for round worms like senkos, I needed a two piece mold.
-
Good idea. I just got a new package of pocket spirals for the new year. One will definately go into the garage, hung by a piece of braid above the work bench.
-
You could glue scale cloth onto the bait, and then foil over it. I've seen it done on this site, but I don't remember where.
-
Why Do You Leave The Lip Off Of Your Bait Until Last?
mark poulson replied to shaners's topic in Hard Baits
Rofish brought up the point I was thinking of for not gluing in a lip before sealing. With wooden lures, water intrusion is death. There are many other ways to seal wooden baits. This is just the method I use. But, whichever method you use, sealing before gluing in the lip is a very good idea. I do not make many wood baits any more, but when I do make a wooden bait, I cut the lip slot, and all the hardware holes and ballast holes, finish shape the lure, and then seal the wood as well as I can. I don't mind masking the lips, so I glue the lips in after I seal the bait, and then paint and top coat. By sealing the lip slot before I glue in the lip, I get another layer of protection. I use runny crazy glue to seal the lip slot, the ballast holes, and the hook hanger and line tie holes, because it really penetrates and actually makes the wood stronger. -
Really clever idea! Thanks! I might even get organized enough to make a notebook of my colors, instead of constantly having to "reinvent the wheel".