-
Posts
60 -
Joined
-
Last visited
Content Type
Profiles
Articles
TU Classifieds
Glossary
Website Links
Forums
Gallery
Store
Everything posted by GCD
-
I buy my lead online at rotometals, look in the bullet casting section... they have quite a few different mixes with alloys like tin and antimony. Rotometals is a reliable dealer with good prices, and you can get free shipping on orders of 20 lbs. or more I believe. Pure lead is the easiest to work with, but isn't as durable as the harder leads. I started out using pure lead but switched to the "hardball" mix for a more durable jig. I've never pour the ultra minnow mold so I can't help with that.. but if Cadman says it's best to use pure lead for that mold, that's what I would go with!
-
I wouldn't use any masonry products to mold hot lead! Masonry products inherently retain a certain amount of the moisture they are mixed with to cast and will explode when exposed to high heat! If you must try it, use a fireplace grade mortar... but it will have to cure for months before you can pour hot lead into it. The majority of masonry products will shrink and crack when curing, which is another disadvantage for this application. There other more suitable materials for making lead molds, like high temp resitant silicone...
-
I use the toaster oven method on my jigs and get paint on the hook shaft as well, most of the time it doesn't matter because the plastic grub will cover it up... but for the jigs that it does matter, I simply scrape it off with a utility knife... takes about 30 seconds to do a hook.
-
If you're pouring mostly crappie jigs, I see no need for a 20 lb. capacity pot. I have the Lee 10# bottom pour and it does an excellent job pouring 1/16th-3/8th oz. jigs and I can pour for hours on a full pot of lead! The 20# pot will take longer to heat up at startup and longer to cool off at shutdown and costs nearly twice as much as the 10# pot! A bottom pour pot is a great choice for pouring small to medium jigs!
-
-
Yeah, Crappie+cold water= pink pink pink!!! Hot pink, shocking pink light pink, bright pink... you just can't go wrong with pink in cold water for crappie! I like pink and white or pink and black.. glow pink works well on cloudy days!
-
-
-
-
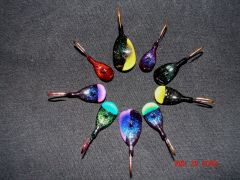
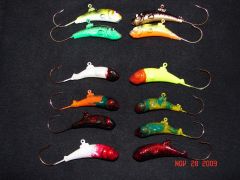
I don't use an airbrush, but I do some 2 toning. I've just recently started using the brush and tap on method, but have a long way to go with that (T&E!) I do a lot of layering, multiple coats of different colors to make a unique color. I'm going to post a couple pics to the gallery in a little bit, check them out if you have time.
-
The hooks with the eyes inline would be for a swimming jig and horizontal presentation, the ones with the 90* bend are for a vertical presentation... more ore less.
-
Heya Dave! I'm a lead head and powder addict as well! I'd be interested in seeing some of your work! I've only been doing it for a couple years myself and learn something new just about every time I fire up the furnace or toaster oven. Welcome aboard! Glen
-
Hey B, It sounds like you may have more of a temperature problem than a paint problem to me, I don't know what your normal heating procedures are... but I've found that the toaster oven method works best for me. I've tried the plumbers torch (disaster!), and heat gun... the heat gun is too tedious for me. I can heat 40 jigs in my toaster oven at once, but usually just do 10 at a time. I've found that 325-350 is ideal for alomst all colors (except white it requires a lower temp between 300-325). The white base coat is a good suggestion, but be sure to cool your jig and then cure it before adding a top coat... or you may have dripping and bubbling problems when you try to apply another coat! I've found that a base coat of a flourescent color of the same color as the glow will work much better (in your case green) I apply a base coat of flourescent and then cure, then apply 2 coats of glow and then cure again. The glow really glows well and is the color you desire! I hope this helps!
-
I have found a paint stripper called Citrus Strip (available at Wal-Mart in the paint section), it has no noxious fumes and is safe to use indoors. I had some problems when first starting out powder painting and found that I can put the painted jigs in a bowl of the stripper and let them set for 24 hrs, then just hit them with a sharp stream from a garden hose and they come out clean! I still use this method on some of my "experiments" and some of my earlier jigs that I did... before my ability improved.
-
Have you tried spraying the screw with penetrating oil and letting it set for a couple days, then heat the pot up and try to remove it? ... as far as getting all of the lead out of the pot with a spout that doesn't work, cut the tops out of a bunch of aluminum soda cans and clean and dry them thoroughly... then, using a pair of welding gloves to lift the pot very carefully pour 1 1/2 -2 inches of hot lead into each can until you empty the pot. After the lead has cooled you can cut/tear the aluminum can away from the lead and have a nice round pug that will fit back into your pot when you get it fixed!
-
Powder painting requires a certain amount of trial and error... some folks like to call it research and development. ...but once you get the hang of it you can really create some good looking jigs!!! What kind of problems did you have?
-
I like the Daiichi Bleeding Bait Hook Sabiki rigs, you can get 3 rigs for $6 at Cabelas. I prefer the glow head to the red head. I use the #4 and #6 hook rigs, they're very strong for their size!... I landed a 15# Flathead Catfish on one! As mentioned above, check you local regulations for the numer of hooks you can legally use! In Tennessee I can only use 3 hooks at a time so I cut the rigs in half, in ontario Canada I can only use 4 hooks... so I cut the top and bottom hook off. Here in Alabama I can use all 6 hooks legally! I mainly use these rigs for Crappie... but don't tell anybody... it's my secret!
-
Yes it does! I got mine at Wal-Mart in the ink pen and pencil section, the chisel tip is the biggest Sharpie they make... almost the size of a dill pickle.
-
I use a red chisel tip Sharpie magic marker to brighten up my red hooks after powder painting and curing. It works well and only takes a couple of seconds to do a hook!
-
I have the same thing happen with my Lee 10# furnace. I put an empty tuna fish can under mine at startup and watch it closely for the drips to start. When it starts to drip I use a screwdriver in the slot on the plunger and wiggle it left and right and can get it stopped before a 1/2 oz. drips into the can. The instructions for the Lee melter advises against striking the plunger! Always remember to secure your furnace to your working surface!!! I have drilled 2 holes in the base of my melter and secure it to my table top with 2 screws before startup. this way I can apply the pressure need to manipulate the plunger when the dripping starts. 10 lbs. of spilled 600+*F lead would not be good!!!
-
You may want to look at these vids for a start. Welcome to TJ's Tackle Click on the powder paint for the vids Hope they help!
-
I've also found that temps between 325-350 are optimum for curing and painting! I use the toaster oven method with an internal thermometer and cure my jigs for 15-30 min., sometimes longer. Also when painting, I'll preheat my oven and jigs to 350. Then as I open the oven and retrieve my jigs for dipping, I'll return them to the oven and grab another one for dipping. This will lower the oven temp as I usually paint 6 jigs at a time, after the 6th jig, I leave all the dipped jigs in the oven until the temp returns to at least 325. It makes for a real nice finish and you don't have to worry about the jigs getting too hot... reduces dripping too!
-
I use them, I believe they're considered an "overcoat". A white base will help, and I like to cure my base coat before applying any other coats. I've gotten away from using white as a base coat as much as possible because I find it runny/drippy. For the yellow, try a fluorescent chartreuse base coat. Here are the cure times for most pp colors: White - 10 minutes at 375 F Yellow Chartreuse - 10 minutes at 392 F Green Chartreuse - 10 minutes at 392 F Blaze Orange - 10 minutes at 392 F Black - 10 minutes at 350 F Hot Pink - 10 minutes at 392 F Flame Red - 10 minutes at 392 F White Pearl - 13 minutes at 325 F Clear - 12 minutes at 340 F Bright Green - 10 minutes at 392 F Yellow - 10 minutes at 400 F Red - 15 minutes at 350 F Purple - 15 minutes at 385 F Glow Overcoat - 10 minutes at 375 F Brown - 12 minutes at 390 F Blue - 15 minutes at 375 F Silver - 10 minutes at 375 Gold - 20 minutes at 375 All Glow Colors - 10 minutes at 375 F All Transparent Colors - 10 minutes at 392 F Watermelon - 12 minutes at 390 F Pumpkin Brown - 12 minutes at 390 F Hope this helps!
-
Him: What's for supper tonight hon? Her: Red and white 2 ounce jigs! Him: Mmmmmmm! my favorite!!!


