-
Posts
3,867 -
Joined
-
Last visited
-
Days Won
23
Content Type
Profiles
Articles
TU Classifieds
Glossary
Website Links
Forums
Gallery
Store
Everything posted by diemai
-
A great challenge , ....good luck with it ! Greetz , Dieter
-
Here I am , ....... ! I've made a few of these before in different sizes(approx. 3 1/2" to 8" , if my memory serves me right) , even some sinking ones of small size . Though the design is said to have a very good appeal on local pike(due to its extremely rolling and canting swimming action), I'm not too fond of the "Grandma" , .....I'm most likely casting from the bank and it's casting performance is just too poor for my liking . But if one could get closer to the hotspots in a boat or for trolling , that lure might be much better suited . Due to the from the first poor casting performance I would not use any heavy metal lips but go with Lexan , as this way a bit more ballast could be placed into the belly possibly improving the casting performance a little bit . Also you need to chose your timber material accordingly to the desired lure size , ......would be rather unfavourable to make an 8" bait out of buoyant balsa , ...you'd have to overload it with lead to achieve the approximate waterline at rest indicated by the dotted lines in the sketches shown in your link(been having these very sketches in my lure sketch files for many years) , ......too much belly weight would be counterproductive , as it would decrease the rolling/canting action , in this case one would have to tinker a lot in attempt to put a certain share of the entire ballast into the back to get back to the desired action . I used abachewood for the smaller models , teakwood for larger ones , beechwood for my small sinking "Grandmas" , .......to play around with the final buoyancy of your blanks , you may vary the given thicknesses for about +/- 10% , ...won't change the action too significant , .....but keep the sideview outline and lip/line tie configurations accurately . When going thru-wired , make sure to have the internal wire form pass a bit upward inside of the body , not too low towards the belly , ...just to gain enough space for weightholes drilled into the belly . BTW , ...in that link it is stated , that sketched ballast positions could possibly vary . To increase or decrease the roll a bit , you could also alter the roundings of back and belly , ......a full radius provides more action , ...just breaking the edges causes a little less of a rolling and canting action . Don't know , if you have already come across , ..but here's some info on the "Grandma" as well : http://www.lurebuilding.nl/indexeng.html Click on "crankbaits" on left column , after click on the symbol above "twitchbaits" and also check "articles" . All in all "Grandmas" are pretty much easy to make at home , ...an all-time classic for the lure hobbyist , I'd say , .......but still , ...I'm not too fond of them , ...might cast better utilizing casting gear , not spinning gear as I most likely do . Good luck , Dieter
-
Hi , folks , I have a bootleg copy of that clip on my DVD shelf for a few years , but now finally the copyright owner , the German angling magazine "Der Raubfisch" put it out on their own YouTube channel , .......so free to watch for everybody now . Being made for that magazine exclusively , the clip is only available in German language , ....but I've just thought to put it up in here as well , as it still provides some good insight into the manufacturies of "Rapala" , "Nils Master" and also "Turus Ukko" , ...all located in the Finnish town of Vääksy . Bass anglers might not be familiar to the latter two lure brands , but I've seen all the three brands in American Musky catalogs before . If you'd need any translation on single sequences , just drop me a line in here . Here also is an American made clip , but much shorter footage , displaying the Rapala works only : greetz , diemai
-
I'm painting my lures with handbrushes nowadays , so quite a bit of primer coat and paint gets onto the hookhangers , .....if too bad , I'd scrape those paint remainders off with a carpet knife(Stanley knife)having a pretty blunt blade . But after having applied a few epoxy topcoats the eyes most likely get clogged up with epoxy as well , so I'd drill the epoxy out with my Dremel and small drill or router bits , my Stanley takes care of the rest . But I've read , that this could be unfavourable when done to the line tie , as those little nicks on the wire eye caused by the knife might wear out your line faster leading to line breakage , .......I know , that many of you fellas over there tie on your lures straight to the line , .......over here we always use some kinda leaders connectect with snaps , as toothy pike are almost everywhere , ......so this would not be an issue . When I still used to spraypaint my lures with rattle cans , I've masked the eyes with pieces of approbiate vinyl tubing , ...simply cut off tubing pieces of matching length and fuse one end together by heating it up with a lighter or candle flame and press it together with pliers to bond , ...after just stick the tubing piece over the wire eye to mask . These masking tubing pieces are re-usable , when scraping off all lose paint before next use , ......to make the initial cleaning easier , one can put all previously used tubing pieces into a small tin or plastic container together with some screws or nuts , etc . and shake for a while , most paint would come off this way . Please check out this video of mine , as from 4:22 on you can see some sequences displaying such masking tubing pieces : When done painting , you can carefully separate the tubing with the Stanley knife , .....but for topcoating I'd leave the eyes plain , as I was always concerned , that the epoxy topcoat might crack up at the transition to the tubing to be separated . Greetz , diemai
-
Very nice video , ...you might want to put it up in the "member submitted tutorials" section as well , ....tight lines , diemai
-
@ HAWGFAN ......looks like you've really nailed it , ...a very beautiful and obviously functional lure ! Greetz , diemai
-
@ vodaman Sounds interesting , Dave , .......I hope , that you'd succeed with your design and you'd find a manufacturer . I recall , that during the 1960's or 1970's there were some plugs around made of a softer plastic material , they were named "Burke Flex Plugs" , ........but it was not that soft as the plastic material of present days , not by far , .......as it seems , the material was not chosen for action reasons , but just to avoid the plugs to get damaged due to missed casts against hard surfaces or by sharp predator's teeth . @surfk9 Looking forward to see your refurbishing work , Michel , ....and I'm sure that you would not be disappointed with these vintage plugs , as they are definately still capable of doing their job , even in present days . @ scrubs Bill , I had caught small topwater pike on that spot before , lurking underneath the overhanging trees , ...but that particular day was just another "no-go" ! Greetz , Dieter
-
@ vodkaman Just thought of it , 'cause I had seen a Japanese crankbait in a catalog issued by a large local tackle supplier , ...this one is a shallow diver or even a wakebait with a downward pointing , squarish lip sporting two holes located closer to the belly of the lure . In the catalog describtion is said , that these holes would take some pressure off the lip , ......hence I grew that idea to try it on my own reject lure as well ,...... it's just about reducing the lip's plane at a given portion , .....as a side effect such holes would also create a different vortice pattern in the water , I reckon . Sadly I do not remember the name of that lure right now , got the catalog on the job , going again early next morning to accomplish my weekend shifts , .........if I'd remember , I'd check back and then I'd try to find a link containing a picture . Greetz , Dieter
-
@ Jaw You saw in that video , that there is a small lure , that would not swim as well , ...I guess , this is because the lip plane above the tow eye(between tow eye and body) is too large , in result it somehow overrides the water pressure's force applied to the lower portion of the lip(the part beween line tie and tip) . If I would have placed the line tie somewhat more towards the body the equotation would have turned out in favour of more force applied onto the lower portion of the lip causing the lure to break out sideward and the straight line pull direction getting it back on track , in result the desired wobble would have occured . I haven't tinkered on that lure so far , ....I'm thinking to drill some holes into the upper portion of the lip to reduce it's plane there , ....haven't experimented with holes-in-lip so far , so I'm thinking to take a chance on this one , .....I can only learn , I reckon . So the situation is a little different to your own lures that wouldn't swim , ......but I agree with BobP , that it is always difficult to successfully tinker on the lip to finally save a lure from being a reject . @ vodkaman , @ Tony maxwell Thanks a lot for your support , gents , I really appreciate it ! Greetz , Dieter
-
These vintage plugs surely are time proven lures , and it would be well worth refurbishing your find . I even make knock-offs of some vintage models , since I've found them to be quite successful on local pike , ....often they are superior over modern lures in terms of casting performance , too . Here is a little video , that I have put out almost 2 years ago , .....displaying three of my favourite plugs , ......as from 5 :45 on I'm talking about the Bass Oreno there , ...please listen closely , as English is not my first language . You may also put the term "Bass Oreno" into the YouTube search function ,.....if you're lucky , some other footage might be araound , ...there is of other lures , I know ! Greetz , diemai PS : failed to say it clear in the video , ....when flicking the Bass Oreno below the surface , it would dig down for about 1 to 2,5 body lengths(depending on the intensity of the flick) , leaving the line slack instantly , the lure would dart back to the surface tail first and come to float up at almost the same spot that it has been before the flick , ...great to tease a located fish to strike .
-
@ Jaw Good luck , .....and please tell us about your progress . @ vodkaman I can imagine that you needed to be hanging on every word the way that I'm sometimes stammering in front of the camera , .....it's just different than typing , where I can read over and over again to even out any mistakes . English is not my mother language , ........and even over here in Germany they say of us northerners , that we do not like to make too many words and also would talk more deliberately . @ mark poulson Thanks , Mark ! greetz , Dieter
-
-
Such tow eye/lip configuration is only reliable to work with a slender and pointed lip , in case of your baits the lip's plane ahead of the tow eye is too large , too much water pressure works on it causing the lure to tip it's nose down only and not to wobble , in a worse case to overturn and blow out . Utilizing such slender and pointed lips it might also require a longer , slender body for better guidance in the water , .........if you do not want to alter the basic shape of lip and body , you'd need to place the tow eye further down ON the lip . At 7:55 of one of my YouTube videos I'm making a few words about such line tie /lip configuration , a swim display of that particular lure is shown somewhere earlier in the video : Good luck , diemai
-
-
@ HAWGFAN Take some time to study these written information , .......had a brief once over , ....had the impression , that some of the info in different articles is a bit controversial and contradicting , though : http://www.angelfire.com/tn/treetotreasure/lips.html http://www.tacklecrafting.com/hb_crankbait_types.html http://www.lovetheoutdoors.com/freshwater-fishing/Spoons/Crank-Baits.html http://www.conservationcafe.com/Fishing/article_detail.asp?iArticleID=5720 http://assets.espn.go.com/winnercomm/outdoors/bassmaster/pdf/11_07_webtip.pdf I could also recommend this book , contains a chapter about diving bills and line tie placement(no luremaking , though) , ....also otherwise a very good and easy to comprehend book on all aspects of crankbait fishing , even for me that English is not my first language : http://www.amazon.com/Joe-Buchers-Crankbait-Secrets-Crankbaits/dp/0873417291 Otherwise I'm with the other guys in here , take yourself a commercial bait as a sample and start experimenting making knock-offs from it , ........don't forget to keep exact records to be able to reproduce as accurate as possible . During my luremaking career I would sometimes carve two or three blanks after same sketches , so quite uniform , ....but assemble different lips to them , .....quite interesting to see the sometimes vast differences in swimming actions , also teaches a lot . Crankbait action(including diving depth) does not only depend on lip angle , lip size and shape and line tie placement , but also on body shape , sideward and cross section profile , buoyancy , ballast placement and even a few more variables , I guess . Writing about these lure dynamics would fill entire book chapters , .......I guess , this is why there is no complete sum up around in the web , at least none that I had come across yet . BTW , ...another good book about making wooden baits containing elaborate explanations on crankbait dynamics , ...but sadly was only issued in German and Swedish versions , no English issue ever printed , ......out of print by now : http://www.amazon.de/Wobbler-Hans-Nordin/dp/3275013092 Greetz , diemai
-
Just joined , thanks for having taken me aboard , Curt ! Great idea of yours , ....though not planning on selling baits(yet) , I'm looking forward to see how it progresses ! Greetz , Dieter
-
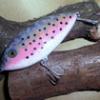
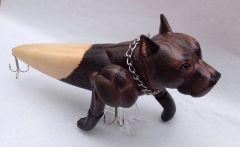
Leroy the top water doggy paddle lure
diemai commented on Meloshfishinglures's gallery image in Hard Baits
-
-
-
Instead of brass you may use round or olive inline sinkers of approbiate size ans weight as well , ...beat them a lttle flat , if neccessary , and extend the hole for your wire form to pass through . Greetz , diemai
-
Sorry , last video did not link , here again : Greetz , diemai
-
@ Jaw Ben had mentioned my name and here I am . Put up some pictures recently displaying my own methods , check post #2 in this thread : http://www.tackleunderground.com/community/index.php?/topic/27714-running-through-wire-through-lexan-bill/ What I'm using is actually no lead tape but 1mm thick sheet , buying it on local Ebay or on scrapyards , originally used for house roofing . For small and /or flat sided balsa lures it would work out as described(my PVC hardfoam material is about as buoyant as balsa) , but bigger , more voluminious lures of such buoyant materials do requre way too much ballast , that this lead sheet pieces can't make up for , ........in this case I would fill up the entire slot with lead sheet and test the lure in the tub . If more ballast would be required , I'd drill equally leveled holes left and right of the slot to glue in leadshot or lead balls , until I'm satisfied . But making bigger lures out of balsa would require too much ballast , and putting all into the belly might also decrease the wiggling action , .....in this case about 1/3 of the entire ballast would habe to be placed into the back of the lure , .......better to chose a less buoyant material for bigger lures right from the start . Here is one of the previously mentioned Paul Adams videos : Otherwise check out his video serial "How to make a balsa fishing lure" , in particular part 2 . Click on video title in the attached video , should take you to YouTube straight , then click on username "Paul Adams" to access all other channel videos . If you do not mind 26 min. in another language but yours , .......a famous German lurecarver , born in Poland , displaying , how he does his lures , ...with a lot of spoken info : Here is the Finnish way , .........at least in your language(well almost , ....the narrator is a Scotsman) . If you do not neccessarely want to go thru-wired on your lures , ...there are twisted wire eyes with a lead weight cast onto them , or you may furnish them at home , ...also pass a screw eye through a hole in a leadchunk , .........all to make up for the belly hook hanger . Good luck , diemai
-
I had not even thought about such before , Mark , ...great input to me . Greetz , Dieter
-
One more add regarding the twisted wire eyes : Just came across this brandnew vid on YouTube put out by a fellow German carver just today , .......nothing much different , though , but I really like the display of the interconnected eyes for jointed lures by the end of the clip , .........thought that I should share this one as well , ....hope , I'm not hijacking this thread too much . Greetz , Dieter
-
@ seanmarty93 I figure out , that you are extremely passionate about your new hobby , ........never mind about that forgotten rear eye , ......you can still wrap it externally now , ....won't look that perfect , but fish surely don't care . Greetz , Dieter


