-
Posts
3,867 -
Joined
-
Last visited
-
Days Won
23
Content Type
Profiles
Articles
TU Classifieds
Glossary
Website Links
Forums
Gallery
Store
Everything posted by diemai
-
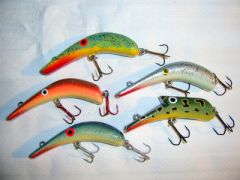
A well proven jerkbait , designed by two Dutchmen named HEIn and eDDY , hence the name of the lure . Meanwhile many copies are around in the tackle boxes of European lure-carvers , and here are three of my own "Heiddy's" . This lure model was the first jerkbait ever , that I caught a pike on:) , that fish was only around 28" in length , but inhaled the lure in such an aggressive way , that the tail hook stuck out of it's gillplate ! These jerkbaits are quite easy to build , they have only one bellyweight to let them sink slowly or a bit faster , just as desired by the maker . They feature a very lively darting "zig-zag"-action , also up,-and downward , best fished 3 to 12 feet deep . Pictured lures are about 4 1/2" long , but they can also be made in different sizes . A little essay about how to build these "Heiddy's" you can find on the Dutch site www.lurebuilding.nl , English version available , go to "jerkbaits" , then click "divers" , the lure is described there under the name "Roach" .
-
To close such holes for weights or rattles in wooden lureblanks , I'd mix some 2-component glue(5 min. processing time) and add some wood chips from my lathe to the mixture , stir up a bit and then smear it into the hole , after a minute or two I'd sprinkle some wood-dust(waste from sanding) over it and press it snugly into the hole , this way it won't stick to your finger . After 24 hrs. of curing I use a "Dremel" with a router bit to remove excess , the last touch-up I do with fine files and sandpaper . Files have to be cleaned up with a steel-bristle-brush occasionally , the glue tends to smear into the teeth of the files , and they become blunt .
-
-
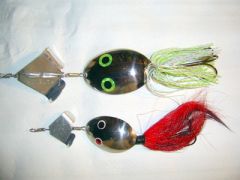
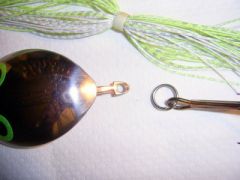
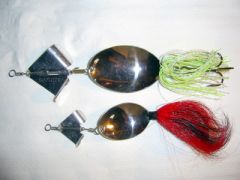
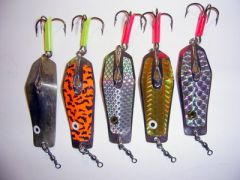
Years ago I came across buzzbaits for the first time , these were quite unknown in Germany those days and still not many people cast them over here . I was curious about them , and after having made some "wire-frame-buzzers"(a German mailorder sold the components back then , only for a year or two), I wanted to try something different , so I tought about making buzzbaits out of old , stainless spoons , quite fast and easy ! The trick is , not to saw off the handle of the spoon first , but utilizing it to fix into a vise to saw and file the root of the handle to shape , so that a skirt or a tied bucktail would fit onto it ! The hole for hook attachement is also drilled BEFORE cutting off the handle , after cutting it , the sawcut is ground and filed to a little pointed shape to slide on the skirt easily . I know , that these buzzers can't be fished in heavy cover due to having trebles attached , just made them to try about such lures over here , though I have occasionally fished them , I can't remember about having caught on them . Anyway ,the smaller one with a bucktail(tied by a friend) is always in my box , I'll keep on trying;) !
-
One of my most prefered types of crankbait , made my first one about 10 years ago after a book picture and since I'm stuck on them , for that first model produced two pike around 35" at the first trials of that lure those days:) ! Lateron I did a lot of tinkering about "bananas" , and there was a lot of frustation and disappointment involved into it as well , before I finally found out about the essential features , such lures must have to perform their distinctive strong wobbling action . Pictured lures are approx. 3" to 3 1/2" in length , my biggest "bananas" so far were approx. 5 1/2". Lures are carved from abachewood , the hook hangers are ordinary screweyes , whereas for the linetie I use a piece of stainless wire , roughly "M-shaped", that is set into a groove and holes in the narrow lip section with 2-component glue . Pictured lures dive down to 2 to 5 feet , most of these have already produced perch and few average pike .
-
I find it more tricky to take care about short spray shots to avoid dripping under the rings . I let final coat set for 24 hrs. (also BEFORE sliding over the rings) , then I carefully cut open ALL loops of the O-rings , DO NOT just slide them down again . Once cut open , some parts of the rings would fall off on their own , when they were under tension , the ones remaining stuck , you would carefully peel away from the lureblank , just in a way like you would peel a banana . When all are removed , carefully use your fingertips to gently wipe over the pattern , this breakes away small paint portions , that potrude a bit , finally clean off with a dry brush ! For cutting the rings I utilize scalpel-like hobby knifes , these consist of a thin , metal handle and an interchangeable short blade , once got a set of them , cheap Asian made , at a supermarket sales , but you could also call in a RC-model-shop for so-called "Balsa Knifes" , these should be similar . If nothing else at hand , you might also use just the blade of a "Stanley-Type" carpet knife , but best is a very pointed triangle blade , that easily slides sideward between rings and lure , the cutting edge than 90
-
Hi , unicorn , I cracked my brain quite a bit , also considered about similarities to your suggestion , but it's just too finacky , the closure tubing is about 1/8" long , the wire loop only as large as the very point of needle nose pliers , so everything is very tiny , would be very elaborate or even yet impossible to furnish such small parts at home , I guess . But thanks for the advice , anyway , greetings , diemai .
-
Quite a popular design for the lure-tinkerer over here . These octopus,-or squid-tails are available in every German tackle shop , they are meant for saltwater fishing to be rigged on sidearms of pirk rigs . But rigged on a homemade in-line spinner , they make up for excellent pike lures , and it's not the "smallies" , that most likely grab them:wink: ! Pictured lures sport a homemade blade and an approx. 5" tail in "glow-in-the-dark" color , a 1/2 ounce egg sinker inside head of the tail provides the weight .
-
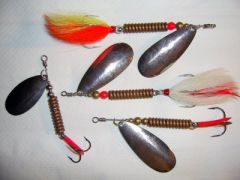
Blades and bodies are the most expensive components of a spinner , especially over here in Germany , since they all are imported from the USA . So I made my own blades out of 0,5mm stainless steel sheet(25,4mm = 1") , more elaborate though , but this way I can shape them different to shop-bought ones . The bodies are made of copper wire(from high voltage cable remainders) , 1,5 to 2,5mm dia. , depending on size of lure , I gathered the two materials on the scrapyard of the company , where I'm working . The wire is simply twisted around a nail , fixed horizontally in a vise . Came across that design in the book "Old Fishing Lures And Tackle" , by Carl F. Luckey , where one of the first "Mepps" is pictured , also made in that way .
-
-
Hi , spare tire , not to have such troubles on an already finished bait anymore I suggest to pre-assemble them and test them in a bath-tube before painting. I always do this , so I am always able to alter things like lip angle and size , linetie position , also location of weigths , etc..... in advance , and this way I always have an idea , how about the finished lure would act later . But you should apply a paint coat of ordinary clear laquer(no epoxy neccessary) before to protect your lure-blank from water sepage , for further painting after testing you just roughen it up with sandpaper for better grip of following paint-coats .
-
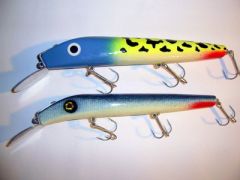
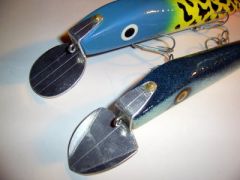
Here are two larger crankbaits , that I made in 2007. I wanted to try out an easier method than cutting them out with a saw from wood boards , so I've thought about turning them down on my lathe from round beechwood dowels , in fact those were old table,-and stool legs , that I gathered from scrap . To make matters still more easier , I had the idea of this not very common way of attaching the diving bill , there is only one thing to care about , when furnishing the fitting holes for it on the blank lure : When placing the finished lip in proper position to mark the pilot holes on the lure , put a piece of thinner cardboard underneat the lip . This cardboard substitutes the later applied finishing coat , the purpose is to get the holes in the lip flush to their counterpart screw holes in the blank for the final assembly , after the painting is completed . The flanks and the top of the head portion of lure are sanded to shape "freehand" after eyesight on a sanding disc , after fine-shaped by hand . Lip is made of 1,5mm(25,4mm = 1") aluminium sheet , the asvantage of such lips is , that they can be shaped , bend and also tuned easily , yet rigid enough for the abuse of local pike:) . Lures are approx. 7" and 7 1/2" in length , haven't fished them that much yet , but both feature a very pronounced wobble and run at about 15 feet or more . greetings , diemai
-
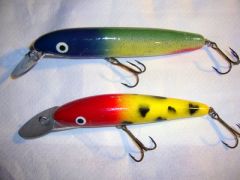
Here are some more lures lures sporting this certain paint pattern sprayed trough slid-on rubber-O-rings . The green lure on top was my first one done that way . The two diving jerkbaits are made after a sketch on www.luremaking.com , free downloads , musky jerkbait pattern 2 , the lure with the rotating head is a "Whiligig" , the flat sinking jerk is an own design , that I named "HumptyDumpty" , due to it's about egg-shape:huh: . greetings , diemai
-
Thank you , Don , indeed I have utilized slid-on rubber-O-rings to spray through , simply with aerosol cans . I don't like spending too much time for a state-of-art lurefinish , I don't even possess airbrush gear , I'd rather spent my limited time on thinking about new , different lure models and put those ideas to practice . I know , that my lures won't win a beauty-contest , but they are not made for such , anyway , they are supposed to catch fish , and that's what they do(most likely , hahahaha)! Though easy made , this certain design perfectly imitates a small jackpike , those never have the distinctive spotted pattern of pike during their first one or two years of life .This rubber-O-ring method only works on lures , that do not have a too pronounced tail taper , on such the O-rings don't get grip and always slide down the taper . Try differently sized rings , loop them double or triple to sit well on the lureblank , before the first paint shot make sure , that they can't easily move anymore . Make some short strokes with small amount of paint at one time , repeat several times , to prevent paint dripping under the O-rings . Good Luck , Dieter
-
-
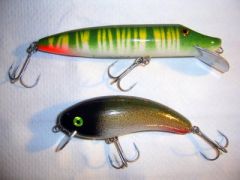
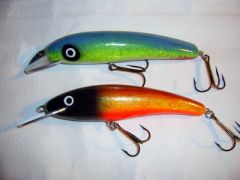
Two older baits , that have already taken their share of pike , the top lure produced my personal best one of almost 47" , the other one got two smaller ones around 35" and 38":) ! That's what all the carving and painting is about:wink: ! Top lure is made of teakwood , bottom of abachewood , both are floaters and sport a homemade , screwed-on diving lip of aluminium sheet , that lets them both run at about 12 feet on retrieve . Top lure has a very pronounced wobble , whereas the other one rolls and wobbles quite moderate . Top lure is around 5 1/2" in length . Greetings , diemai
-
Here are some crankbaits , that I made in winter 2007/08 . I employed a different working method for them , that I had never used before:wink: . These baits are glued together of two halves of half-round pinewood dowels with waterproof wood-glue with the internal wire-harness set in before . To have the two halves flush whilst grinding and sanding their outer shape and later bond them , I placed three thin wood-screws trough them . When grinding away material from the flanks of the lures , I replaced those screws with some toothpicks(because the screw-heads would have been disturbing) , that pinned the halves together temporary . Also employed those toothpicks , glued in , to close up the holes finally before painting . The harness is running through the upper portion of the lures , so that there is enough space for the screws and also for belly weigths to trim out the finished blank for best action . Though they don't look very professional , I like using diving lips of aluminium sheet , they can be bend straight , in case the lip slot got out of angle whilst sawing it , they may also be bend in a "cupped" fashion and they already provide a little weight for a stable lure action . Pictured lures are between approx. 3 1/2" and 5" in length , can't wait to cast them for the first time in May:) . Questions ? Feel free to mail:) ! diemai
-
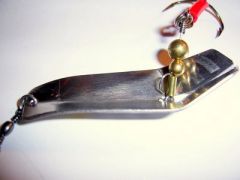
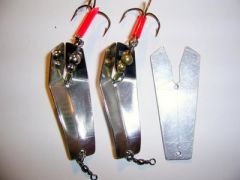
Quite a weird spoon model , that I designed in winter 2006/07 , lateron I've named it "Dinner Bell" . My target of design was to build a spoon , that would off course have an attractive appeal on predatory fish , but can be shaped with only straight saw cuts (no bandsaw neccessary) and does not require extensive swaging with a ballpeen-hammer . After some trial and error I came up with this design , a small spoon of approx. 60mm length(about 2 1/2") made of brass,- or stainless steel sheet , 1,0 or 1,5mm thick(25,4mm=1"). After completing the outer shape of the blank(check template on pic) it is simply bent to shape in a vise , first along the lenghtwise center line(requires plastic hammer) , after the two rear flaps are bent upward equally and finally the front end bent to achieve a slight S-shape of the spoon . It is a little bit tricky to assemble the wire harness holding the hook , the small wire loop over the closure tubing opposite of the longer wire shank with beads and hook is to limit the forward swing of the harness to prevent the hook from leader-tangling whilst casting . At first I rigged those metal beads(one small hollow one as spacer , one bigger solid one for function)to prevent the wire harness to slide through the slot between the two flaps , which worked out well , but during my first bathtube-tests I've found , that these solid beads slide up and down the rear flaps , generating a constant , metalic "clic-clic-clic...." sound , every time they hit the kink between the flaps , hence it's name "Dinner Bell". You can clearly view the traces of the moving bead on the bigger scale detail picture . The spoon has a lively , "rocking" and also irregular swimming pattern , that one can enhance with little twitches of rod tip and/or random retrieve pauses . Only disadvantage is , that the hook occassionally tangles into the small wire loop , maybe every 10th cast , only solution I thought of so far , would be to fix hook rigid onto the harness , either by winding the wire around the hookshank or by soldering . Also made bigger models like this , but those don't provide as much action , I guess , they turned out to be too heavy ! These small lures cast extremely well for their size , I have already caught some smaller pike and perch-pike(Zander or Walleye) , also perch , on them:) . Questions ? Feel free to mail:wink: ! Greetings , diemai


