cz75b
-
Posts
77 -
Joined
-
Last visited
cz75b's Achievements
")


-
That looks like a sculpin head too, available via most fly tying suppliers and easy to replicate with some silicone (as I'm told) https://www.fishusa.com/FishSkull-Sculpin-Helmet-Fly-Heads
-
I've always found that a hot alloy with tin makes exceptional pours even in this mold. Clean hot alloy and a mold release in the cavities plus a pre-warm of wire forms and hooks is the key. Its a great mold and the lures catch fish.
-
You can also spray those pins with graphite mold release, lasts a few pours and helps. I've cast and assembled hundreds of these spinners after powder painting, an art form in itself. My favorite do-it mold
-
We are raising chickens for eggs. Barred rock hens, grizzly on the hoof. You will not save money raising chickens for their feathers, it's fun and the few feathers I will get will be a bonus but I expect my first egg is going to cost me $500. That would buy a lifetime of hackles.
-
As already stated, only put clean lead ingots into your bottom pour pots. Raw wheel weights and other lead items should be smelted fluxed and cleaned in a different pot. That said you will still need to occasionally empty and clean your bottom pour. When empty, I run a brass round wire brush at slow speed to scour our the crud. Additional work on the stem and pouring hole to clean really helps. I spray the rod with mould release and that helps it stay cleaner a little longer. And you can't flux enough. Bad advice about avoiding wheel weights, at least the old style lead ones, they will fill a mould better than pure soft lead every time because of the tin content and the antimony will help the finished product be a little harder than pure lead. If you want to learn all you can about using lead alloys for casting, check out the cast bullet list.
-
My reference to dipping.....the 2 ounce powder paint jars just about full accept buzz bait hooks and the heated head about perfectly, an occasion stir to fluff is all, a quick dip, shake and tap and hang it up to cool. Works up to size 4/0 hooks, bigger baits just need a bigger container of powder paint.
-
I use a heat gun and dip method to make hundreds of buzz bait heads. You can hold the lead head close to the heat gun and concentrate heat on the spot you want to paint, wire painting is minimal. Timing is something you will get the hang of. 3/8 ounce buzz baits take about twenty seconds on the low setting, the high setting is too hot, try and you will see. A rack for a toaster over cures about 40 at a time. Surprising how uniform they can be once you get into the groove. A team of two can really make time. We make them for a program where we teach kids to fish and make tackle, they keep what they make. Northern and smallies here are suckers for the buzz baits. Probably have made a thousand over the past two years. We are now using tin to go lead free.
-
I use a bullet casting thermometer and can watch temps thru the glass.....my thrift store over only has bake and broil so I am able to get close to 400 degrees and back off when I need to, works great.
-
Take a lead version and make a silicone mold to use with the resin. Search this site and find the directions to do just that. It is easy and should work perfectly without screwing up your aluminum molds.
-
The putty is called Amazing Mold Putty. Two parts, one white, one yellow mixed at a 1:1 ratio. No clay needed, fill mold box half full, embed your original to its half mark add you keys and sprue and let harden. Remove the keys, spray with a release spray ( I used dry lube gun lube) then mix another batch anf fill the mold over the half embedded original. At Michaels this runs about $20 for just under a pound. There is always a 40-50% off coupon somewhere. You can make about four or five of these small molds with one package. As an aside, the straight hook revolved in the first casting, a small dab of soldering flux on the hook shank fixed that. This putty is cheap, fast and holds up well to lead allow casting.
-
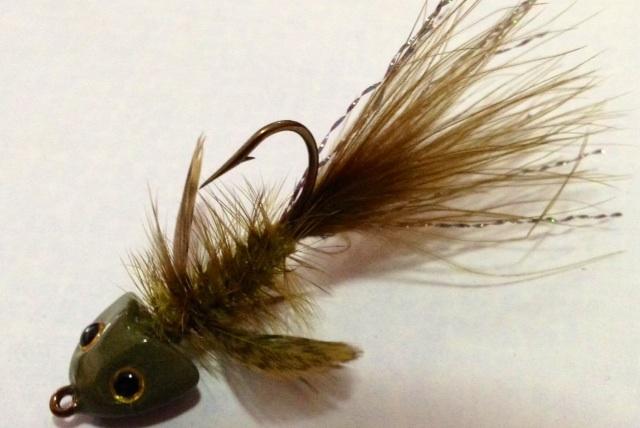
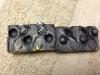
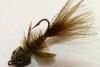
Body is chennile with palmered saddle hackle. Fins are hen hackle stiffened with clear nail polish. Mold was easy, the two part putty from the craft store, I used sprues from a do-it mold and 36 caliber round balls for mold keys. A Lego mold box and it was done in about an hour and a half or so. I tied original sculpin helmets to hooks and filled the hollow back with a glue to help it release easier. I've made a similar mould for a wobble jig original as that mold isn't available anymore. I've made about 100 copies using these molds and they still have some life left. I've also made molds for hourglass eyes for Clouser minnows. My first complex two part mold was a civil war soldier that came out ok. Alloy is clean wheel weight metal.
-
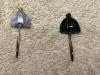
I've been intrigued by the relatively new sculpin helmets but was a little put off by the price, about $6-8 for 8. I decided to make my own using an original as a model tied on a size 2 Mustad 3366 Sproat hook. I made a silicone mold and cast a few then powder painted them various sculpin like colors. Three photos outline this, the mold, rough cast, painted and finished jig/fly. I will use these for smallmouth on the Upper Mississippi River here in Minnesota. I will try both a 7wt fly rod and an ultralight spinning rig and fish shoreline rock structure. Think spring.
-
So, this may help although the loose hook issue means the mold and/or alloy is too cool for a solid and well filled casting. Recently I made a small silicone mold to make sculpin heads directly on a 3366 Sproat hook and the first few turned on the hook after casting. I started putting a little soldering flux on the hook shank before putting it in the mold and that solved the problem. The flux is only on the shank covered by lead and you hear a sizzle and see a small puff of smoke when the cavity is filled but the mold fills completely and the detail is fine. In a commercial jig mold, loose hooks are a function of temperature though. If you are using pure lead, soft lead, use alloyed lead with tin and antimony. Wheel weights (clean and fluxed) are perfect.
-
Step to note in making the second halk of the two part mold.....spray the first half and model jig with a release agent so the mold halves will separate and consider using ball bearings as keys the help align the mold halves for each pour. Put the bearing in your first half and take then out when you make the second half.....scatter them around the outside of the subject out of the way.....
-
Zinc in your lead pot will be a giant problem and will not provide good casts with any mold. Once in the melt there is little you can do to remove the zinc and reclaim the lead/tin/antimony. Pure, soft lead melts at a higher temp than alloyed like wheel weights and Linotype. In small cavity molds especially, this results in not filling in details well and a mold that is tough to keep at an optimal operating temp. That is why the hooks are loose. Don't believe the do- it instructions regarding the use of pure, soft lead. It's bad advice. Surf any bullet casting site and learn a lot about precision casting and lead alloy use. This is where the use of mold release came from. The bad news is that alloyed lead wheel weights are being phased out.