swimb8s
-
Posts
202 -
Joined
-
Last visited
-
Days Won
13
Content Type
Profiles
Articles
TU Classifieds
Glossary
Website Links
Forums
Gallery
Store
Everything posted by swimb8s
-
Here is a simple method for making some stencils I came up with I lay down a sheet of aluminum foil , sprayed with butter flavored Pam ( that was all I had , I suspect regular Pam would also work ) Drizzle hot glue randomly , about 10 " above work surface . If you want thick lines you can let the glue spread before cooling down or the thinner lines cool down quickly - I just blew air on them to set at what stage I wanted . Clean with soap and water . They are soft and pliable and can be clipped around lure like tulle or laid down as usual . I am going to try doing this method on blank square bill ( sprayed with butter Pam first ) to see if it will hold the shape once cooled down , more ideas will have to wait till next weekend
-
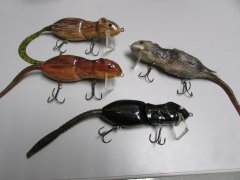
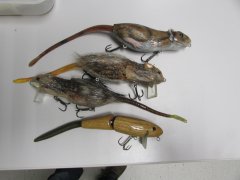 The top rat is a MATT MOREAU bait , his baits and style have always influenced me . the bottom rat is my first rat from many years ago , made of oak and sinks like a rock , didn't think that thru
 -
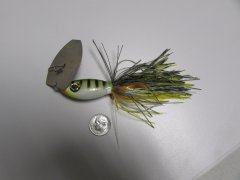 1 1/2 ounce vibrating jig , Magnum blade ( Barlow's ? )hand tied skirt and 5/0 owner spinnerbait hook
 -
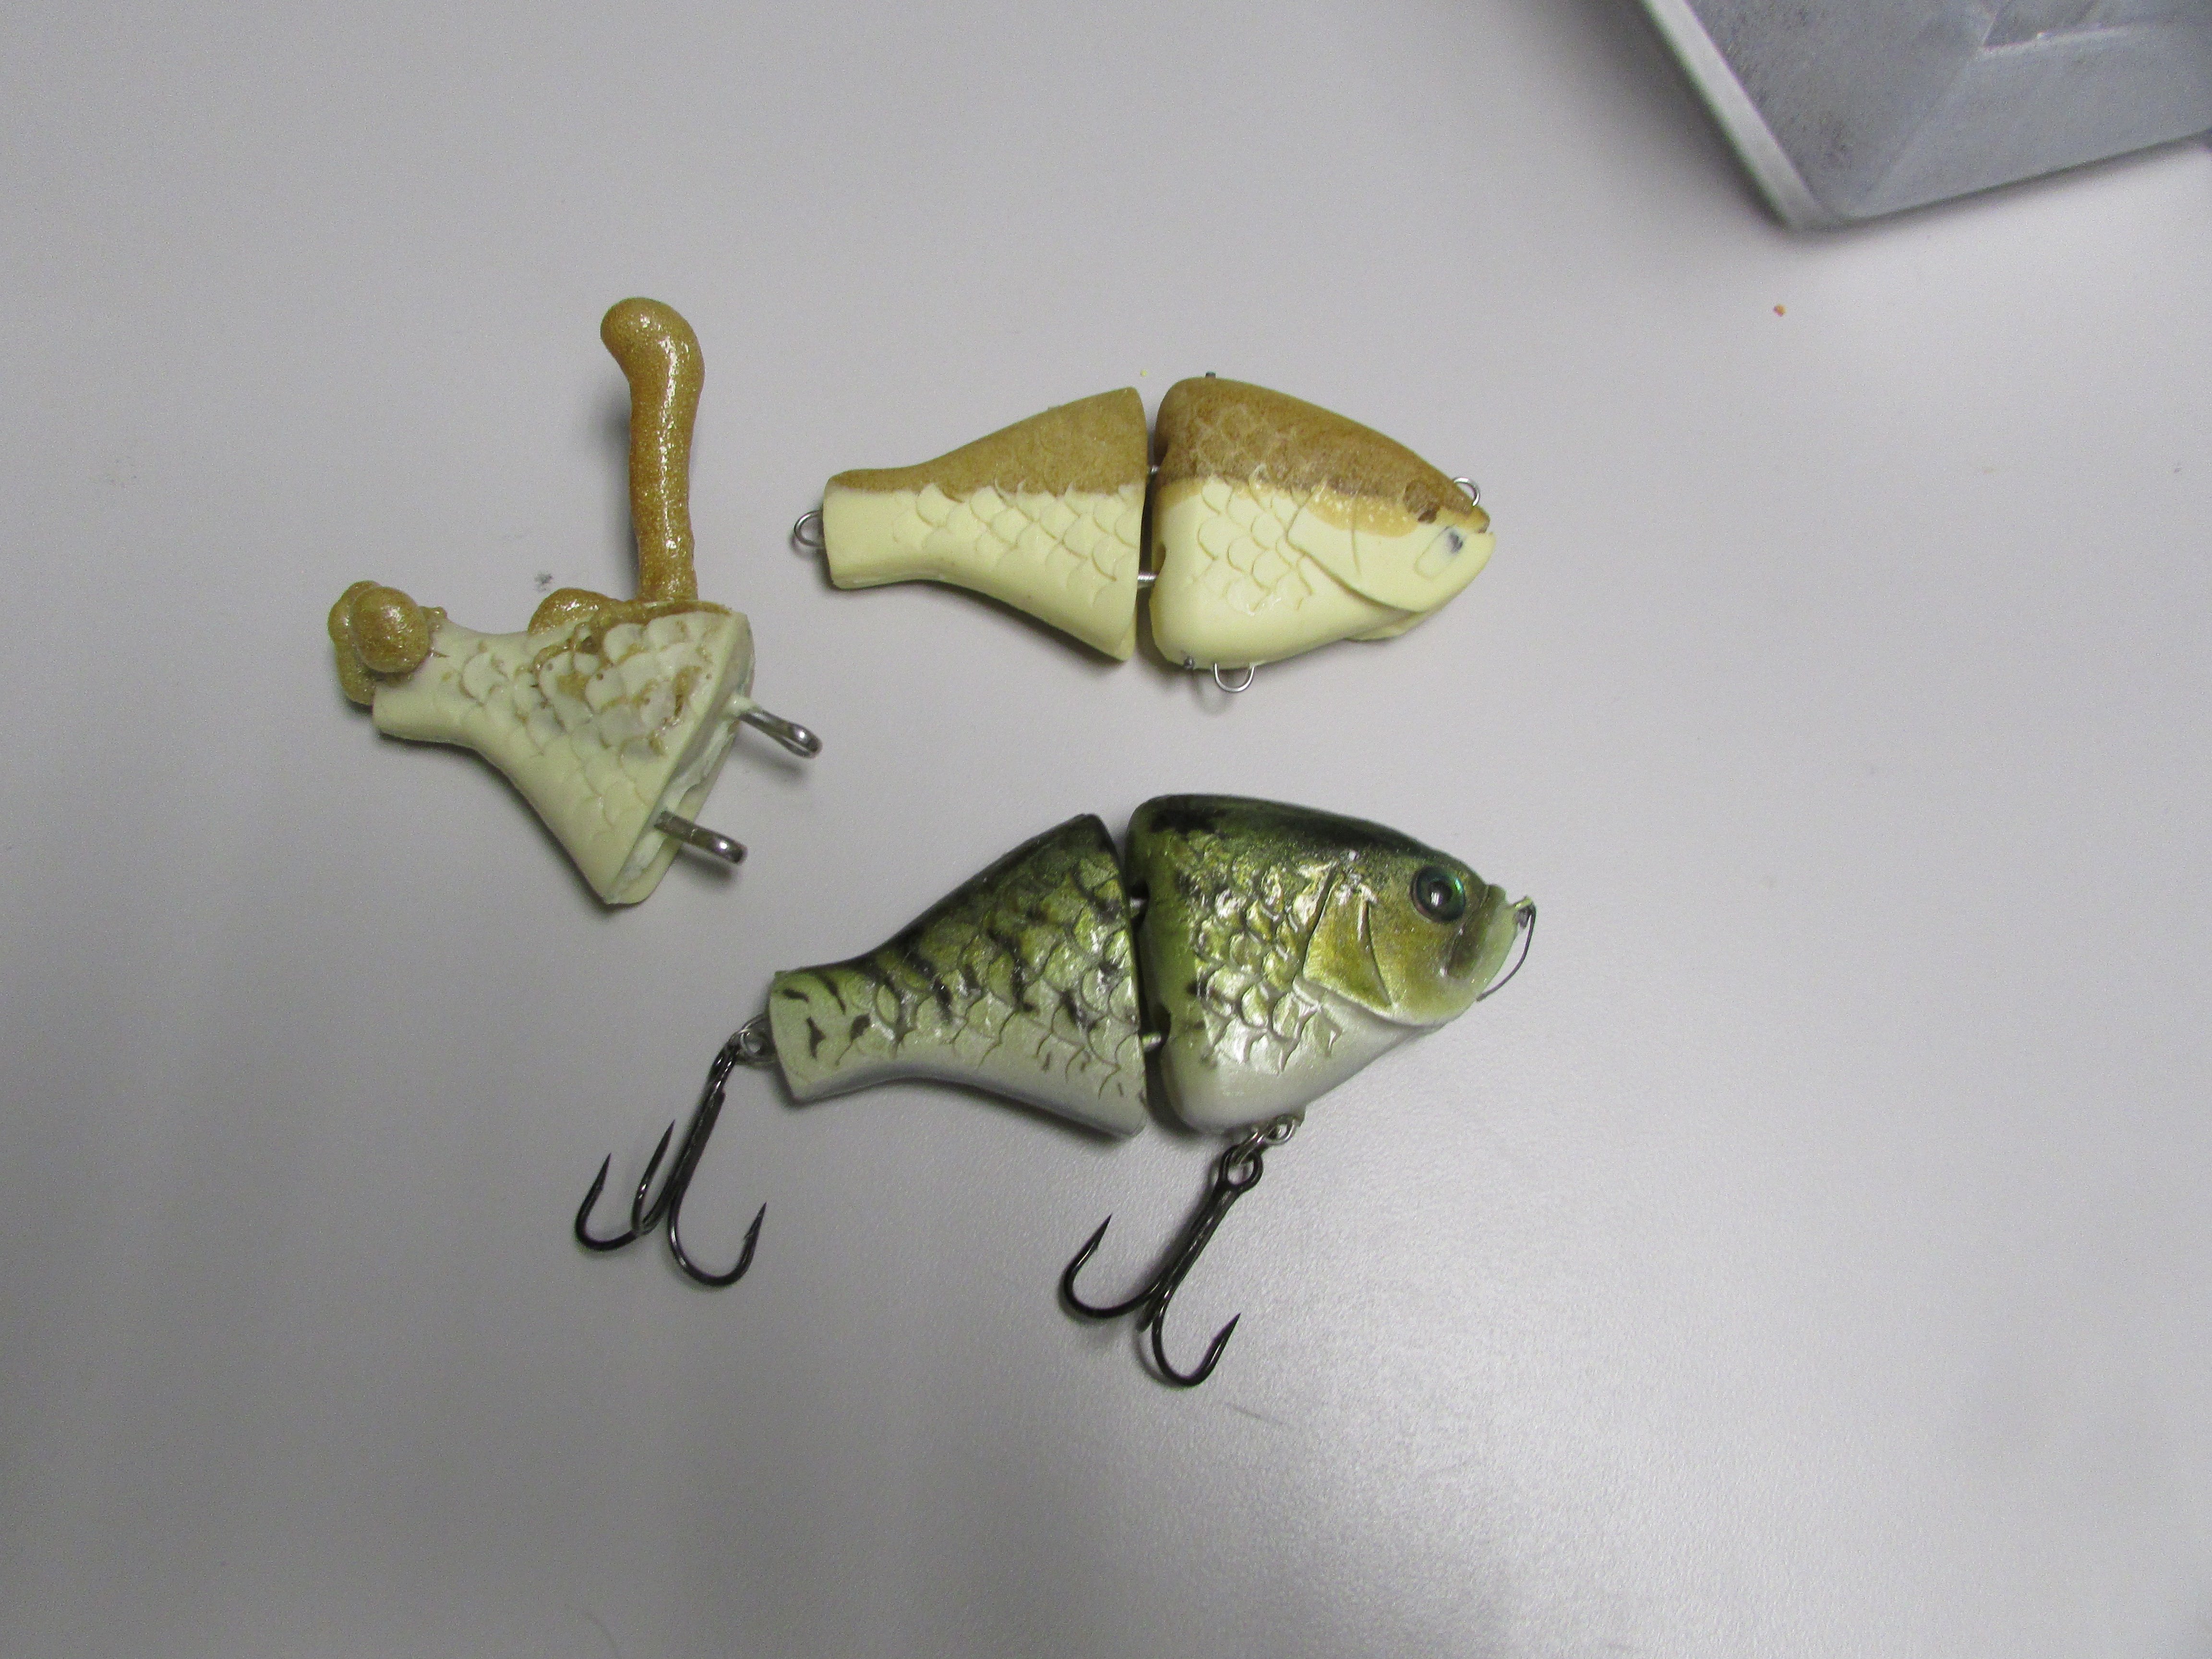
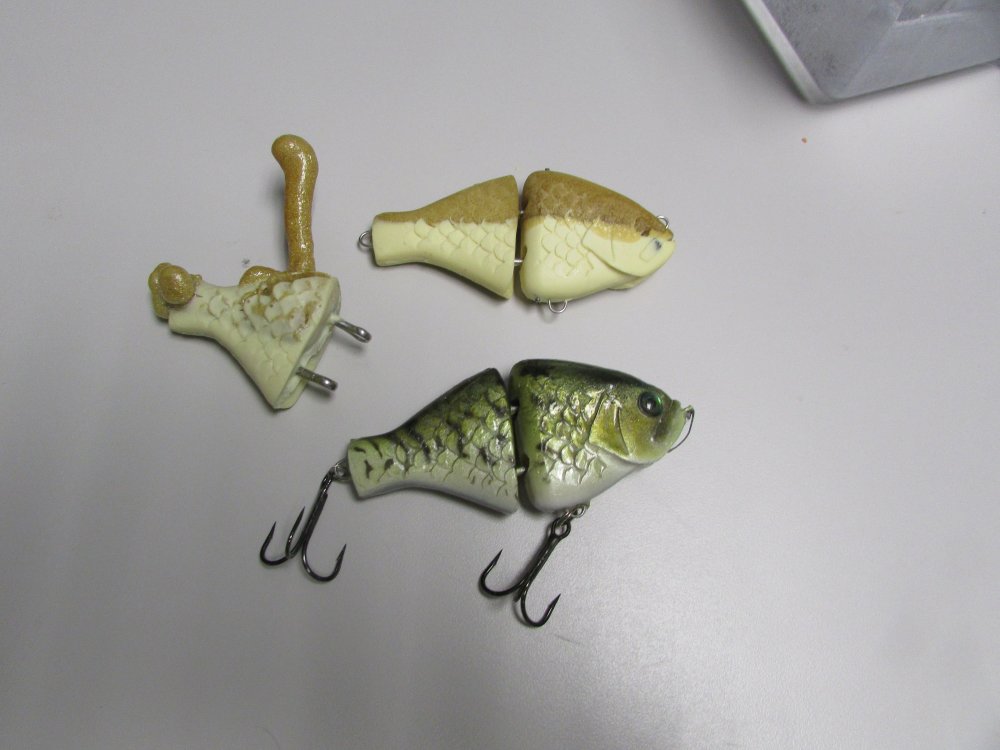
If you use resins you can try these ideas too, The unpainted one up top is Alumires ( RC-3 ) tan for the lower body and the Alumifoam on top . I let the RC-3 cure and poured the foam in mold and use a small piece of cardboard at the pour spout to keep the foam compressed in the mold as it rises - makes the foam more dense , this foam cures very hard and dense but really floats . The unpainted one sinks slowly and upright , I didn't add micro balloons to the RC-3 as I did with the painted one . The painted one is a moderate wake bait with great action , I don't have any of the ones I made with a lip around any more to show you but use the advice above about lip angles and such . The resin portion is heavier and the foam keeps it upright so with this style of bait no weight is necessary . Can also use the Alumilite White to do the same thing , You might be able to see in the painted version some of the " grain " from the foam come thru . The foam may not keep the crisp details . The exploding one was the first attempt , the resin was still soft . Poured foam in walked away and came back and had a good laugh . I have poured the resin and let it partly cure and add foam , fully cure and add foam ( to see if the foam bonded any better to the partly cured resin ) seemed to be the same good bond .
-
 Thank you sir , it's interesting just looking at it motionless on the surface . Fairly convincing it looks like a real critter . Fun to make
 -
.jpg.c1f1ed1cca9bb7ea592b64ff621605b0.jpg) Those all look great , Really like the showcase of lures , alot of time right there . Well done !
Those all look great , Really like the showcase of lures , alot of time right there . Well done ! -
Resin rat , with a touch of death ...
-
 Yes they are Lexan , Much appreciated and keep up the good work you are doing .
 -
Finished some rats , all resin from my mold , the black one has a feather inlay that I will take better pics of . Tried out making a couple with swivels so the hooks rotate
-
 Thank You , Will be interesting to see your results with " blending " if you try dusting with different colors , good luck Tommy
 -
The paper gills are recessed with the gill plates that help protect them . If you do the same and super glue or a little epoxy to hold in place and then use your Aerosol clear coat to keep the details it shouldn't fall off , but they may be a little bit more fragile . The epoxy keeps them rigid and in place
-
 Thank you sir I appreciate that !
 -
Cotter Pins vs Screw Eyes vs Twist Wires vs Through Wire
swimb8s replied to RiverSmallieGuy's topic in Hard Baits
X2 -
Thanks Mark I appreciate it ! One of the ladies I work with in the office knows I make this kinda stuff so she brought in a full length rabbit fur coat ... Lifetime supply of fur for sure Tommy
-
 Your work is always so nice , now I want to do a carp !
 -
This is a 2" mouse . I carved this out of PVC , used Badger hair for body and feathers for head . The tail is a t-stop for pegging weights
-
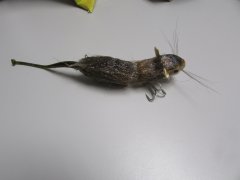
 Thanks guys ! Will have to throw it around some this weekend , Think the coyote whiskers could bend / break easy , I'll find an alternative . Thanks for the support ! Tommy
 -
-
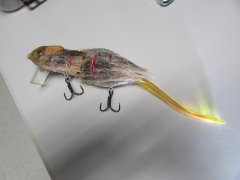
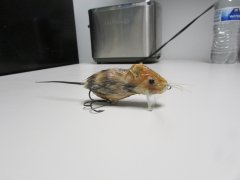
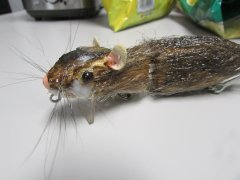
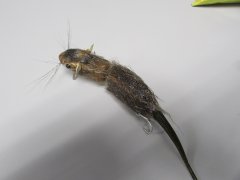 Rat is 4" long and tail makes total length 9" . " Fur " is deer hair , ears made from deer skin . Whiskers from coyote tail and eyes are glass tortoise color beads . This is not wet but how it looks with clear coat . I have a baby muskrat in the works too . Thanks guys
 -
Nice video , had no idea changing colors could be so easy . I need to take a break from my fly tying and art project so this will be perfect this weekend , melt some lead pour some spinnerbaits and jigs . Thanks for Jungle Jim info too So many things to do ...
-
 Really nice , always like your clean work sir Tommy
 -
I don't think paint would adhere to it but staining is an interesting idea , I have lots of in different colors so I will experiment and let you know Tommy