-
Posts
504 -
Joined
-
Last visited
-
Days Won
6
Content Type
Profiles
Articles
TU Classifieds
Glossary
Website Links
Forums
Gallery
Store
Everything posted by Fishwhittler
-
-
For anyone that's interested, lurepartsonline carries Vision 110 knockoffs. I haven't purchased any of these or other Vision 110 knockoffs, but they look about the same as the ones on ebay.
-
-
some old colours in new glider bodies
Fishwhittler commented on solarfall's gallery image in Hard Baits
-
Those all look very good. I really like the handmade baits you've been building lately. You may have problems with mounting the line tie that far out on the deeper baits. Most baits with the line tie built into the bill have the line tie mounted roughly halfway between the nose of the lure and the tip of the bill. If the line tie is to close to the tip of the bill, the bait may roll on retrieve. Of course if they work as they are, forget what I just said.
-
Thanks! I don't use a filler, but I prep-coat with U-40 Color Lock. However, I do a lot of sanding before I use Color Lock to get a smooth surface to paint on. Here's the process I use: I start by carving the blank bait to a more or less rounded shape with a knife. A utility knife works fine for this, but any knife you use should be sharp. Next, use a dremel tool to rough-sand the bait all over. There's no need to try to get it very smooth at this stage; you're just trying to get it a bit smoother than the knife left it. Hand-sand with 80 grit sandpaper. All sanding subsequent to this will be done by hand. Next, put a couple drops of water on the bait and wet-sand with 80 grit sandpaper. Now repeat the hand-sanding process above with 120, 220, and 500-600 grit sandpaper. It helps if the sandpaper you wet-sand with is a little more worn than the piece you use for dry-sanding. If you want to get the bait even smoother, use a piece of paper to polish the bait. I don't always do this step, but it does make the surface a bit smoother. Finally, I spray on several coats of U-40 Color Lock. With this coat I just build up enough paint over the bait to make it as smooth as possible for the final paint. There you have it. My method takes a bit of elbow grease, but the end result is a smooth PVC bait that is easy to paint. Ben
-
-

New Design Shad Swimbait
Fishwhittler commented on MR KNOW IT ALL KIND OF's gallery image in Hard Baits
-
-
I use Flex Coat Five-Minute epoxy glue for most of my lures. I also use their 2-hour cure epoxy occasionally, but for the most part I stick with the Five-Minute epoxy. Lately I've been looking at using a metal filled epoxy paste such as J.B. Weld. Five minute epoxy works great, but it sets up quickly so you can only do one or two lures at once. You can do a large batch of lures at once with 2-hour epoxies, but they have a tendency to run and they don't fill in ballast holes as well. Using a paste-type epoxy seems like it would solve both of those problems: you'd have plenty of working time, but you could still fill in holes with the epoxy and not have it drip. I think either J.B. Weld or the Metal Set A-4 epoxy from Mudhole will do the job.
-
Thanks! @ braveviper: The Elmer's glue crackle method is where you apply Elmer's glue to a bait and then spray paint over the still-wet glue. Use a hairdryer to heat-set the paint, and it should crackle as it dries. Then let the glue dry for about an hour, and then you can finish the bait like you would any other. @ Mark Poulson, thanks for the tip! I'll give that a try when I do some more crackle baits. I was using a brush, but instead of brushing the glue in one direction, I dabbed it on so there were no stroke marks. I think that your method will work much better though, and I'll definitely try it.
-
-

Twisted Scud with rattle and cracked paint
Fishwhittler commented on herwin's gallery image in Hard Baits
-
-
-
-
Your needle may need to be reset. To do this, loosen the nut that holds the needle in place and slide the needle forward until it's snug against the nozzle (make sure the needle assembly is still in the brush when you do this). Then retighten the nut and the brush should be good to go. Hope this helps. Ben
-
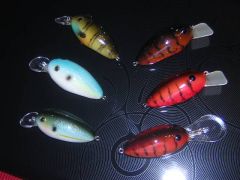
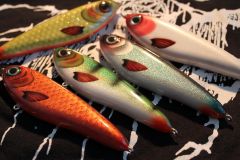
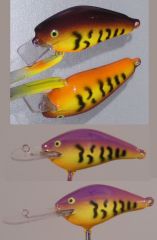
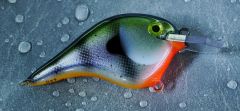
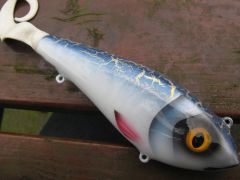
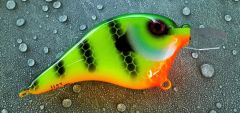
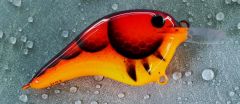
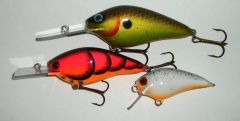
Here's some of what I've been working on lately. All of these are carved out of PVC. Main pic, top to bottom: Deep runner, don't have a name for the color - Medium diver in Red Razor Craw - Shallow diver in a splatter-back pattern Bluegill An earlier Bluegill and a simple green/yellow pattern Fat shallow divers with more green/yellow, and a simple shad pattern Semi-flat cranks. The red craw has gold scales on the shoulders and a black back, but they don't show up well in the pic. White crappie. Both this one and the first bluegill above have dark metallic green paint on their backs, but it looks black in the pics. A mix of fat and standard crankbaits. The middle bait is a Poe's 1100 (I think?) with a lexan bill. The old bill was badly cracked, so I removed it and used it as a template for a new lexan bill. And finally, a couple fat shallow runners in Copper Chartreuse Shad. Thanks for looking. Let me know what you think! Ben
-

Help Finding Or Where To Buy Wieghts For Crankbaits
Fishwhittler replied to Rangerboats1's topic in Hard Baits
There are a lot of ways to ballast lures; I like to use egg sinkers. They're cheap, and you can get them from practically any fishing tackle retailer. -
I don't know about that compressor; the one I have is the TC-20. It has performed very well for me in the six months or so I've had it. I would recommend you get the most powerful compressor you can afford. You can always turn down the pressure, but if you have a compressor that isn't powerful enough you're stuck. The combo with the TC-20 compressor is only about $10 more than the combo you mentioned, and it has more power. I hope this helps. Ben
-
The G22 is an inexpensive brush that has performed very well for me. It's the only brush I have, and I don't see a need to get another one at this point. You can find it on Amazon for less than $100 in a combo with a compressor, air hose, and pressure regulator.
-
I just push the tool into the lure body in rows, staggering each row in relation to the previous row. I can post pics if that would help. This swimbait has scales made using this technique, so it might help show how I did it.
-
Here are some pics of a scaling tool I made. I made it from a 1/4" steel rod. The tools I used were a dremel with a grinding bit and a round file. This is the tool I used to do the scale patterns on the bait in my gallery. The other scales I did are made with a wood-burning tool. I used the wood-burner without plugging it in, as it gets too hot for PVC. This works very well on PVC baits, but you might run into some issues with wooden baits. Wooden baits require sealing, and it could be difficult to seal the bait and avoid covering the scale pattern with whatever sealer was used. An epoxy would probably smooth over the scales, and a thinner sealer might let the woodgrain show through. You might be able to make it work by foiling directly over the scales instead of sealing. Then the scales would still be visible after paint and topcoat. I don't have to worry about this because I'm using PVC and it doesn't require sealing. I'm sure there's a way to make this system work with wooden baits; it just might take a bit of experimenting to find the best way. I hope this helps. Ben
-
I did finish it, and I've been meaning to post some pics of it for a couple days but hadn't gotten around to it yet. I eventually decided not to apply another coat of epoxy; instead I sanded and polished the epoxy already on there. It's very smooth and comfortable, and I don't think it's going to cause blisters. Here's a pic: I'll post how it works once I get a chance to test it in the spring.


