


Tom in Sweetwater
-
Posts
54 -
Joined
-
Last visited
Content Type
Profiles
Articles
TU Classifieds
Glossary
Website Links
Forums
Gallery
Store
Everything posted by Tom in Sweetwater
-
 Looks good, I can't see that it's a decal.
 -
 I've been painting up jerkbaits as the water temp is getting close to right for them around here. This is one I dreamed up I'm calling "Spooky"
 -
The finish on those Lucky's are extremely sensitive to solvent. Found out the hard way myself. It only takes about 30 seconds to take it off, however. Lightly brush it with lacquer thinner and as soon as it wrinkles, which will be pretty much immediately, wipe it off with a paper towel. You don't want to use too much thinner or for too long as it will soften the plastic of the bait. It may be best to work in sections until you get a feel for it. I have been doing this on my Lucky repaints and it has worked out really well.
-
I used to spray CV as well, and have always loved it. I will be very curious how this experiment turns out. If it works dipping it, it would be a great option.
-
What did you do before you repainted the Lucky's? If you don't take the finish off them, all hell will break loose. It take about 30 seconds to take the finish off a Lucky. Just brush a thin coat of lacquer thinner and quickly wipe off the paint before it starts to eat the plastic. The finish on a Lucky is extremely sensitive to anything with solvent in it. (ask me how I found out) It is also very thin, so comes off super easy. I usually hit them with a very light coat of adhesion promoter afterward.
-
 Repaint of a Lucky Craft FatCB DBS 3 in a pumpkin seed pattern
 -
 New Lucky Craft FatCB DBS 3 painted in a white crappie pattern
 -
Here ya go: http://www.dicknite.com/TU_Lander.htm
-
I have had success using Sharpie Ultra-fine markers on baits. Just do a test or two before committing to using it on a good bait. I would suggest mid-coat clear before and after using it to isolate it on it's own layer. That's what I've done and have had no issues with them running or bleeding yet.
-
 What color to paint? Why not all of them?
 -
 Finally got a craw looking the way I want it to.
 -

-
 Great looking bait!
 -
my version of a lavender shad
Tom in Sweetwater commented on RayburnGuy's gallery image in Hard Baits
 Nice color, I reckon they'll eat that!
 -
Here's a pic of the bag set-up

-
I am repainting some 20's right now. I just key and prime them and start painting. I use urethanes which go on very thin and so don't add a lot to the weight. I haven't had any issued thus far.
-
Sounds like what you need is a hardwood stair handrail.
-
Here's a pic of the technique in action. It is nearly impossible to photograph, because the effect is all about motion.
-
Here is a nifty little trick I use that comes out of the auto painting world. It is a frottage technique for applying metallic underpaint for a little extra flash. And the only extra tool you need is a plastic grocery bag! First, give the lure a solid base coat. To start, try just black or white. I also do fades or colors, but to see the effect the first time it's best to keep it simple. Black will be the most dramatic. Prep your grocery bag. I grab the bottom between two fingers and pull it out in a tight straight line like I am trying to squeeze something out of it. This will cause the wrinkles in the bag to more or less pull in a straight line. Fold it in the middle and stretch it again, trying to keep the air out of it. Then I clip each end to hold it in this shape. Load your airbrush with silver or gold metallic. Silver is the best bet here, but this can be fun with gold as well. This next bit will take some practice. Shoot a fairly wet layer down the side of the bait. If you are using Createx or similar you will have time set your brush down and pick up the bag, but if you shoot urethanes like me you had better know how to work two handed. Gently touch the bag into the wet paint, working down the side and keeping the striations vertical and touching a clean portion of the bag each time. Now just let it dry and start building up your paint scheme using transparent color. With a little practice, this can be a very cool technique, and effective as well. If done right, it will give a rippling flash effect down the sides of the bait as it moves back and forth. Let me know how this works for you!
-
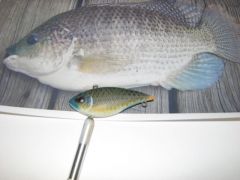
 Another version of a bluegill. Every time I see a photo of a bluegill with coloring I haven't seen I want to paint it.
 -
 Second version of craw pattern, getting closer!
 -
I haven't used this on baits yet, but back in my commercial illustration days we used to use stuff called liquid friskit. You paint it on and then rub it off when you are through. I would have to do some research, but I have heard of some stuff like that that can be painted on and then cut and removed in sections as needed.
-
As far as stencils go, I love the stencil material they sell at craft stores. I have found a fun way to get certain shapes into it: Soldering iron. It goes through it like butter. It won't leave a perfect line like a knife, but sometimes that's what you want. And it's good for rounding the stencil where the cuts are too angular.
-
 These are my first shot at doing a craw pattern.
 -
 That's a good looking pattern.
