


Mayberry_Customs
-
Posts
68 -
Joined
-
Last visited
Mayberry_Customs's Achievements
")
Newbie (1/14)
8
Reputation
-
 Thank you! Nice Job on your baits as well!
 -
-
-
-
-

-
-
-
-
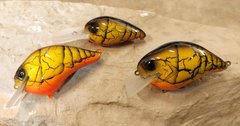
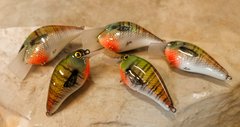
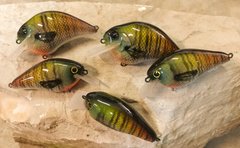
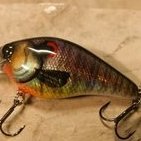 Mayberry_Customs changed their profile photo
 -
I am self taught at CAD so I know where you are coming from, although I have a degree in networking technology so im pretty knowledgable about computers..I own a diy CNC wood router and a 3d printer....CAD is not a quick thing you can really be effecient at....it takes time to learn and can be very overwhelming at first...there is several suggestions i can make...dont expect to scratch design a fishing lure right out of the gate, you have to build some foundational knowledge before you can really design what you want to. There are so many design programs out there, many which are free to use but every program is different. You will learn that some programs use entirely different basic design principles...in my opinion, sketch based programs are the easiest to learn. You have to think of everything originating as a 2D drawing or sketch, then modifying that sketch by making it 3D as necessary..,you will see there is several "easy to use" programs out there but to me they are not that beneficial because you put the effort into learning a program thats not very powerful...my suggestion is to start with design spark mechanical, its really as easy as you are going to find but still very powerful..from there I suggest transitioning to Fusion 360 which is also free to hobby users. Fusion 360 is created by the makers of Auto Cad so it is very powerful. Both these programs are sketch based. You really need to be in fusion 360 to properly design a fishing lure with any complexity. Next ill talk about 3d printing...3d printing has a degree of a learning curve as well...most people can fairly efficiently download a model off of a 3d printing site, use a slicing program with recommended settings, and print with decent results...when you design from scratch for 3d printing you will learn that you have to design in a certain way. You have to have some sort of surface that maintains contact with the bed, in order to properly print. You can't design over hangs over 45 degrees, because the printer cant print something in mid air with no support...this is what supports are for, but generally leave a pretty rough surface which has to be filled and smooth to create a paintable surface like a fishing lure. When you get into custom print settings it can get somewhat complicated as well. If you really want to learn all of it you absolutely can, but its a process. YouTube is your friend, and absolutely do not pay for a CAD program for learning hobby use, you dont need to. Hope that helps a little. Andy
-
Its this stuff, if you look up jekyll baits on youtube she does some videos talking about using this type of netting. Darice Metallic Mesh, 6" x 8 yd, Silver https://www.amazon.com/dp/B01MTLK35Z/ref=cm_sw_r_cp_apa_eFOOBbTZ74470
-
I have some I bought from hobby lobby labeled wax o stencil paper "scratch art" brand...this stuff on Amazon looks to be what you are looking for Inovart Waxed Stencil Paper, 9 by 12-Inch, 12 Sheets Per Pack https://www.amazon.com/dp/B00H7PMEEG/ref=cm_sw_r_cp_apa_wiCGBbGK0CS01
- 1 reply
-
- 1
-

-
Beginner painting questions
Mayberry_Customs replied to SouthBelleGroveOutdoors's topic in Hard Baits
I have mentioned this before, may seem crazy but its what I always do and it works well..after you coat your lure with epoxy and its on the turner. Right after brushing it on (epoxy is still wet)stop it momentarily, take a piece of small SS wire and pass it through the hook eye grabbing it on the other side...don't put it in the eye and pull it back the same way, it has to be passed through...this grabs epoxy as its pulled through...i usually do one at a time, let it spin at least once after you do one...even if the epoxy is starting to set up this still works as long as you hit it with a little heat...I much prefer this instead of post cleaning them....when you do this there is no epoxy in the eye and around it is all smooth and "factory" looking. Andy -
Color changing paint. Color Shifting paint, powder pearls. Paint
Mayberry_Customs replied to Kreate's topic in Hard Baits
I also use the floor care and a little water ...works pretty well as long as you stay away from the "extreme glitter" and colors like that, the glitter is just too large...i work in the automotive field and have started using some PPG water based wax and grease remover as a spray through cleaner...it can be diluted way way down and I havnt had any problems with the floor care drying and sticking up the brush. -
It's been years since I have even posted but I figured I would chime in and give you my experiences...I always painted with solvent based HOK brand paint, but I recently have had to temporarily use water based because of smell and the location at which I am currently able to paint...I have been using folk art some, just because it's so cheap and they do have a lot of cool colors...I personally recommend the pledge floor care as a thinner, yes it is a bit hard to clean...but it helps it flow out of the airbrush so much better...I just guess when I mix, but it's something like 20% pledge 10% water...hope that helps a little
