atijigs
-
Posts
203 -
Joined
-
Last visited
-
Days Won
2
Content Type
Profiles
Articles
TU Classifieds
Glossary
Website Links
Forums
Gallery
Store
Everything posted by atijigs
-
Hi guys. It's been a long time. I had a 2nd computer crash and lost my info. I managed to sign in because of an email from TU but I can't reset my email (sarmst1997@aol.com because it is already in use under my first identity ddsbyday. I don't have the energy to keep trying to get it straightened out or start over creating a new identity. Sorry.
-
I personally prefer softer lead for my castings. However, I started casting bullets due to the problems associated with trying to buy them. The hardness of the alloy is not critical for lures but is for bullets. What I found out by spending a day at my computer is you can get a very good idea of the hardness of your alloy with artist pencils. They cost about 13$ at Walmart. The bullet guys are sloppy in their pouring techniques but they know their alloys. I had a head ache from trying to soak it all in. Pretty much the same way I felt when I first came to this site. I'm heading to Wally World tomorrow. If there is any interest I can follow up on this.
-
I have one do-it buzz bait mold that is impossible. The sprue empties into the terminal part of the bait where it is the thinnest.. The sprue can rarely be removed without pulling the lead away from the hook. I don't use hard lead for these so I don't know if that would help or not. The design was changed for good reason. The new design is easy. ( I don't know when the change occurred but I am going to give the old one away with free shipping on Ebay )
-
The answer to the question is that dyed hooks will lose their color when heated. They will also lose their color when getting dragged on rocks or rattling around in your tackle box. If you want red hooks they can be powder painted electrostatic-ally. . .
-
Be sure to cover those vinyl painted eyes with clear coat or epoxy if there is any chance of them coming into contact with hand poured soft plastics. Powder paints are not a problem. Not so with the vinyls.
-
I'm glad I saw this thread. I saw that i had warning points and did not understand either. After a little research I was able to figure out why I got mine. I did not know at the time and I have no remorse. Do the warning points ever go away?
-
When using vinyl paint you must clear coat with D2T or seal coat. The vinyl paint reacts with the plasticiser in you plastic baits. Turns it into a gooey mess.
-
Another option is making a rubber stamp out of the eraser on a pencil. Just shape it the way you want.
-
I just use a two sided old dental intstrument. I filed the tips to points. Scoop up an eye spin it, scoop up the other eye. Transfer the eyes to the jig. The process only takes seconds.
-
Don't overlook vinyl paints. They are easy to use. They come in a nice array of colors that can be mixed. They have nice glow colors as well.
-
Do-it Walking Sinker / Weight Question - Need Info.
atijigs replied to WidowMaker's topic in Wire Baits
Hagen's caries them. -
You just need the kind that does not harden. You should be able to find it in any craft store. We always used it in grade school. I use it anywhere I have made modifications in a mold to eliminate any flash. It seems as it heats up it becomes slightly stiffer but never hard.
-
Modeling clay works great and is removable. You don't need to fill the whole collar either. Just the 3-4 mms where the collar starts.
-
Thats a nice hard wax. You will be able to carve that easily. The low shinkage caught my attention. Shrinkage was the problem I ran into with inlay wax. A piece of nylon will smooth this wax to a mirror like finish.
-
The lost wax tecnique is also used in Dentistry. I am not familiar with the wax you are using but if it is hard you should be able to get a wax carving set at any Micheals or craft store. Most waxes you want to keep hard and cool and carve with sharp instrument. Depending on your wax hardness rubbing with a nylon will give you a glassy smooth finish. I tried using dental inlay wax in a mold but the shinkage was excesive. It works great for small items and the wax addition technique( where you add the wax in tiny increments). I don't see how investing and casting would really be of any benefit when centrifical casting with silicone molds is much more efficient. Pk Thomas wax intrument is one tool for adding wax in the incremental technique. Rotory and hot tools will not work well.
-
Most likely you are getting suck back from the plastic cooling and shrinking. Keep a little extra pressure on the injector after the cavity is filled. Be sure to over fill the sprue and them go back and top it off again with the hot plastic. As the cavity cools you want it to draw down plastic and not air.
-
I had the same problem. Crimp the wire around the hook eye. Then have a platform or something to support the wire, hook assembly until you close the mold. Use a ladle to pour and you should get better results.
-
Are you painting jigs or just the hooks?
-
I ordered the same mold. Order # 8076 Date paid March 26 2011. I'm sure it will be here any day now.
-
Thanks for the information guys. Looks like a bigger project than I thought. I will remove the finish on the blades from now on. Has anyone tried electrostatically powder painting to the nickle finish (after the laquer is removed) ? I might try this to see if the bond would be better. I also need to order some DK before I get into painting blades any further. Thanks again. Maybe this thread will save someone else from catostrophic blade painting mistakes.
-
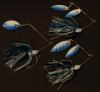
I searched this topic and could not find the specific answers to my problem. After the field test that had great results it ended like the wicked witch of the west.(just disappeared). I like vinyl paint for my jigs. I don't mind the smell and I like the detail I can get. I decided to paint some blades for spinner baits and really liked the result. I did not pre treat the nickel and brass finished blades in any way. I airbrushed a white base coat of vinyl paint on one side followed by the airbrushed colors. I followed up with a thin coat or d2t and had a very nice finished blade. Put the baits together and sent some out to be tested. I can't get on the water until this weekend. Results were great. They caught bass and pike. All was good. My field tester left the bait on his rod for the ride home. Today he goes out to go fishing and the blades are bare and back to their original finish. I did not remove the lacquer from the blades and found out the d2t will not protect paint that does not stick to the metal. My thoughts are the blades banged together on the drive home and the whole paint job just dropped off. Questions for the experts- When using vinyl paint on blades 1. Can I soak the blades in lacquer thinner or do I need to sand them too ? 2. Will that solve my problem. 3. I have not used Dick nights(sp?) before. Will this work with vinyl paints? 4. If I use Dick nights do I still have to remove the laquer finish from the blades? 5. The Dick nights blade dip top coat was discussed on other threads. If it would be compatible with vinyl paints can it also be airbrushed? Any help would be greatly appreciated.
-
Anyone have a better way? I use a round nose pliers but I just can't seen to get a consistent result. The thinner wire frames are not a problem, There has to be a way to get the same result with heavier wire frames. everytime.
-
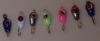
This is one of my favorites. 1/32 oz. Glow orange with white sprinkles. Looks very translucent to the human eye. Salmon egg-leech.bmp Salmon egg-leech.bmp Salmon egg-leech.bmp Salmon egg-leech.bmp Salmon egg-leech.bmp Salmon egg-leech.bmp Salmon egg-leech.bmp Salmon egg-leech.bmp Salmon egg-leech.bmp
-
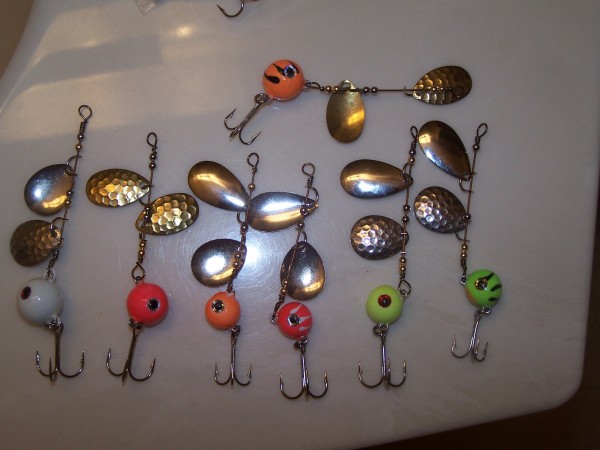
Here are a couple of pics. I have been playing with these for years. A past good friend of mine after fishing with me got a write up in the MPLS. and St. Paul papers for coming up with a great idea. His articles by Dennis Anderson did forget to mention the part of the great idea coming to him after saw he me fish with them. He applied for a patent with a slight change. So have at it guys. Here are some ideas. You can read his story at Danlures.com. It's a great story. All BS but a great story.


-
No worries. By using and electrostatic spray gun the paint will not clog up the holes at all. The gun just puffs out powder so there will be no movement either. I would suggest Christmas tree ornament hangers for your spoons. Very light wire and will leave only a tiny defect where the wire actually touches the spoon. You will need more than one rack to hang them on. After painting them transfer them to a clean rack. There will be no paint drip so other than any paint that got on the hanger there will be no paint on your curing rack. You can wipe off the hanger so you have no paint on your curing rack. The powder painted first rack just rinse off with water. End result is two clean racks, uniformly painted spoons and a happy customer. It sounds simple and it is along as there is no breeze whatsoever. If you have the rack on something you can turn you can get full coverage easier. You are going about it the right way. When you transfer them to the curing rack be sure to inspect for full coverage. If you missed any spots hit it again. The paint will only adhere to non painted surfaces. Good luck. I hope this helps.