

littleriver
-
Posts
1,131 -
Joined
-
Last visited
-
Days Won
9
Content Type
Profiles
Articles
TU Classifieds
Glossary
Website Links
Forums
Gallery
Store
Everything posted by littleriver
-
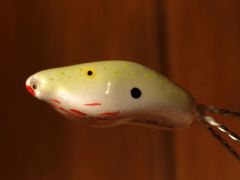
 Thanks Patrick! A minnow finally.
 -
Gentle , Great observation! I would have never thought the added displacement would overcome the weight but then it still amazes me how thick the steel is on ships an barges and they float. Thank you for sharing this information. Vic
-
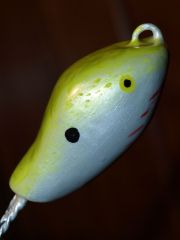
I hope so John. That is your bill on the bait. Thank you! I really like the circuit lips on these little baits. The lure has nice action. Vic
-
Pine
-
Blazt, i use the bill I will be fishing with for testing . Once I have the bait water sealed i put a tin piece of masking tape on end of bill and in install in slot. This holds well enough for testing. I also sometimes employ a temporary extended line lie that may be bent to variety of positions until a good position is found. I credit Vodkaman for this fantastic prototyping idea. My very first crank with the long bill and steep angle bill was able to swim after bending my line tie down onto the bill. On the bill as bob suggests. Many of my first baits were more learning than success. I know literally nothing of the bait your copying or how deep it will dive. But I am developing an idea of what makes any bait dive and act the way it does. Ballast effects buoyancy and both ballast and buoyancy have influence on depth and action. So does line tie position, lure shape,lure weight, weight distribution bill angle, bill length, bill width and bill shape. Basically it can get very complicated very quick. I commend for trying to get more depth. Trying a new mod often leads to dissapointment but try and try again and finally success. My intention is to hopefully save you a couple of those tries and fast track you to success. The reason we do not see commercial baits with steep bill angles and long bills with line ties on nose is simple; they usually do not work. The buoyancy (lift) of the bait with line tie on nose coupled with long steep angled bill(drag) will nose over too far and swim out of control. There is a balance that must be achieved for proper swimming action between the two like a seasaw. Put too much force on either end of this delicate balance and no wobble. For such a large bill on a short bait with this angle, it would take so much ballast at rear of bait to balance and this would not make for a good swimmer even if it did work. I wish you well with your build and I hope your swimming this bait soon. Vic
-
My first crank looked alot like yours. I made it 5 months ago. The bill I feel is too long. The bill length, angle and line tie position will most likely produce a bait that tends to roll out. I think we all want to produce a deep diver first time out. Go look at tackle warehouse deep divers and the first thing you will notice is the angle of the bill is or almost horizontal with the bait and all the line ties are on the bill. This will be true no matter the shape of bill. Your lure will swim with angle and line tie position. The bill will need to shorter. Look and the shallower diving baits 4 foot range and you will have an idea of the length that will work for this line tie and bill angle. The bill on the lure your coping is probably the perfect length. Vic
-
 Very nice ! What kind of action does this bait produce ? I have enjoyed many of your airbrush tutorials. Thank you for sharing your techniques. Some day I hope to use them. Vic
 -
Thank you Ed.
-
 Thanks for sharing Bob People laugh at me but sometimes I find a topwater bait harder to make than a swimmer. Sure it floats or not but does it do what you want? I have a nack for making topwaters that do nothing I want.
 -
Beautiful baits Bob! Is there a secret to keeping this style of baits from spinning? Vic
-
 Thanks John. I owe many thanks to Diemai for introducing me to Hans Nordin's work. This paint was done at the kitchen table with my one year old setting on my lap. Well that is a TN stretch but I did do it on the kitchen table with a brush and some cheap folk art acrylics from walmart. Beleive it or not. Thanks Patrick. I do a pretty mean snake head if I may say so myself. Not sure where the snake shapes are coming from. I hope to carve a minnow some day. LOL
 -
Mark that is a great idea! I never thought of this.
-
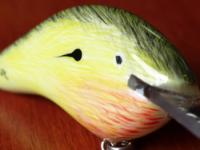
Here is my latest interpretation. Vic
-
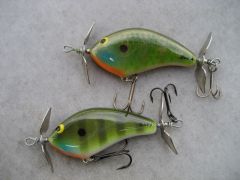
Another pine body Three wire "A" rig. I hope Tennessee is happy. Vic
-
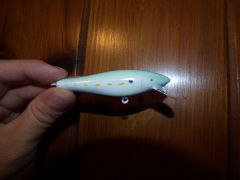
 Pine body with three wires out the back. Vic
 -
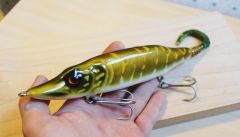
 The little lady is made from pine. The bill I have JBlaze to thank for. Thank you John! Again a big thank you goes out to all the many great contributors on this site. Vic
 -
If possible, add after topcoat. Another idea, that just came to me now and is much more complicated. Dip the swivel in hot wax. After topcoating is done use a lighter to remove wax. Have no idea if this will work and even sounds hard. Not all my ideas are good ones. Vic
-

Who's Interested In Buying Translucent White Circuit Board?
littleriver replied to RayburnGuy's topic in Hard Baits
Professor Some really good info. Nothing beats experience in my book. Have you tried G11 as well. I have been reading and not fishing. What i read says G11 has a cloth instead of fiberglass fiber. It is suppose to be less water resistant and not as hard. One would think G10 would hold up better than G11 in all circumstances. Only experience like yours could tell. I want my baits to tear up the bottom and from what your telling me I may be better of sticking with the lexan? Vic -
A knife is quick. A coping saw safe and cheap to buy but slower. A hack saw will do ok. Suggest you try a few till you find one that suits you. Before I used Band saw, i used the knife. A bit wild but very quick. I have also tried the rasp. A bit slow compared to a sharp blade. Vic
-
 Looks great John!
 -
I would try some longer stick baits. The bigger the bait the less trouble you'll have getting them to float. Not all baits are designed to float at all. Rattle traps for one catch many fish.
-
Another Lure Design With Shifting Internal Weights
littleriver replied to diemai's topic in Hard Baits
Really great idea Dieter! Thank you for sharing. Cant wait to try it. Also like the look of the lure with the sloped nose. Looking forward to seeing it swim. Vic -
Who's Interested In Buying Translucent White Circuit Board?
littleriver replied to RayburnGuy's topic in Hard Baits
You'll never know till you do it. Vic -
Pete, Check out Gene's carving Tutorial on the tutorial page. This really helped me get started in the right direction. Vic
-
Your welcome Pete Make sure the grain of the wood is running nose to tail. Not top to bottom. Hold the wood with front or back of wood facing you, then carve from middle of lure to end as you shape it. You may either cut away or to you . I carve to me. I have carved many pine lures and the grain can be frustrating but not bad once you get the hang of it. Many use poplar. The grain is easier to work with and has decent buoyancy. The pine grain is difficult to cover in the end because of the varying density between hard and soft grain leaves uneven surface aftet sanding. Woods with no differences in grain densities finish smoother.