-
Posts
451 -
Joined
-
Last visited
-
Days Won
28
Content Type
Profiles
Articles
TU Classifieds
Glossary
Website Links
Forums
Gallery
Store
Everything posted by eastman03
-
Awesome job everyone! Amazing work by all the entries.
-

Do you do foiled lures? If so, please step inside...
eastman03 replied to exx1976's topic in Hard Baits
Yea let us know how it works. Did you see All eyes post in the gallery! Now that is a sick foil/scale job. You should ask him how he did that, he doesn't seem to post much here. -

Do you do foiled lures? If so, please step inside...
eastman03 replied to exx1976's topic in Hard Baits
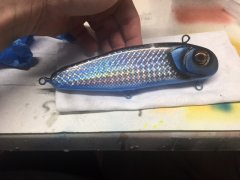
lol, sorry to confuse you. I get confused about what I do some days. Usually I will, epoxy, basecoat of paint/primer, foil, polycrylic, epoxy, paint, (sometimes polycyrlic during the paint if i feel i need to seal a layer to prevent tape from stencils or netting from damaging the paint), then epoxy. Again, this is just what I do. There might be better or easier ways to do it. -
-

Do you do foiled lures? If so, please step inside...
eastman03 replied to exx1976's topic in Hard Baits
Usually at least a day between each step. Mostly because I'm never trying to get them out fast. Honestly it is probably more like a few days between each step. The polycrylic layer that I spray dries quite quickly. That one could be epoxied or painted over over in the same day. Paint too. If I paint a lure in the morning, I have epoxied them in the same day as well. -

Do you do foiled lures? If so, please step inside...
eastman03 replied to exx1976's topic in Hard Baits
Ahh got ya. I sprayed over the foil with polycrylic to make help get a good surface prep for epoxy. Then epoxy. Then paint. I don’t usually scuff anything up. I don’t know if it’s totally necessary. I haven’t seemed to have any issues. -

Do you do foiled lures? If so, please step inside...
eastman03 replied to exx1976's topic in Hard Baits
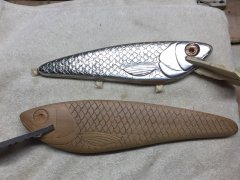
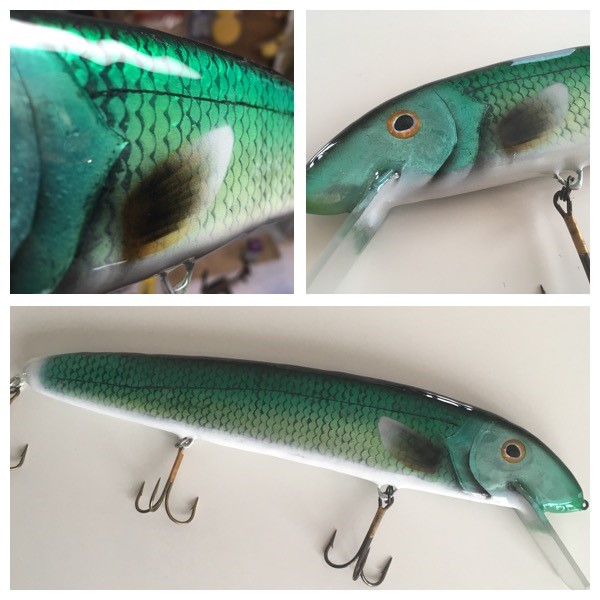
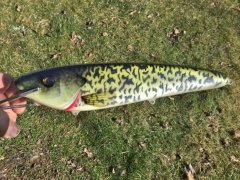
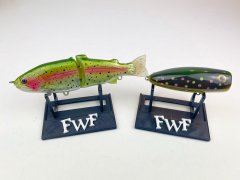
Yea, it is a pretty cool way to foil a lure. I got the idea from engineered angler on youtube. The head transition was very tricky. Again, I've only done this a few times, so there might be better ways to do it. Basically I foiled the scale pattern right up past the area where the gill plate would be. Then I made a quick stencil for the shape of the gill that I wanted. I carefully traced it onto the foil scales, then using a very sharp knife, i cut out that shape, and peeled the cut offs of the foil scales. . Then I cut a flat piece of foil to fit in that spot using the stencil and carefully fit it into the cutout spot on the lure. It is a pain, but can look super cool! Here is another one that worked out good too. I ended up using two separate pieces for the gill, then the head. You can kind of see the overlap, most of which i was able to hide with that black paint to accent the gill. You can see better on this one too, how I highlighted the scales with black paint, then wiped the foil scales down, leaving just the edges black. Then I epoxied over the whole bait, before adding any more paint. Looking back at it in hindsight, I really left the head/eye area blank. lol. Should have added more detail. There is still time to I guess. haha This is my version of a Manitoba "greenback" walleye. -

Do you do foiled lures? If so, please step inside...
eastman03 replied to exx1976's topic in Hard Baits
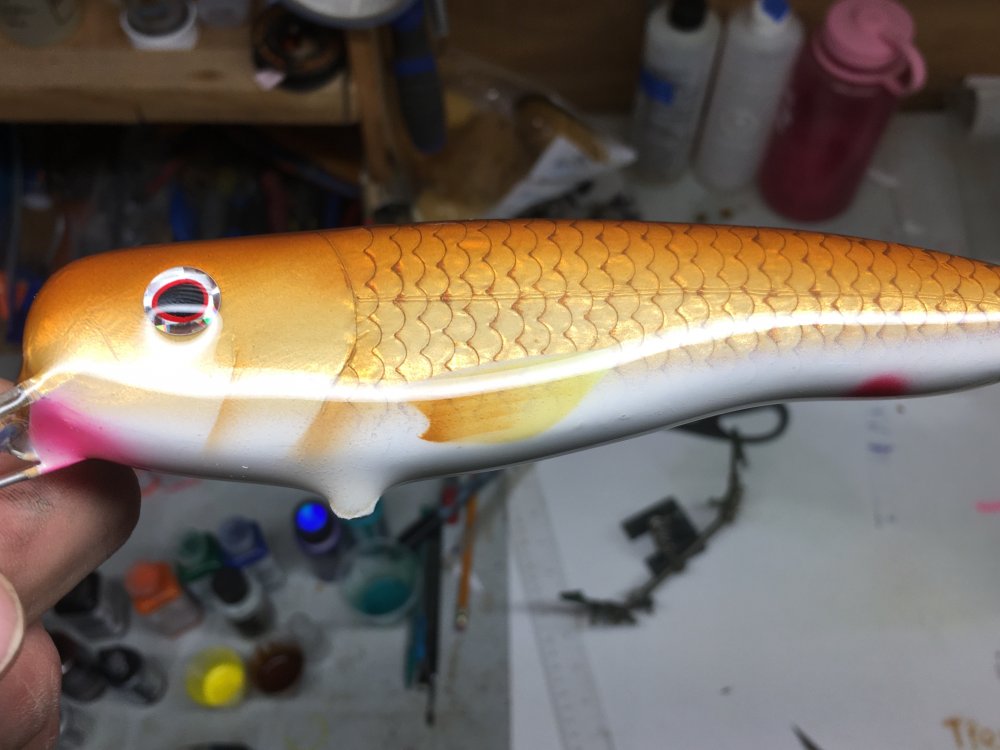
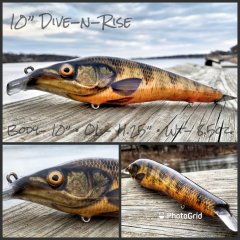
I’ve done scales out of foil as well. And other types of foil with pattern and smooth. Usually I epoxy over the foil to ensure the top/bottom is completely smooth. Helps hide any seems. if you want a thin “seal” over the foil that won’t be as think as epoxy I have sprayed/airbrushed a few very thin coats of polycrylic (cut with 1/3 water) That stuff is great. I’m no expert. Just letting you know what I’ve tried. I have painted right over foil, but it doesn’t seem to adhere great. sometimes I’ll paint a layer at an angle against the scales, then wipe off the paint to try to “highlight” the edges of the scales. Here is an example of one that I tried. I’m not exactly sure how you are going yours, but I wasn’t too concerned with preserving the texture to the touch. Just for a visual effect. -
Hey welcome here. Honestly you might not get to many responses to the bottle fed airbrush, I think (myself included) the majority of lure painters use the gravity fed airbrushes. But I'm sure you might get a few tips here. As far as clear coat - that is a huge question. Better clear coat than epoxy? Epoxy is an excellent clear coat, but like all clear coats, it depends on many factors. What kind of epoxy have you been using? Also, what have your issues been? What kind of lures are you clear coating? That might help dictate what clear coats could work for you. As I've said in previous posts on finishes, make sure you practice and master whatever method you are going to try, because they ALL have their learning period. Some of the other options UV clear coat like AlumaUV (i think it is called). Another option is a type of MCU (moisture cured urethane) - like KBS diamond finish. Search some of the discussion on this form for clear coats. There has been lots of great tips and discussions on all the different methods.
-
It is a strange thread lol. To make a quick and dirty test mold, i have used 100% silicone caulking. I followed some random youtube demo. I added water and some soap i think lol. I mixed it all up with gloves on (very stinky). Then i sort of forced it and pressed it around my master. It did work, although with imperfections. I would never choose this for an actual mold, but here in manitoba, that stuff is bloody expensive. Especially if I want to mold a larger lure. Anyway, it worked and I make a couple large paddle tail tails for a hybrid lure. I'm glad I did it that way, as a test, because I need to make a few tweaks to improve it before I would make a good mold.
-
What kind of paint jobs you looking for? Do you need them finished with epoxy? Or whatever finish
-
-
Ohh those are going to be my next purchase for sure. Wish I could help you more. The one thing I constantly hear is that the colors can 'bleed' between layers or clearcoat. I believe the solution is to use 4030 (i think) as a bleed stopper after a layer of paint.
-

No posts since Thursday! What's everyone working on?
eastman03 replied to eastman03's topic in Hard Baits
Right on. I'm the same way. I have a few different projects and ideas on the go. And a couple of lures waiting for open water to do some testing. I'm up in Thompson, Manitoba right now. We got a foot of snow last week, and we are in the process of getting another foot today. Barf -
Wait?!? you aren't allowed to do that!!? lol They should have rules or something. Well even if there are less entries (probably more coming), there are some beauties in there!
-
Sorry, I got sent way up north for emergency relief work and haven't been able to finish my lure for the competition. I'm just bored. And it's been way to quite here haha.
-
-
-
That looked like tough conditions. He caught some good ones! Gussy won last week! Huge win for the Canadian. I mark a waypoint every time I see him on lake of the woods. Haha.
- 1 reply
-
- 1
-

-
Normally I would paint some opaque white over the black, then paint the color that I want because you are right, the black really dulls the color down. That can be hard if you are free hand painting, but it works well with stencils or mesh for scales. Just make sure the stencil/mesh is pressed down on the lure, and doesn't move. Sometimes I will put a layer of epoxy (or something like polycrylic) over the black, then paint my next layers. That way if you mess up, you can wipe the paint off without affecting the previous layer.
-
Welcome here, I agree 100% with what Bob said. Those are the three main choices overall, and they can all work really well, but they each have their own issues too. I think it would sell out all over the bait making community if you could come up with a insanely tough, dippable, easy to store, very clear, non yellowing clear coat. UV cure might suit your needs, especially if you are making relatively small lures. Lots of positive reviews overall. Search the form for previous threads, there have been a few good discussions on clear coats. But like we have said, it too has some downfalls. Learn how to use it and get good at it before making any judgements.
-
-

E46601A7-2D17-4090-AD5E-DAEA31391628.jpeg
eastman03 commented on fishordie79's gallery image in Hard Baits
-
@Hillbilly voodoo I had similar problems with the tail I made (as far as the action). I was hoping for a wide thumping action at slow speeds, which was ok when I softened the plastic, but then the tail "straightened out" and loses action sometimes. So when I made a stiffer plastic version, it stayed straight, but had to be reeled in pretty fast to get the desired action. I'm sure this is an issue for almost every paddle tail, and it was originally why i got into making my own (also because they are super expensive). A popular Muskie lure I liked had soft really good action paddle tails, then they changed their formula or maybe manufacturer and the plastic was stiffer and more durable, but the action at slow speeds disappeared. Anyway, I'm sure there is a way to balance the durability with the desired action. I might try pouring the bottom of the tail/shaft with harder plastic, then softer plastic on the top half. See if i can keep the paddle down, but still have a wide waggle. Did you use any softener or hardener in the plastic you used for your tail?
-
It has been a pretty mild winter other than the two weeks of -30. So, if this nicer weather holds, most of the ice will be out mid-april ish. but we are a gigantic north to south province, so up north it is still -25, and the ice roads are still have semi-trucks rolling on them. The north often has ice right up into mid-may. I'm on my way to Thompson tomorrow for work, so maybe I'll get a day of lake trout fishing in some time!


