

eastman03
-
Posts
462 -
Joined
-
Last visited
-
Days Won
28
Content Type
Profiles
Articles
TU Classifieds
Glossary
Website Links
Forums
Gallery
Store
Everything posted by eastman03
-
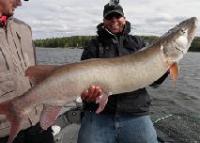
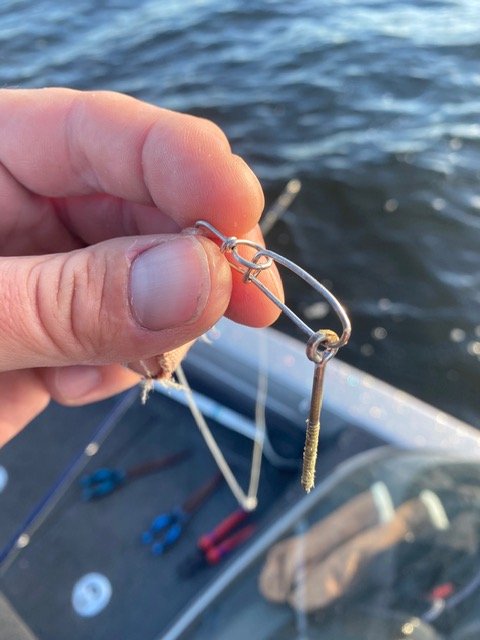
I hate to always be the wet blanket when it comes to screw wire vs thru wire, but in my opinion, if you are making a premium lure for muskies or pike, it should always be thru wire. Screw eyes are plenty strong when new, but after fishing with a lure for a year or two, almost no amount of finish will be able to withstand rocks and fish. If there is any moisture ingress or if the threads 'crack' loose from the glue that's holding the screw, it can pull out. Sorry, it just bugs me seeing musky lures that go for 100+$ dollars, and they have screw in hardware. This is the result. A lost lure and possibly a dead fish. This was from a big pike that crushed the lure boat side. Set the hook and out came the large screw eye. Hopefully the fish chucked the lure. This is from a 'well made' well known lure manufacturer (I won't name names or anything). This is the second time that it has happened to me, so I can only imagine with all the people fishing, how many times this may happen. This would not happen with thru wire. I'm tough on equipment, I fish a lot, and if there is a weakness, musky fishermen tend to find it. I'm headed out this weekend, freezing temps, and lakes icing up to go bash some other lures around on the Canadian shield hoping for another hog.
-
Cool effect. I believe I've had this happen before to a similar effect. I seem to have this happen with a few of my paints that I did not shake well enough. So similar problem as to over thinning, basically not enough pigment. It happened to my orange paint, a pearl white and a black as well. Was super watery and dried splotchy like that (I was going for a nice smooth finish). When I tried to actually stir the paint with a stir stick, turns out I had a bunch of the pigment clumped up and stuck to the jar. Especially orange, I have had lots of trouble with oranges lol.
-

How to Make Holographic 3D Eyes
eastman03 replied to fishordie79's topic in Member Submitted Tutorials
@fishordie79 so it's been a while, but I have almost all the right parts to make my own eyes! Learned a bit about photoshop, and waterslide paper during the whole process! Waiting for a leather punch kit to punch the eyes out. Now only my own creativity can hold me back! Thanks for the tutorial!
-
I like cedar for it's buoyancy, and natural water/rot resistant properties. I'm not exactly sure what kind of cedar they grow in California but i'm sure it will do. However, for carving fine details, it can be frustrating. The grain that is there is much harder than the wood between the grain if that makes any sense. So I can make for a difficult process to carve details. I prefer bass wood if I want to add any fine details, that stuff carves like a block of butter, it is amazing.
-
I use western red cedar mostly. I will use white cedar if I can get it as well. I have a friend that operates a sawmill, and he saves me cutoffs of western red cedar that have no knots and relatively straight grain. If I need really consistent straight clear pieces, I will go and actually buy a 2x8 of clear straight grain cedar from Windsor plywood. I don't like doing that because it gets pretty pricey per foot.
-
It sorta depends on how complex you want to get. I usually only make a dozen baits at a time, so I often just do the vice grips method to make the loop at one end. But you can make yourself jigs to get repeatable bends. Kinda like this: It helps to get yourself a good pair of round nose pliers that are strong enough to bed thicker wire, I use anywhere from .051 to .092" wire. Knipex makes excellent tools.
-
I have used polyurethane to seal wood, then primed and painted with acrylic paints overtop. It seemed to work alright, however I did not use the polyurethane on the top of the paint. I finished these lures with epoxy, so I cant say how that would work over top of the paint. To seal the wood, I dipped the lures in polyurethane and sanded after it was dry, twice just to seal the pours and get a smooth surface to work with.
-
Check out our member submitted tutorials! @fishordie79 has a cool tutorial on how to make lure eyes. I'm hoping to try this soon.
-
That looks like it has excellent action! Nice work
-
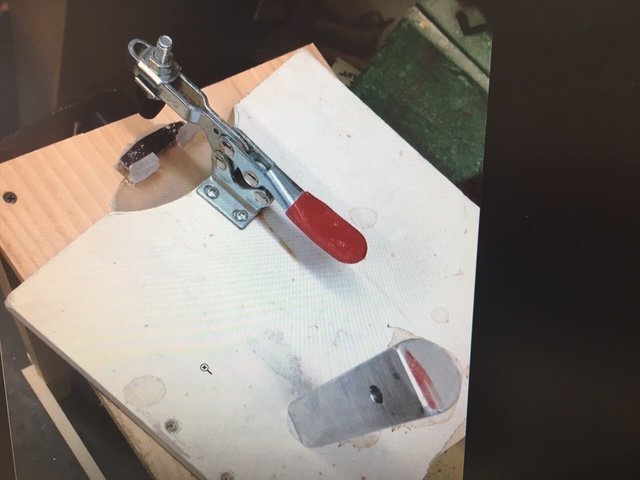
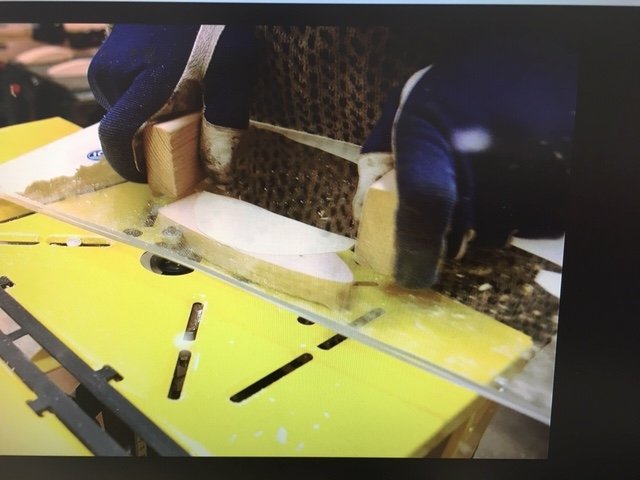
Routers are unforgiving tools! Especially when working in close quarters with a small piece or wood. I suggest make some sort of jig that removes your fingers from the danger zone. Here is a few ideas and past conversations for jigs when using the router. I see no reason to get my fingers anywhere near there. www.tackleunderground.com/community/topic/21991-using-a-table-router-to-make-lures/
-
Welcome here first of all! Bait making is a fun and addictive hobby! With a small propbait, you might not need any weight at all? Might be a trial and error thing. The hardware and hooks might give it enough ballast to remain in an upright position. Tough to know without some trial and error. Lots of information on wood density and weight needed if you look up Archimedes dunk test here on the forum. That probably gets a bit more technical than what you need at the moment Decals would probably last depending on the topcoats strength. Many of us use foil (like aluminum foil tape from a hardware store for duct work), or you can buy holographic sticker material. So as long as you have a good topcoat, whatever is under it should be protected. That being said, depending on the fish you are catching, might also depend on how long the topcoat lasts! Lots of great info and help on this site. What I usually do when I'm making a new to me style lure, make a few of them. Whip out a few kinda quicker prototypes (mine usually don't even have paint). Experiment with different weights, in your case maybe prop blades, or body sizes/shapes. Just don't change too many variables at once! Have fun with it. Keep asking questions here if you are stuck.
-
 This is the first homemade lure that I lost, I knew it was going to happen eventually. It still sucks lol.
 -
It is with great sadness that I announce this lure has a new home at the bottom of the lake. In it's short life, it has given me many beautiful fish, and held up amazingly. One of my favorite lures, I will recreate it, but this one in particular will always have a place in my heart. Lets all have a moment of silence. Thank you.
-
I really like the Engineered Angler channel on YouTube! Great ideas from him. I also have started using a mid coat for several applications and it really preps the paint for the final smooth epoxy finish! I dilute Minwax polycrylic with water and shoot it thru my airbrush to give a nice smooth mid coat for the final epoxy. I have also used it between painting and stencil layers where I want to tape a stencil or something like that to the bait. I clean out my airbrush immediately after spraying the polycrylic and haven't had any issues with it clogging up or doing any damage. If you let it harden in there I could see it being tough to remove. But airbrush restorer would probably take it off as it seems to dislodge everything (love that stuff).
-
 Pretty good, two of the tails plastic was a but to stiff. So I made a softer one, and it has lots of body roll and vibration. I was able to cast at some muskies with it yesterday for a bit. However, we don't typically use large lures like that till a bit later in the season. Hope to get a hog on it!
 -
Superglue was my first thought too. Liquid superglue. Or you could spray polycrylic. Love that stuff now. Probably wouldn’t penetrate as well as superglue. But you could just dip it in polycrylic too. It is thin enough it would clog the hole.
-
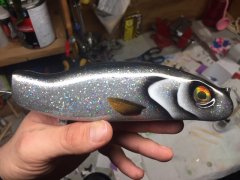
 Used maple for this one, and added a bunch of lead near the front for a very head heavy sinking action. I corkscrewed a wire out the back and added a 'bulldawg' style soft tail. I wanted a lure that falls straight up and down more than others on the market. Lots of the full soft plastics seem to glide and sink slower. And also, I wanted to try something! It works well!
 -
I'll post some pics in the hard baits section today, you bet!
-
I'm with Mark on this one. I found some ammonia free window cleaner (it wasn't windex brand), and/or soapy water back flushes for between colors. And Airbrush restorer for a deep clean once in a while or if the performance drops. Lots of questions on airbrushes not spraying right on the other FB forums, but most of them are not doing the deep clean. Airbrush restorer works wonders for cleaning out the tight spaces. I haven't experimented with sonic cleaners, but I don't paint enough to warrant one of those. Restorer isn't really cheap either (or easy to find for me), but just soak the components and pour the solution back into the bottle. I've been using a 4 oz bottle now for quite a while lol.
-
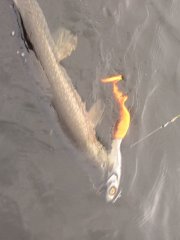
 Fathers day weekend, better than Christmas. It is the muskie opener in Ontario! Good weekend, landed a couple muskies and caught a few on home made lures!!
 -
First couple casts with a new hybrid lure! No better feeling than catching with a home made lure!
-
-
-
As far as the width, I'm not sure it is a huge factor in the trolling game. We have taken a lot of footage in the last three years of our trolling lures with Spydro cameras, and see tons of followers or followers then biters and they all are behind or to the side of the lure and often nuzzle up to the lure basically letting it hit them in the face, it's crazy.
-
Most of the muskie trolling baits we use on LOTW in the fall range from 10-14". As far as depth, when the water temps are 40+ degrees, we get most of our bites from 10-20 feet. Cranks like 10-14" grandmas/jakes are popular. Trolled at 3-5mph. Once the water temp gets in the low 40's and into the 30's some of the real big girls can be caught deeper. We tend to move a bit slower as well 2-3.5mph. Lures like a legend plow are popular. Trolling in 20-30 feet off a deeper breakline. Lures hitting bottom in 20-25. But this is a small window before lakes start to ice up, so as much as I love these lures (and love making lures like them), they don't see a ton a use, but have caught some of my biggest fish. Anyway, just my little bit of experience as a musky fisherman on a shield lake. As far as construction, I would stay away from hardwoods like maple. I cant seem to find it, but I remember reading an article about how a lure kicks in the water, and the cedar lures outperformed, and out fished almost every hardwood lure. Tough to really tell though honestly. Send one over! I'll give it a good test lol.

