-
Posts
966 -
Joined
-
Last visited
-
Days Won
45
Content Type
Profiles
Articles
TU Classifieds
Glossary
Website Links
Forums
Gallery
Store
Everything posted by Kasilofchrisn
-
Making a "HARDER" lead-head jig, drop shot sinker etc
Kasilofchrisn replied to kbonanny's topic in Wire Baits
If you already have the Bismuth then that should work. The problem with Bismuth is it expands slightly as it cools so you will need to use drop out and unmolding might give you some issues depending on the mold used. If you have a choice I would use Tin or Antimony instead as they're easier to work with. -

Making a "HARDER" lead-head jig, drop shot sinker etc
Kasilofchrisn replied to kbonanny's topic in Wire Baits
I've used pure tin on various jigs one ounce and up and it works great. But it is $20 per pound. So I prefer to use scrap pewter. Most pewter is 96% tin and cast just as easily as pure tin. Often you can find some pewter at a thrift store or garage sale for a decent price. I don't know where you get the idea that PURE tin will crumble. It casts just fine for me and is not the least bit crumbly or like sand. It is also ~30% lighter than lead. I buy pure tin at Rotometals. I make my lead harder by using superhard from Rotometals. It is a 70/30 Lead/Antimony alloy. Since the Antimony is already alloyed with the lead it is much easier to use. Pure Antimony melts at over 1,000*f but superhard melts at normal lead temps. -
You can get the pins from Cadman. Get ahold of him here or on his website. http://cadmansjigs.weebly.com/
-

A new CNC machined mold from a new mold maker!
Kasilofchrisn replied to Kasilofchrisn's topic in Wire Baits
This mold can be purchased on eBay if you use the search feature look up "jigging minnow mold". If anybody is interested this mold makers name is Kent Desautel. It's contact information is: Kentdesautel@gmail.com Phone: (701)520-1872 I know some people are not happy with Sean Collins being hard to get ahold of. Though personally I really like Sean's molds and own over 20 of them. I know Bob at CNC mold and stuff does very good work and I have a couple of his molds. This just gives another option for those who may be looking for someone to make them an aluminum mold. -

A new CNC machined mold from a new mold maker!
Kasilofchrisn replied to Kasilofchrisn's topic in Wire Baits
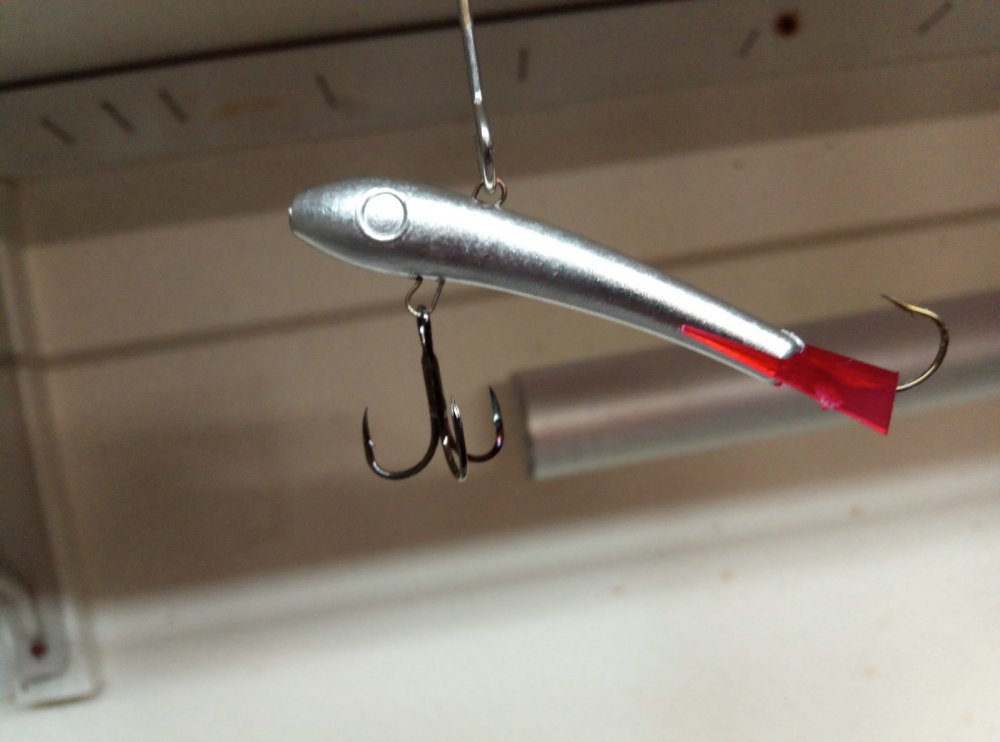
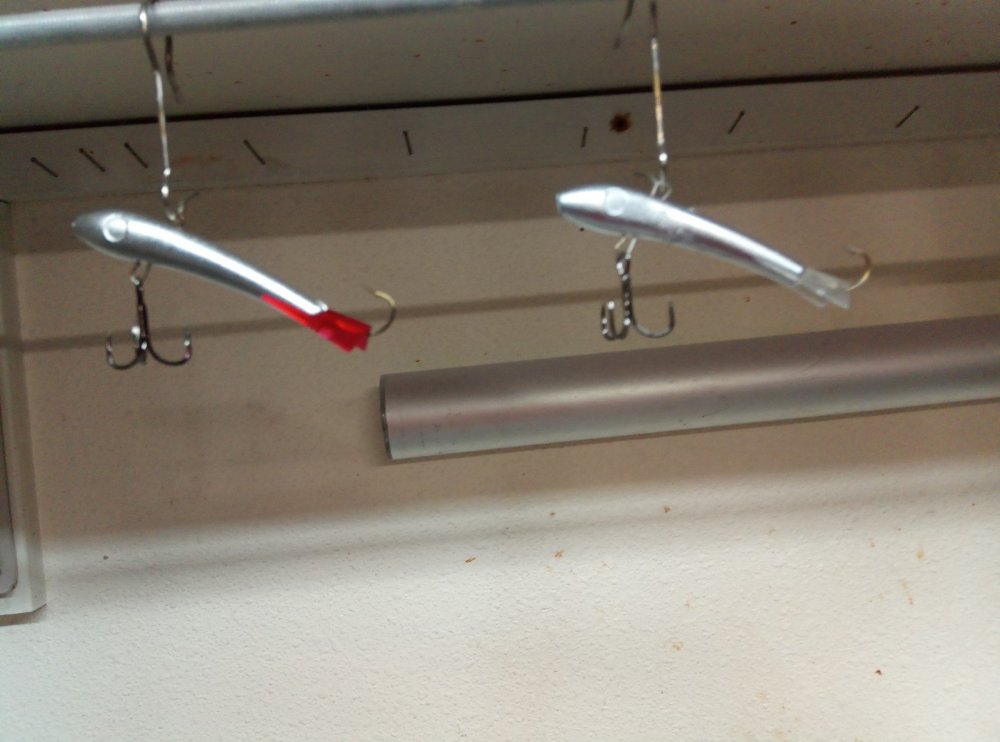
Had a bit of trouble getting the pictures uploaded but I think I got it figured out. The fin is just resting there for looks I have not glued it on yet. I won't do that till after it is painted. -

A new CNC machined mold from a new mold maker!
Kasilofchrisn replied to Kasilofchrisn's topic in Wire Baits
-
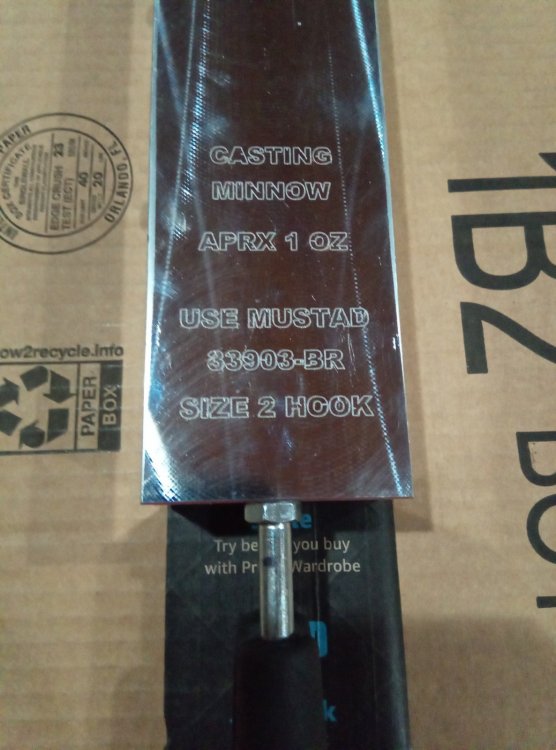
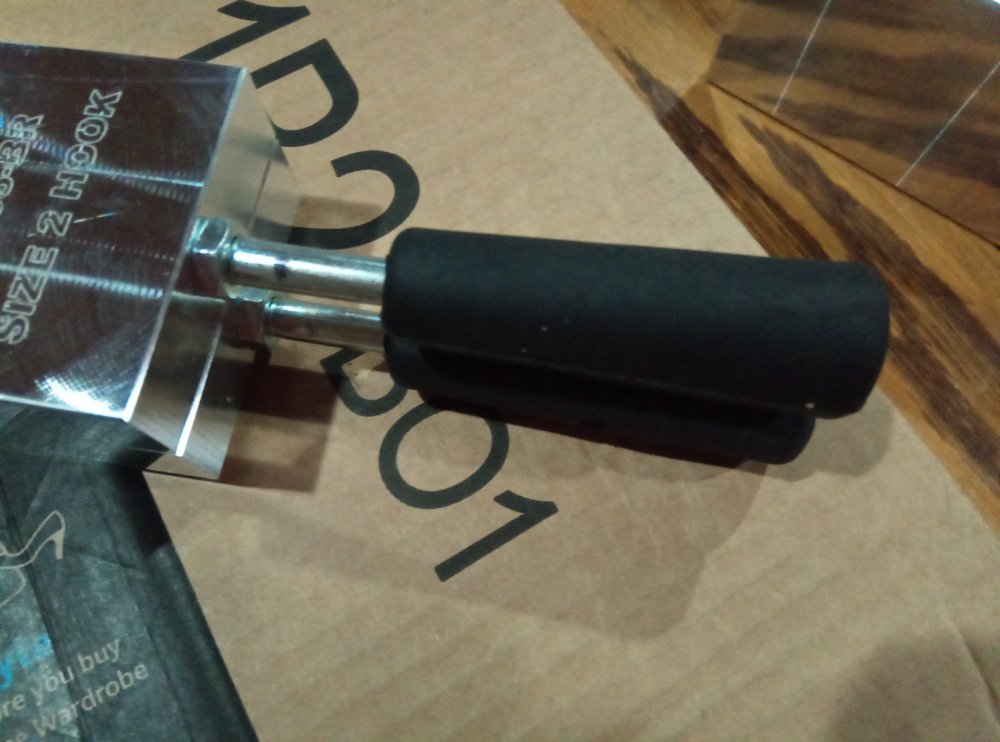
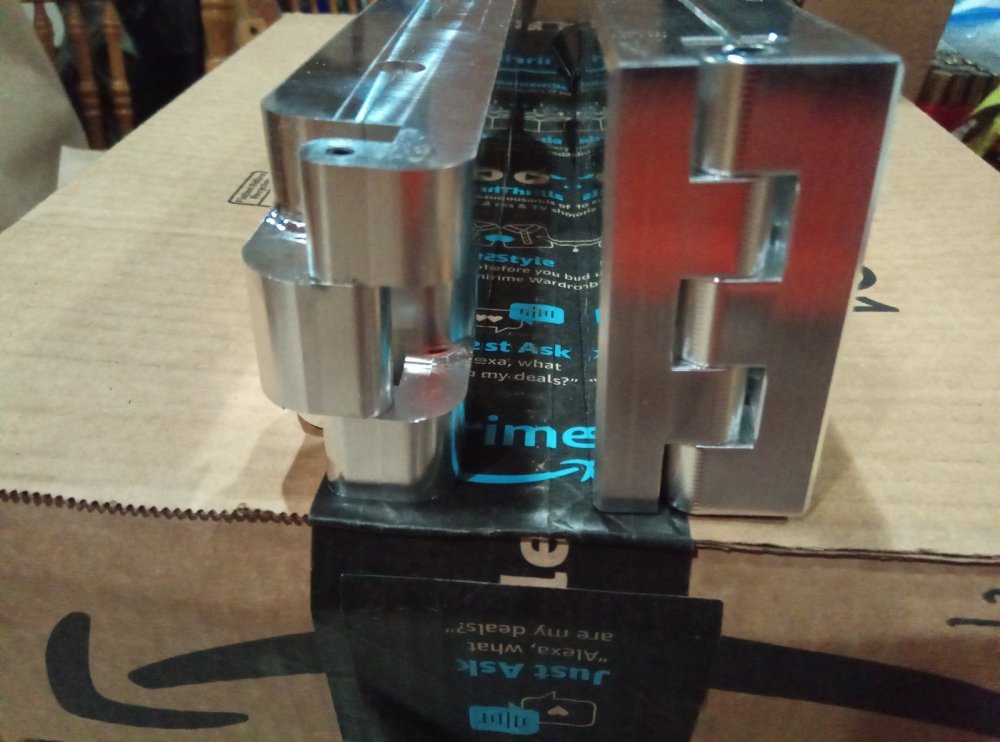
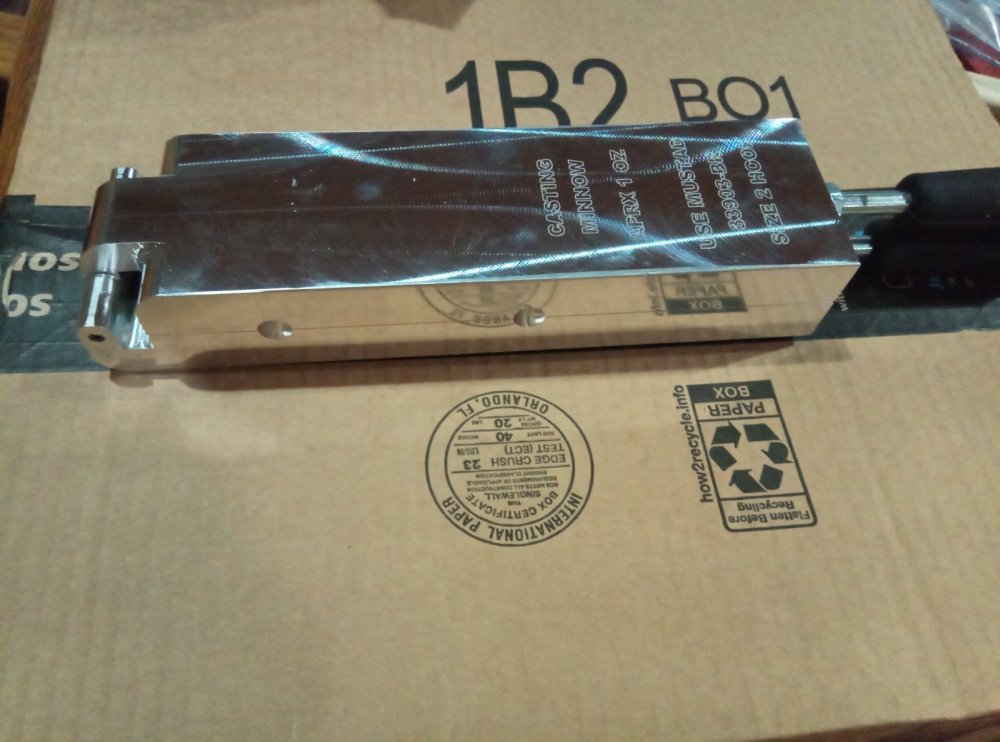
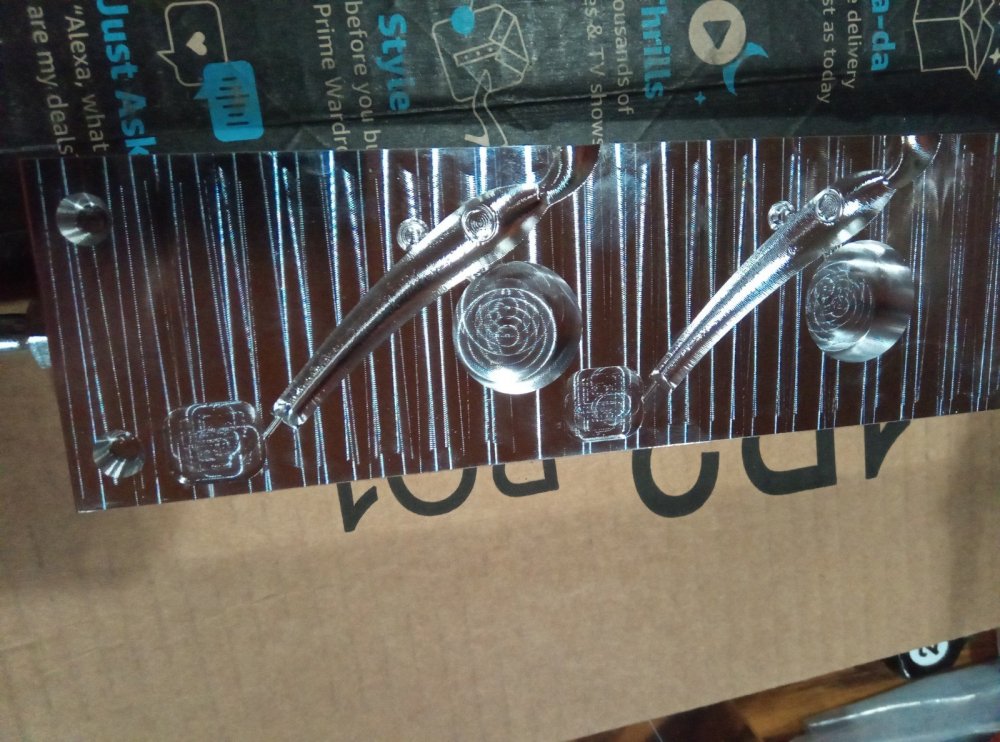
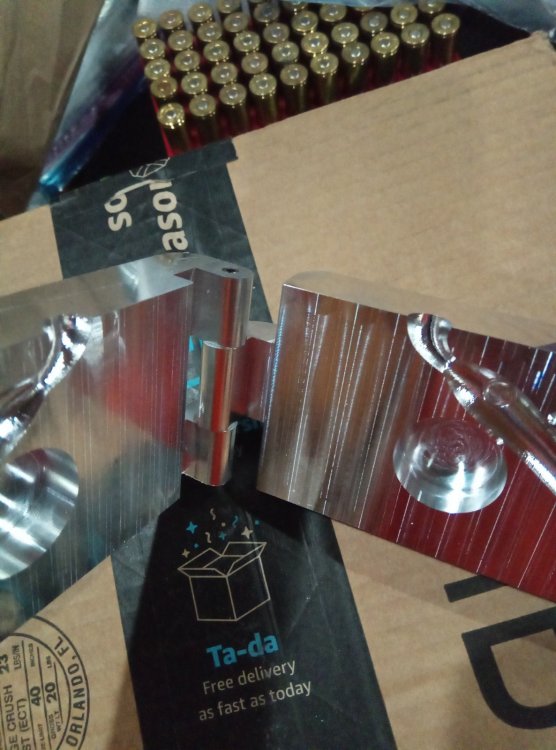
Found this mold on eBay and decided to give it a shot. This is a CNC machined mold for a jigging minnow. Something similar to a jigging Rapala or a shiver minnow. The two cavity mold came with 50 of the tail fins 25 clear and 25 red and 50 wire inserts. The wire inserts are merely a short piece of wire with opposite facing R bends in it. The tails are made out of some sort of rigid plastic. The mold information appears to be laser engraved on the front. This mold calls for a # 2 mustad popper style kink shank hook in the rear and has a hole machined in it on each side to accommodate a #4 or smaller treble hook placed on the wire insert. The handles have some kind of rubber coating on them. The mold makers name is Kent Desautel and my mold shipped from Minnesota. I ordered extra wire inserts and extra tails for this as he had them listed on eBay as well. He sent me a message saying he is looking to get into the custom mold making market. I messaged him back asking for his contact information and have not received it yet. But when I do I will let you know. I had a little trouble when I first tried casting with this mold. Then I realized I had forgotten to spray dropout in the mold. Once I did that it worked pretty good. The only thing I really don't like about this mold is the rubber handles are loose on the bolts that secure them to the mold. They were that way before I heated it up. As you can see the hinges are pinned with roll pins similar to how my Shawn Collins molds are pinned. This mold has much loser tolerances though and opens and closes to easily (loosely) for my liking but that doesn't affect the function of the mold. He did machine alignment holes and pins on the handle end, though with the hinge I don't know why those would be necessary. This is supposed to make an approximately 1 oz jig. With the alloy in my pot which is a mix of lead and a small amount of tin I got 1.1 oz and when cast in tin I got .8 oz. That is with a blank jig only with hooks and a fin stuck on just for looks and no paint or coatings. This mold sells on eBay for $150. I'll include some comparison photos with a new Shawn Collins mold that just arrived in the mail as well. Now I just need to get some holographic foil on these some paint and some eyes put in and test them out.
-
I have not tried to dubro Bender either. I've been looking at them but they're too expensive for me to buy when I already have a Hagens Bender a twistech and I just bought a twistech magnum that will do .051 wire. I do have the adapter for my Hagens to do . 051 wire. The dubro Bender is pretty spendy for doing the same thing as a Hagens or a twistech. the twistech Magnum that will do .051 wire cost me $120 plus shipping. That's a heck of a lot less than the Dubro Bender.
-
Look up the videos from forum member Diemai on YouTube. He's got a lot of videos on making various spoons. I believe he lives in Germany hence the accent that he has. there are also a lot of other videos they're on spoon making including making spoons from kitchen spoons.
-

Heavy gauge wire twisting, any suggestions?
Kasilofchrisn replied to SilverXFoX's topic in Wire Baits
First off your hagins is not rated for .062 wire. And it is only rated for .051 wire if you have the larger forming die installed. Twistech does make a magnum version that will do . 051 wire. I just ordered mine have not tried it out yet. But if you really want to do . 051 wire and . 062 wire I would suggest looking into the dubrow bucktail twister. https://www.lurepartsonline.com/DuBro-Bucktail-Twister-Tool I have not personally tried one of these tools but is the only one I'm aware of that is specifically rated for the larger wires. There are some YouTube videos on this wire twister for you to get an idea of how it works. Forgot to add that when using your Hagen's you should be pushing in slightly as you twist the loop. This will help you achieve a tighter twist. -
Thanks Cadman! That gives me a place to start so at least I know approximately how many skirts to order for how many Baits.
-
So while I was at moose hunting with my dad at his cabin he was talking about making him some fishing lures. He's had this cabin about a year and a half or so and were really just starting to figure out how to fish it. I've already been planning to make some lures anyway and ordered some new molds and will use some existing molds I own. I'm also going to be making some spinners using my wire formers. The lake is full of big lake trout, burbot, and grayling. Anywho my dad was talking about watching a lake trout fishing video where they were using a unique spinner. And he bought one the other day to show me what it was. Turns out it was a spinnerbait. So of course I ordered some hidden weight spinnerbait molds in sizes up to 2 oz for some lake trout fishing next summer. Now I need to order the components. Powder paint I have plenty of and that's what I will use to paint them with. But I need to order some skirt material for these. I've never used this style skirt before as I generally just use a one-piece skirt such as a hoochie with the tip cut off. I was thinking of ordering some kits for these but I wasn't sure if that was the best way to go or if I should order the tabs separately? I'm thinking for colors I will start with some basic colors such as chartreuse, blue, green, etc. But I also don't know how many tabs I will need per spinnerbait. Especially the larger sizes. Any help would be much appreciated.
-
Buy hands-free do you mean pointing up or pointing sideways or what? Mine is designed to sit on my workbench pointing up and that works good for me.
-
Hagens sells a silicone hook protector that would be perfect for this application. I put it on my jigs to keep people from getting hooked as they handle them. If you wanted the two-tone look here's how I would do it. First put on a silicone hook protector on each hook point. Then heat the hooks via a heat gun holding them with forceps and rotating being sure to get an even heat over the entire hook. I'm thinking you could grab it with a forceps on one of the silicone hook protectors. Next you would want to dip it in a fluid bed of your base color. Working quickly I would then hit it with your accent color from a powder paint spray gun. if needed you could reheat before spraying with your powder paint spray gun. Cure it in your oven and you're done. I'm 100% certain you could get the same look doing it this way.
-
Those are made from mother of pearl. I don't believe they're made anymore but you can find them on eBay and other places from time to time. I see a listing for them right now on eBay. Look up Hildebrandt mother-of-pearl blades on eBay.I don't suppose you'll get them for cheap but if you really want to have them it's probably your best bet. Another option would be to find a similar color blade in that same style and try them or paint your own in a similar color. They will weigh a bit more but they'll probably give you the same look.
-
The super glow orange does indeed glow orange in the dark. all of their super glow colors are the same color in the daylight as they are in the dark. I highly recommend them when glow is needed.
- 1 reply
-
- 1
-

-
I buy my foil on eBay. Prices are good as is the foil. I buy the stuff for a Kingsley paper foiling machine.
-
Depends on how many jigs your making. If your making a few thousand you might save a few cents each making your own wires and maybe it's worth your time? maybe? But personally I prefer to buy them. So much easier and saving a couple cents each isn't worth my time trying to make them. My favorite ones are made using a 3D holographic foil. I posted a tutorial on how I make mine using foil awhile back. A search of this site should find it. You'll have to buy some special materials. And it's more involved. But I personally like the look of them. Do they outfish plain powder coated jigs? Being as fish species and behavior can vary I'd say the jury's still out on that one.
-
Me too! This seems like a logical idea for me as well. A master list of molds/numbers could save a few minutes of fumbling through looking for the right mold.
-
Watch this video and you'll learn how they do it at Cast Industries the largest tackle manufacturer in the United States.
-
I just keep mine on some shelves. It's just some used pressboard type shelving. But I do group them together on the shelves. Sinker molds on a bottom shelf, freshwater jig molds on another shelf, saltwater jig molds on the top shelf, etc. I only have about a hundred and twenty molds though. I do need to sit down and make a master list of everything I own just for easy reference. Especially when one of my friends will ask if I can make something and I know there's a mold for it but I can't remember if I own it.
-
I'll second Bob Lalonde at https://www.cncmolds.com/webstore/ I have two of His molds and am happy with them.
-
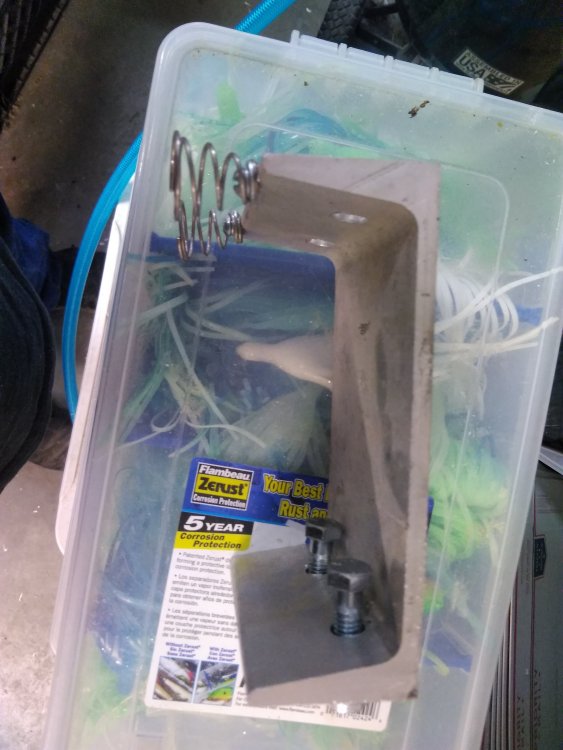
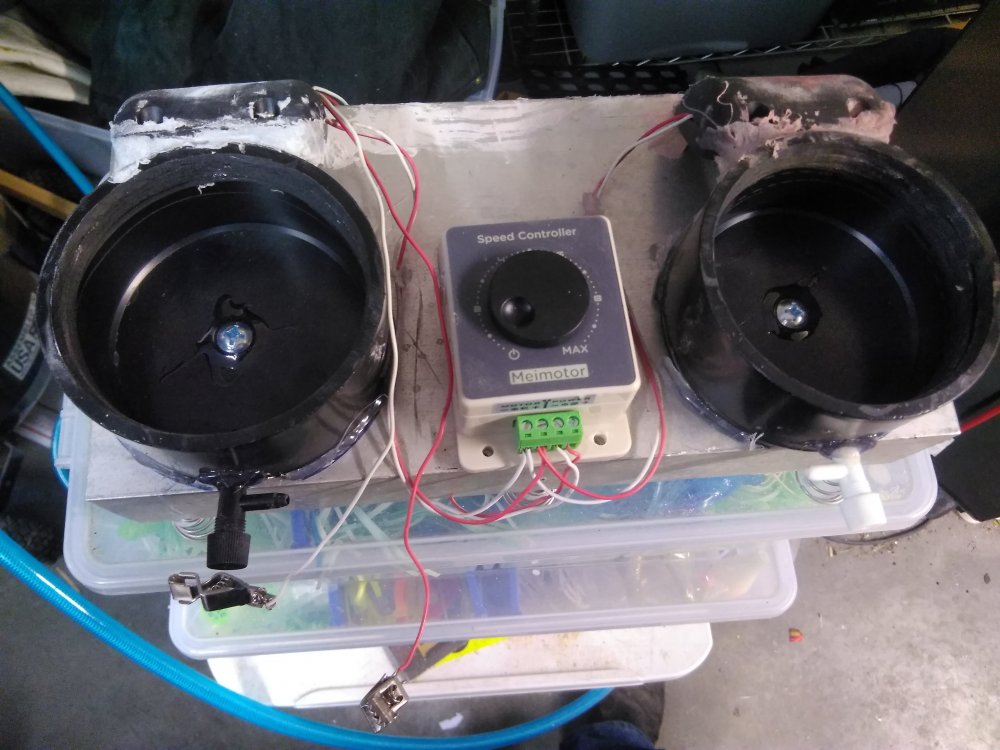
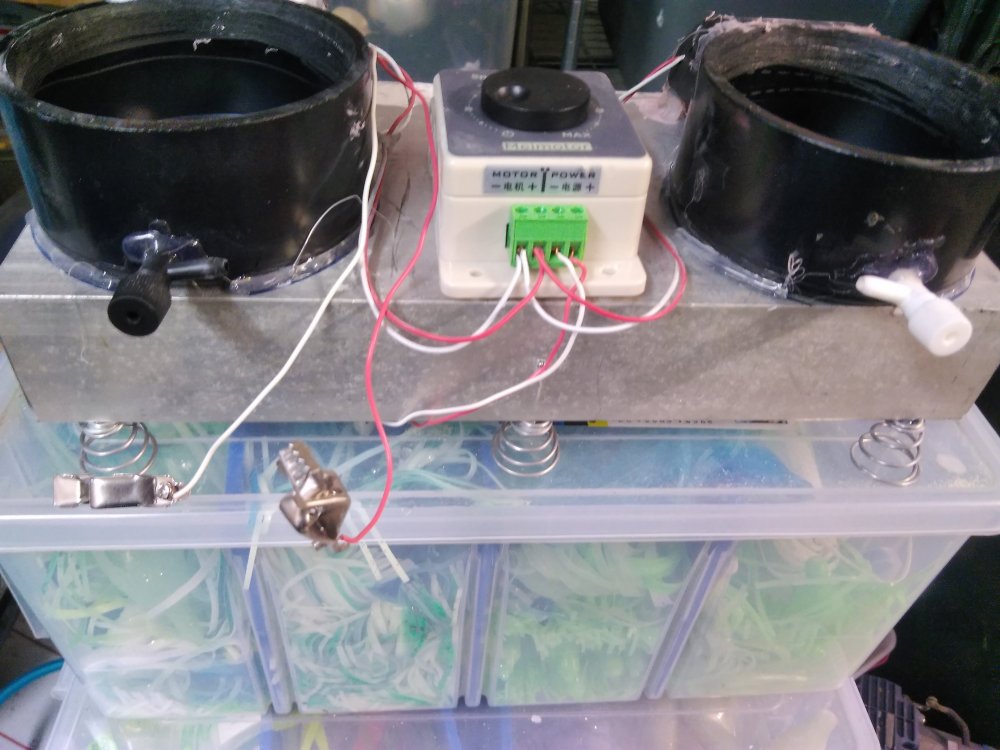
This is the piece that I originally made to use with a vibrating hand sander for the vibration which as I stated above was a failure in a few ways. I'm thinking I may reattach this aluminum piece to it but instead use it to mount the air pump on. Overall this vibratory fluid bed system works pretty good at reducing/eliminating volcanoes in powder paints that do not want to fluidize properly. Overall cost wasn't too bad either though I never have added it all up.
-
-
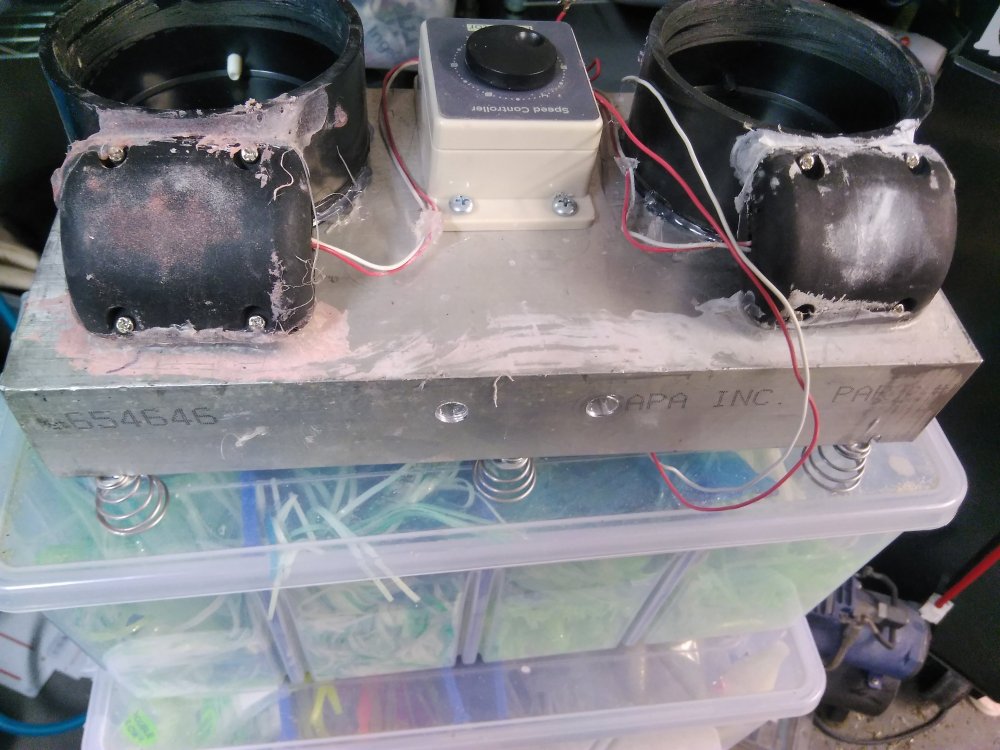
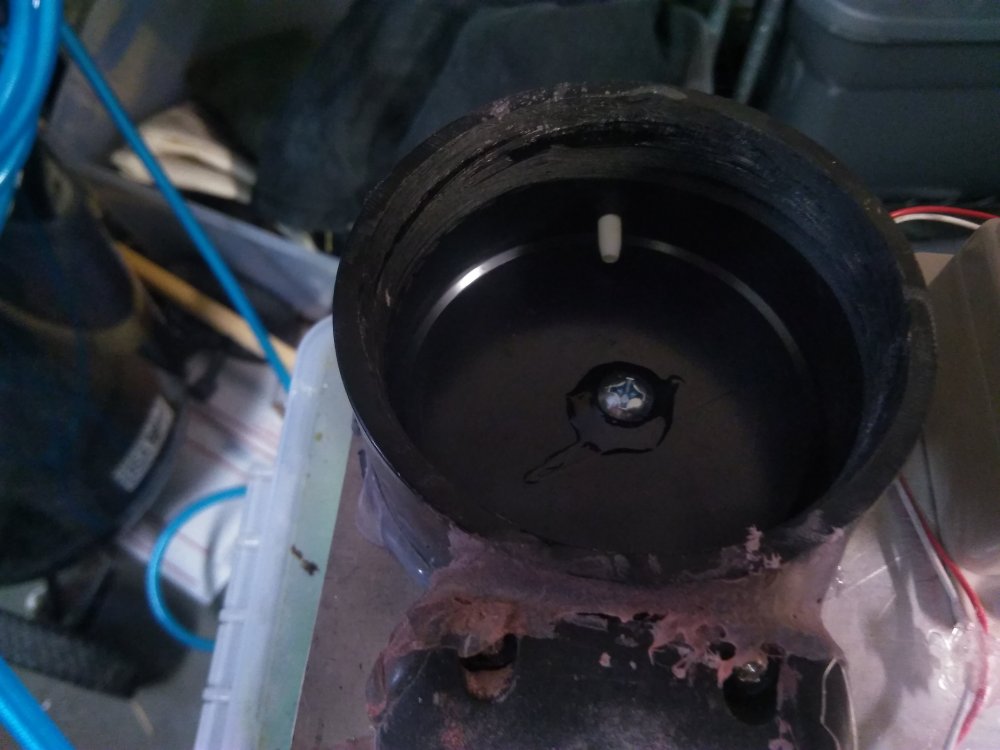
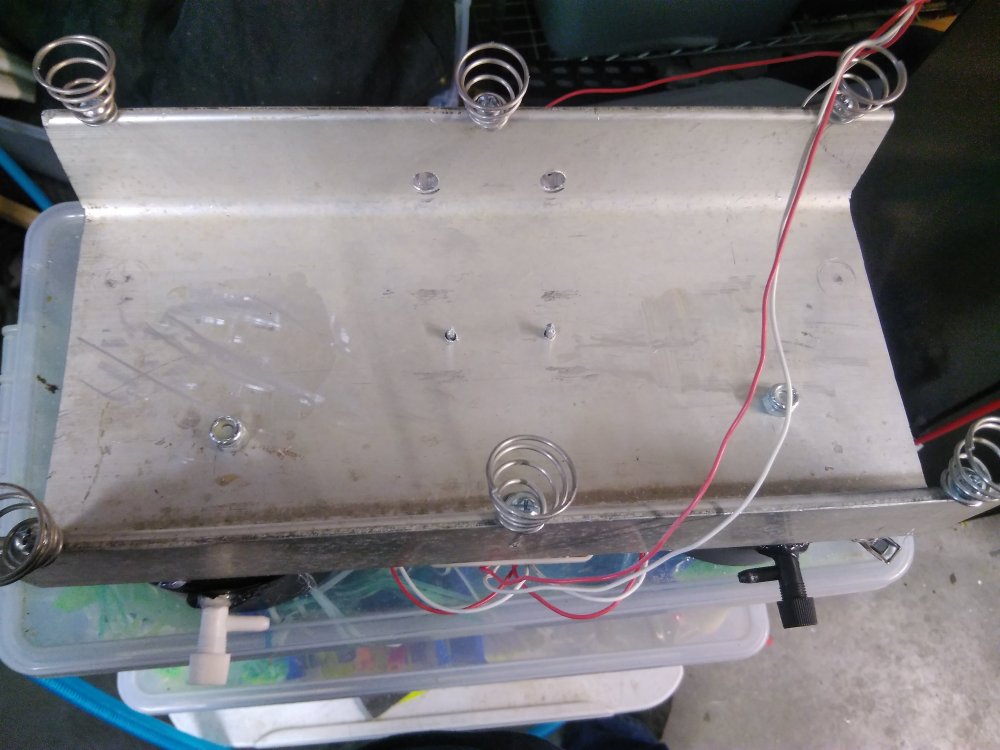
. So this came up in another thread and I figured I would post it here. I made a vibratory fluid bed awhile back and some people were asking about it. I used aluminum C channel for the base. Then I drilled and tapped it for some cone shaped spring feet and bolted them on. Originally I built a T piece for attaching a vibratory sander. This didn't work well so was eventually removed. I then bolted on some 3" ABS flat caps. Bolting was required as installing and removing cups would rip them off with just epoxy. A hole was drilled in each cap near the bottom to accommodate a plastic aquarium valve which was epoxied in. I then attached a small vibratory motor on the back of each fluid bed securing to the base. The wires from the motors feed into a speed controller. The current power source is a small(old snowmobile) 12v battery. Cups are made by cutting some 3" ABS (or PVC) pipe. Put in a knock out test cap and knock out the center and discard. Retain outer ring. Cover with Tyvek and replace ring. You now have a cup with a tight membrane on the bottom. Use another knock out test cap as a lid for the cup. I use a cheap 30/60 aquarium air pump from Walmart for air. For a 2" fluid bed press in a 2x3 adapter and 2" cup. This way you now have a dual 3" or 2" fluid bed. Vibration is adjustable via the speed controller and air via the aquarium valve. Vibratory motors and speed controller came from eBay. Spring feet from McMaster-Carr. C channel was scrap from work. Aquarium parts from Walmart and ABS from Home Depot. It works well for me though I'm sure I'll tweak it some more. And likely add an adapter for outlet plug in capability.


