barrybait
TU Member-
Posts
397 -
Joined
-
Last visited
-
Days Won
12
Content Type
Profiles
Articles
TU Classifieds
Glossary
Website Links
Forums
Gallery
Store
Everything posted by barrybait
-
It gets to be about building a bait that works, and the sooner it gets destroyed the better! When you walk in my shop I want to point at that lure hanging and say "Look at that lure, took me 12 hrs to make and it didn't last four months. Wacked 'em thou. They destroyed it! And it was coated with 2 Ton Epoxy! Didn't matter who threw it either, fish couldn't stand it.........". Have fun making. Barry
-
I finished two ABT Glide Baits and posted pics in the Hard Bait Gallery. First one is kitchen foil type attached with Solarez/MEKP. Second is imitation silver leaf attached with D2T. The leaf resulted in a better silver side of a trout look in my opinion. The kitchen foil looks more like it was chromed. Sorry I don't know how to link my pics. Barry
-
I completed two ABT Glide Baits and posted the pictures in the hardbait gallery. First one I attached cheap kitchen foil to the bait with Solarez/MEKP and the other one I attached imitation silver leaf with D2T. They turned out pretty well but I like the silver leaf better for the silver sided trout look. Sorry I don't know how to link the pics I posted.
-
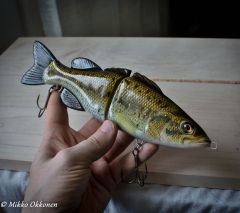
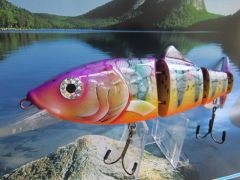
ABT Glide Bait I foiled and painted. This bait has a deep scale pattern in the mold. I applied imitation silver leaf to this bait to compare to the kitchen foil type of my other bait. Attached the leaf to the bait with D2T pressing down with breath and cotton ball. Scrubbed it off with DA a couple times before I got an acceptable job this being one of my first attempts at this procedure. Wanting the silver sides of the natural trout effect I was careful not to get too much transparent white on the sides. Seams much easier to hide due the leaf being very thin base coated edges opaque white to hide color transition. Body paints transparent Createx colors then opaque black for spots and pearlized white for belly. Liked the looks of this one better than the one I foiled with kitchen type foil. Came out with a crushed silver look made for a nice looking silver sided trout. The other bait looked more like I had applied chromed type paints Barry
- 5 comments
-
- rainbow trout
- trout
-
(and 5 more)
Tagged with:
-
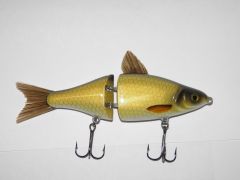
ABT Glide Bait I foiled and painted. I used "cheap" kitchen type foil attached with Solarez UV cure resin using MEKP for curing agent. This bait has a distinctive and fairly deep scale pattern in the mold. All Createx paints. Used opaque white to cover the seams, then transparent paints for body and back. Opaque black for spots and pearlized white for belly. Seems the overspray of the white covered the foil more than I wanted but it comes through in outside light better. One of my first attempts with foil. Barry
- 3 comments
-
- rainbow trout
- hard bait
-
(and 3 more)
Tagged with:
-
- 3 comments
-
- pumpkinseed
- sunfish
-
(and 4 more)
Tagged with:
-
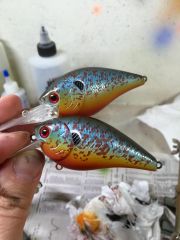
I painted one of the larger s-wavers for a friend and posted it in the gallery. I don't know how the coatings hold up with hook rash etc. but I used a small sand blast pot ant the finish popped off like crazy with the slightest sweep of the blasting media. If you have access to that or a bead blaster it works great. I haven't tried the brake fluid yet.
-
Thanks John. I followed your progress with the foil scales. Nice job. The scales I am doing are on the bait itself. I am making some progress. I used kitchen foil on one bait and it formed pretty well. I am trying leaf on the other so I can compare the two.
-
Thanks Jaw. I can see the advantages of that. I went with leaf thinking it would be better for the crisp scale pattern. Would the tape conform to a cut scale pattern well? Hurley. Yeah I figured you didn't see my post when you started yours. I may try the 3M. Right now I am considering using either D2T or Solarez with the MEKP and maybe get all the excess glue or air out for a crisp detail. Haven't heard of anyone doing that yet. Got the cheap aluminum foil now too but haven't got the tape yet to try. The leaf will conform. The extra just breaks off but it is not like smooth chrome when you get done, it is more like crushed chrome.
-
Yesterday I attempted my first two hard bait foiling projects. Read all the posts after searching 'foiling' but there is just nothing like actually doing it that brings up a few questions. I went to Hobby Lobby and bought imitation silver foil, the "Spray It" Permanent Metal Leaf Adhesive, and the Spray It Metal Leaf Sealer. Instructions on the can of adhesive were simple. Spray adhesive, apply metal leaf while adhesive still wet, Spray Sealer over finished foiling. My main troubling aspect of this process is...How does the adhesive dry under the foil? Reading the posts, whether it is water based or volatile compound seems like if you put it on a sealed bait, and cover it with foil, it is going to stop curing/drying. If I used a 2 part mix like D2T of course it will finish curing but other glues/adhesives seems like I just put the lid back on the jar when I apply the foil. Contact adhesive on other applications where you spray both parts, let dry, then press together also makes sense to me. My next trouble is....Controlling the amount of adhesive on the bait. I sprayed it on and could barely see it but I was watching the spray pattern and sprayed it on some paper first for coverage and it seemed about right. I could tell when applying the foil leaf that the glue underneath the foil was getting pushed around causing me an undesirable effect. On the second bait it degraded a nice scale pattern, made it lumpy. Spray adhesive, seems you can't adjust so I'm leaning toward water based brush application so I can get a nice thin coat ready for the leaf but I am also back to the first problem, how does it dry under foil. My second bait with the scales, I hung overnight in the house. It firmed up but "glue" bubbles can be pushed around indicating there is still uncured adhesive underneath. I thought that the leaf being so fragile that by lightly tapping and pushing it into place with the soft bristle brush I might actually be breaking it slightly over the scales or actually poking holes in it with the brush which would let the leaf 'breath' enough to cure but that didn't happen. Thanks in advance for any advise to help get this de-railed train back on the tracks, Barry
-
-
Corsaire, Been awhile since you posted this. I was thumbing thru the galleries and this caught my eye. I generally like paint jobs but this photo finish looks great. I don't know where you are from but out here in the Calif. Delta it looks like that would be a nice Golden Shiner for Largemouth Bass and Stripers. Have you fished these? How do they fish? Nice work, Barry
-
-
-
-
-
3 hours? Uncle!!! My standing joke is when someone ask me how long it took me goes like this..."Well uh I guess I took about 2 weeks to make that bait. Not working on it all day of course, more like half days. You know, 12 hrs." No kidding, that bait looks great. Good job and I hope it catches 'em. Start to finish in 3 hrs is amazing. The other thing that floored me was that you planning on fishing it "down past 20'." I don't know how you figured out all that weight placement stuff but I got a feeling you're going to send us another picture of a big so-cal bass. (Sounds like we're pumping too much water down there if you have a resevoir with more than 20 feet of water in it during this drought.)
-
-
On a bait like the wake jr. I use a small ball tip die grinder and pull the pin then paint, coat, reassemble, and touch up the pin hole. But on most other baits I stretch them out on the sewing ring or craft hoops you can buy at the craft stores. I have even used a small roll of brake line tubing I had in my shop because I needed a larger hoop for a big glide bait. Using a chunk of strong wire bent into a "s" shape, I rubber band it to the hoop. Then using another wire hook, I hook the tail hook hangar (or a pin if pins are used to secure a tail) and rubber band that to the other side of the hoop. If I need more stability, I sometimes get a wire hooked into the hinge pin eyes and secure it to the hoop too. Now the bait is stretched out and the sections will not flop around and touch at the joints but there is some flexibility so I can push it from the off side to open up the joints on the near side toward me and carefully brush in epoxy or resin in the joints. Turn over and get the other side of the joints before you do the sides. Now do the sides. Clamp a stick off your bench or shelf and hang the bait by the hoop to cure/dry flipping it over occasionally and hanging it by different angles using the hoop until dry to touch. If a little gets in the joints I can usually get something in there to clean it up or just work the bait in your hands to free it up. Barry
-
-
That is it! Thanks. That's certainly it. Thanks for the help. Barry
-
uncustered: Cool. I was just interested to see/hear how you made out. Mark: Are they translucent because they are phantom or are they phantom because their translucent? LOL. Yeah I really like the transparent paints and painting baits that the light shines through. Have put together some nice gill, and craw patterns with that but I remember some phantom shad patterns you posted that I really like. Too bad we can't do that with the PVC baits. Barry
-
I'm guess'n it didn't work out.
-
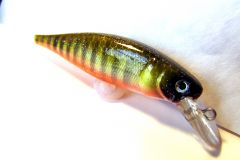
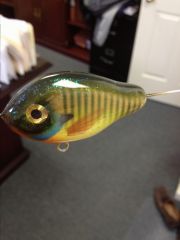
I thought you guys would nail this. My friend got back to me and says it is a Team Diawa TD Vibration. I looked it up on Google and Ebay. They are discontinued baits. Everything about the TD Vibration looks the same except the shape of the molded gill plate is rounded and does not have that angled point. Also, I did not see the color available same as the color I photographed. The round indent on the nose is the same.. Hook hangers look the same. Curious I did not see the same color because I found the bait I'm looking for 3 times on the internet and each time it was exactly the bait and it was the same color. Now, if it is the vibration, the vibration has an ayu color but it is not the same. Close as we got so far. Let me know if you come across it some time. Thanks, Barry
-
You need to search around. There are some good videos of how to make eyes. You can get some good circles for your eyes by using a hole punch. There are a couple of different sizes. You can also use gasket punches for some other sizes or you can make small punches with various size tubing and sharpen one end, punch the hole with it using a light mallet punching through the material into wood end grain. Use a smaller punch, or the drill bit end dipped in paint for the pupil. If you punch the pupil hole size you want in clear plastic sheet, you can center it easier in the eye. The 3D effect is achieved by using a dome of epoxy over the painted eye. If you punch holes in painters tape, stick it to cardboard a couple times to reduce the holding power so it doesn't pull your other paint off the lure. If I am making an eye, I like to punch the eye size in painters tape and air brush the large circle, then I prefer the opposite end of a drill bit like Saltshaker mentioned to do the pupil in black because the drill bit end holds a nice dose of paint. Good luck, have fun, Barry


![20150324 090433[1]](https://www.tackleunderground.com/community/media/gallery/category_8/sml_gallery_44587_8_44888.jpg)
![20150324 090347[1]](https://www.tackleunderground.com/community/media/gallery/category_8/sml_gallery_44587_8_535161.jpg)
