


FrogAddict
-
Posts
328 -
Joined
-
Last visited
-
Days Won
6
Content Type
Profiles
Articles
TU Classifieds
Glossary
Website Links
Forums
Gallery
Store
Everything posted by FrogAddict
-
Just remember, anything you use to fill in the slots will add weight. I just built a muskie jerkbait and had it perfectly weighted and used epoxy to seal up the ballast holes....now I have a slow sinker!! I recommend using a handsaw to cut the slot for the through wire. The key is to go slow and make sure you're hitting your line. Speaking of the center line. I recommend marking your center line when your piece of wood is still square (and your line ties, ballast holes and lip slot as well). You can use a number of techniques to get your center line. A marking square deal or just a pencil laying flat on a work surface may work as well. I prefer using a fine tip permanent marker so it won't completely disappear when I sand. Any line left will be covered by paint anyway. Dave is right however, making your own twisted hook hangers and drilling an over-sized hole, filling the hole with epoxy and embedding your hook hangers in the hole will be very strong. Unless I work with Balsa, I don't do through wire anymore. I think I use .51 wire but honestly, I don't pay attention, I just grab the thicker spool when building Muskie lures. Just watch a couple Paul Adams videos on YouTube and you'll see some of these techniques being used.
-
Centigrade, I have had that issue as well. I found that it wasn't the fit of the dowel into the square slot but play in the actual motor casing somewhere (maybe a loose fitting of some sort). I have had two cheaper rotisserie motors die on me and I bought a third to replace them (different brand this time) and a fourth as a back up. There has to be a better way but right now I'm still working with the rotisserie motors. I'm contemplating buying a high end disco ball motor. What do you guys think?
-
I would run away because once you get into this deal, life will never be the same. You'll look at normal everyday items and try to figure out how to use them to make your next lure. You'll daydream and doodle at work about your next lure build. You'll spend more money than you thought you had in pursuit of the next great lure! Oh wait, never mind, all that sounds like fun to me. I would recommend PVC. There is a pinned topic called "why pvc" at the top of the hard baits forum regarding this subject.
-
Littleriver, I won't even show you my first lure. Talk about ugly!
-
AZ Fisher, I just went to the site and didn't see it. Am I missing something?
-
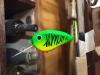
Just to add to some already great information here, I have been laminating some balsa that I had laying around to make a couple Balsa lures. First I cut 6 small 2 inch by 3 inch squares of 1/8 inch thick pieces of balsa. I stack three together gluing them with super glue. Now I have two stacks of 3 each. Now I use some spray adhesive to temporarily glue the two sides together. Next I shape with a template that I affix to the stack of balsa using spray adhesive or double sided tape if I have some. I use a small pull saw to rough cut and then carve to final shape. At this point I also cut the slot for the lip. I have been using circuit boards for lips. Where I fish there aren't many rocks so the circuit boards seem to work. I cut these lips with ordinary heavy duty scissors and use a template. I use a 2 inch section of cove trim with a piece of sandpaper attached to sand the round over corners (thanks to Paul Adams for that tip). You can also create your own convex sanding block by drilling a hole of the appropriate size in a 2 inch section of wood and then splitting the wood using a band saw. I have both and prefer the cove. Once I have the body shaped to my liking, I use a knife to pry the two sides apart. I then carve out a channel for the through wire and using a drill bit (not with a drill just by hand), I spin it in reverse to start two shallow holes on either side of the belly hanger for my ballast weights. I use simple split shot. You do this on both sides of the body. One tip for alignment is to position the through wire and ballast on one side, take the other side and press it against the first side. This will leave an impression you can use to carve the channel and ballast depressions on the second side of the lure. If you want to add a rattle, follow the same instructions to create a depression on both sides for the rattle to sit in. Next, shape your through wire and install it into the channel you've carved and place the ballast accordingly. Once everything is in place, I use 5 min epoxy and then clamp both sides together. This is when I do the final install of the bill as well. Make sure to use a couple small pieces of wood to sandwich the lure when you clamp. Now all you have to do is some final sanding and you can seal the lure. I use 30 min epoxy to seal. Now you can tank test the lure if you'd like. After testing, I like to rough up the lure with 400 grit paper before painting. One thing I've been experimenting with lately is using spackle before I do a final sanding. I like how smooth I can get the lure with this stuff. One other helpful tip that most of us learned the hard way, put tape over the bill when painting the lure but remove it to epoxy. You don't need the extra work of trying to remove epoxied tape from a bill. Here's a crank bait I just finished using this technique.
-
I purchase mostly top water popper and walking bodies from LPO. I have had some that don't work at all and others that work great as was mentioned before. I believe someone else mentioned tank testing right away, I suggest that strategy as well (although I forget to do this all the time). I did buy a popper/walker hybrid type blank that simply didn't do either well. If I remembered the part number, I'd share it. I think the issue with it was the line tie position. It was far from center at the 12 o'clock position and it just didn't do a thing on the water.
-
There are many threads on this subject but please don't go cheap here. You'll just end up wasting your money. Buy a good airbrush the first time. I bought 2 before I learned my lesson. The math is easy, I paid $40 for a worthless brush, then $85 for a pretty but still worthless brush that frustrated me to no end and I finally spent $140 and got a brush that makes painting lures fun again. Specifically, stay away from cheap brushes to include the Iwata Neo. Yes, you can get a good one but the quality control isn't good with them. Get a higher end brush from Iwata, Badger, or Patsche (sp). Once you get a brush, you have to consider a couple important accessories as well such as a compressor, cleaning pot, cleaners etc. Just do a search on here and you'll find days of reading.
-
I've abandoned this experiment for now. I just couldn't get the density I wanted.
-
here ya go <iframe width="500" height="344" src="https://www.youtube.com/embed/24_FhTKVL6Q" frameborder="0" allowfullscreen></iframe>
-
Dremels are great for carving lures (especially PVC), buffing out scratches, cleaning hook hangers and many other things as well.
-
Kasil, I think that's the one I watched but I could be mistaken. I'll look again.
-
Kasil, I did see that video a while ago but if I remember correctly,he was making a larger jig to use for some exotic fish species. I could get the desired weight easy enough but I'm trying to stay as close to a lead sized 1/2 oz. flipping jig as possible. I'll watch the video again though. Dave, That's a good idea to mix the resin and powder first. I'll try that next. There are too many things to attempt in the 60 seconds one has until the resin needs to be poured/injected into the mold.
-
Dave, The problem was that even at the "paste" stage, the tungsten still isn't adequately mixing with the resin. I wonder if I could cast a shell of a jig with resin and fill the cavity with tungsten powder?
-

Keeping Powder Paint Out Of The Eye On A Brush Jig.
FrogAddict replied to Ccfish's topic in Wire Baits
I use foil tape and tape over the eye before heating. After I've dipped, I remove the tape. I know the fish don't care but I like a clean eye. -
I like to use 3/0 Orvis thread to tie on my skirts. I do glue the weed guard after and I do use superglue on the tie when I'm done. It takes more time but I find it therapeutic.
-
X3 on the cut off wheel.
-
Last night I attempted to suspend tungsten powder in resin to make a "non-toxic" flipping jig. First I created a silicone mold of a 1/2 once flipping jig. I then mixed resin and tungsten and attempted to create the heaviest jig I could with the mixture. My results weren't so great. The best I could accomplish was 1/4 oz. The problem is that in order to get more weight, I had to add more tungsten. When I did so, the mixture was a very thick paste. So next I will be creating a mold with a 5/8 oz. flipping jig and I'll see if I can get 3/8 oz. out of it. I'm guessing others have tried this but I did a search and didn't find any results so I'm posting this to help anyone else who is thinking about attempting this.
-
I have a question about this. I know the post is old but I hope someone can answer me. I'm looking to add tungsten powder to resin and poor a bass jig head using a two part mold (1/2 oz.). I'm being realistic here and I am hoping to get 3/8 oz. out of a 1/2 oz. lead jig sized mold. What do you guys think? Will the resin be too thick to pour? Will I be able to achieve the 3/8 oz. weight?
-
My first lure was a popper made out of an Aspen dowel from Menards. I painted the whole thing white and the head red with spray paint. It didn't work worth a darn but I still have it somewhere. I'm planning on building a display case this winter to house all my failed lures.....it'll be a big display case.
-
Thanks! I found that interesting.
-
I too get some drift on my drill press when drilling my ballast hole. If I take my time and start with a smaller bit it works better. X2 on buying top quality Forster bits.
-
I tried using the milk idea but I realized I use paper milk cartons.
-
Does Casting Resin Bond With Resin Already Casted?
FrogAddict replied to jigginpig's topic in Hard Baits
Jigginpig, I've been casting sexy dawgs using alumilite for awhile now. I use micro balloons in the mix and put some ballast toward the tail because I want them to sit almost vertical while at rest. I haven't felt the need to do what you r suggesting yet. -
X3 on buying a good airbrush. I started w a cheap Iwata Neo now I have an Iwata Revolution and I enjoy painting again. My wife did buy me a quiet airbrush compressor but before that I used a compressor I bought at lowes to shoot brad nails. I did notice some surge when I used the big compressor when it cycled on and it did scare me to death at times. Yes get a hairdryer to heat set after every coat. Mark or Ben wrote a good post awhile ago about how to easily clean your brush between colors and when done. Just do a search, you'll find it.

