-
Posts
906 -
Joined
-
Last visited
-
Days Won
45
Content Type
Profiles
Articles
TU Classifieds
Glossary
Website Links
Forums
Gallery
Store
Everything posted by Chuck Young
-
Pearl paints do shift a little. But the pigment in color shifting paints and powders give a much stronger effect. There are also some transparent films that can be applied that shift colors, but they are very labor intensive.
-
A quick search of forums turned these up. http://www.tackleund...de-decal-paper/ http://www.tackleund...-faux-finishes/ To use the search forum: 1) Hold over browse. 2) Drop down to more. 3) Click on search 4) Type in subject - in this case, photo finish.
-
I use a suction brush too. To empty paint from the gun I put the cap on the brush and spray it out the back. Keep a bottle of clean water in one of your adapter jars. Use it between colors.in this manner: spray water - remove feed jar - keep spraying until flow stops - touch jar to the feed tube while spraying - repeat until spray is clear. This takes no time at all. It is much more effective than back-flushing. Createx Airbrush Restorer is made to dissolve old paint.I use it for cleanup at the end o each session. I leave it in the brush with the cap and water jar on, Any paint in there will be flushed out when I rinse with water at the start of the next session. If my brush starts acting up during a session I use the water method followed by restorer squeezed into the feed hole. Occasionally the head needs to be removed (possibly soaked in the compromise cup) and needle need to to be cleaned. DO NOT BEND IT. If these things don't work, it could be the seal between the needle and the gun body. It is in front o the trigger assy and behind the paint feed. You normally won't see it - it's way back in there. Every brush has to have this seal. If it is not air tight, the gun will suck air instead of paint and air will blow back into the paint supply.
-
Don't be afraid to use two different size hooks on a bait. Another way to to test different weights is to cut lengths of solder and twist them around the hook. If you find one that works, drill and add permanently.
-
If you are almost finished with a lure, but your epoxy starts to thicken, you can add a drop or two of DNA and it will extend your working time enough to finish.
-
Make your own - cheap.
-
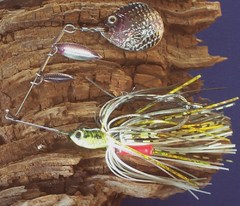
I noticed the same thing about spinner baits.
-
Try thinner clearcoat - It might work better.
-
Pictures uploaded fine on Google Chrome.
-
Those are some beautiful eyes. Lot of options too!. There is a process to make them yourself using GIMP or photoshop if he doesn't have what you need. I love Ed and Lisa.s eyes as well. Three steps above normal eyes and an incredible price.
-
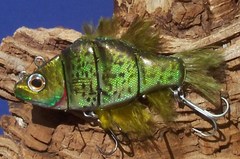
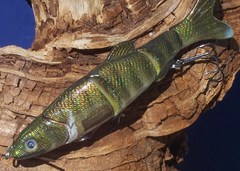
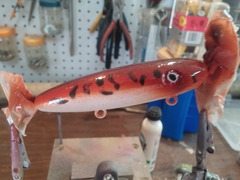
I just posted my entries into the lure contest in the gallery. I appreciate any critiques. How can these be improved?
-
-
-
-
- hand carved
- crappie
-
(and 1 more)
Tagged with:
-
-
Make sure you buy petite size. Queen size are too big for that little tube.
-
When I was 13 I coated my spoons with nail polish t make the paint last longer. I was never very happy with the results. There is a slight possibility that nail polish has improved over the last 45 years. Thinned epoxy works better in my opinion. Sorry Mark. Super Glue will penetrate all layers of hair, even soaking into the loose hair behind the head. Apply cautiously. Remember that when applied to a thick medium (like the head of a bucktail) it will heat up and cause fumes that will stick in your lungs and form crystals. That can't be good. Super glue will also cause the fibers in some threads to fuzz up and harden. Some light sanding with 1500 gt might be a good idea before applying topcoat.
-
I tried this when I had some bad paint (curdled). It didn't stop the brush from getting clogged; so I removed it. It would work fine on big pieces though. Like if you accidentally dropped some dried paint from the cap into the paint reservoir.
-
Stick with it, and post some pics to the gallery. If you find the lines are too thin, you can thicken them by spraying at an angle. It gives a nice effect too. Hold your brush near the nose and angle it toward the back.
-
-
Laquer paints seem to clog way more than Createx. The solvent base evaporates quickly and the paint thickens in storage if any air gets to it. Then you have the solvents - totally unsuitable for inside spraying without ventilation. Some Createx colors store better than others after being reduced. Transparent and detail paints will last a while after reduction if stored in an airtight container. Pearls and fluorescent colors tend to curdle more once reduced and stored. I think the size of pigment has something to do with it. Maybe the larger pigment acts like a catalyst to curdling , similar to the way rain droplets accumulate around dust particles. Closely examine the paint you have been spraying, and you will likely see a grainy quality to it - esp on the bottom. This is the result of being thinned with the wrong material, or being stored too long in a reduced state. There is no way to restore this paint. It must be discarded.
-
For reducing Createx paints, use the Createx reducer. Thin small amounts of paint just prior to use. Other solutions (including water) cause the paint to break down (curdle). It then plugs the airbrush EVERY time. Forget the floorshine / water mix. Forget windex. With a bottom feed airbrush, keep an adapter bottle of clean water. Between colors, empty the brush and keep touching and removing the bottle to the brush. It washes out all the paint. Final cleanup is done with Createx airbrush restorer. Finally I rinse with water and put the cap on the brush while spraying water into it. The bottle of water is left on the gun. Everything is ready to go next session.
-
I have used a badger 150 from day one. It is the bottom feed type. I like the handiness of being able to premix a color and store it in a jar with a feed on it. It does everything I ask it to do. I will say this about Badger. They really stand behind their product. I sent mine in to have a seal replaced. They totally restored the brush in no time at all. It had a new head assy, seal, needle with an extra needle and seals, new trigger assy, a new paint cup, and probably some other stuff I can't remember. It cost me $12 for shipping and $10.50 for parts. I don't know of any other company that does that.
-
Scale material can be found everywhere. Visit a fabric store. One yard of fabric 42" wide costs 1.99 to 6.99. One yd does a ton of lures. I like a little strech in most fabric I use for scales. Cut it into strips and roll it on wooden dowel. I use hex material in 3 sizes. Diamond mesh in 6 sizes, and bath sponge type mesh in 4 sizes. I save the bag that garlic comes in. It looks exactly like what you have in the picture. Some scale materials are a pita to work with. But once you use them and heat set paint with them in place, they hold their shape and slide on with no work at all. So I reuse mine as much as possible. Just store it with whatever lure blank matches it. To organize mesh, I cut swim noodles in half lengthwise and glue them to the top of my paint booth. It is handy, organized and out of the way. The wood dowels with fabric rolled on them are inserted into the foam. The size of lures varies greatly. The size of the mesh has to match the size and type of fish.
-
Thin with the Createx reducer. For cleaning between colors I use water. With bottom feed brushes keep a bottle with clean water and touch it to the feed, remove , spray till dry, repeat till clean. This is very fast and effective. Final cleaning (after session) is done with airbrush restorer. Using a booth with a fan helps with overspray. Properly reduced , transparent and Wicked detail colors should spray in single digit PSI.


