


whitaker201
-
Posts
136 -
Joined
-
Last visited
-
Days Won
3
Content Type
Profiles
Articles
TU Classifieds
Glossary
Website Links
Forums
Gallery
Store
Everything posted by whitaker201
-
I'll try it from the gallery this time.
-
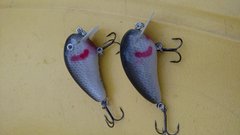 A couple more finished
 -
More progress over the weekend. Cleaned out more of the barn and got the area I want to work in pressured washed out. Then I had I little time to test these two baits that I finished on Friday. I am making progress and learning a little more with every bait. I did learn I need to turn the pressure down more when painting the gill slash. Next time should be better.
-
Awesome Jonister! Yes change one thing at a time when you make another. That will allow you to know what affects the action of the lure.
-
I will have room for open shelving. LOL. Yes, I am going to need all the luck I can get! Next step is re-configuring the electric in the area.
-
It should be easier after I build a work bench and a paint bench.
-
Last week my FIL gave me a scroll saw and a benchtop sander that he does not use anymore. Then last night I picked up a new air compressor. It is a 5 gallon quite version and only draws 8.5 amps. The compressor I was using would trip my circuit breaker (15amp) if I had anything else running at the same time. The main purpose of the new compressor will be for my airbrush but it will be nice to be able to use it to fill up tires too. I am making progress on getting all the tools together to be able to make baits easier. Now I still need to get the "shop area" organized.
-
You can also check out Autodesk's Fusion360. It is free as long as you are only using it as a student or a hobbyist.
-
The orientation of the bait on the printer table will make a difference. Our printer at work will even print out support automatically if the part needs it. The support material is even dissolves in water.
-
Hughesy: sweet looking frog! Jonister: Lol. I can design in CAD easier than I can carve out a lure!
-
That looks great Vodkaman.
-
I modeled the hangers in. I was surprised that our printer did them so well. They are only .030" in diameter. Mine was only for looks.
-
No, I just kinda winged it and made a size and shape that I liked.
-
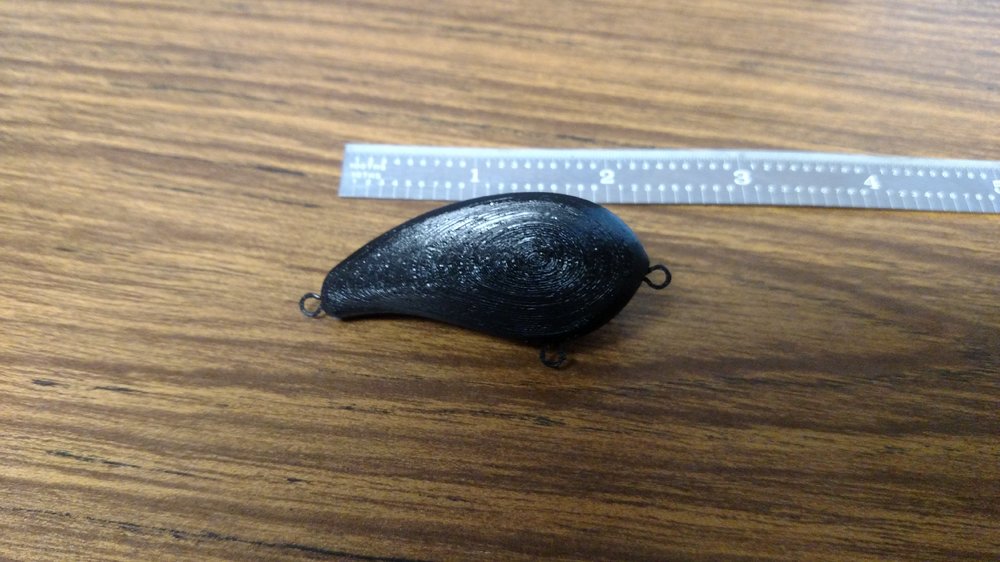
Time wise it is not efficient yet for production, but for prototypes or a mold master it is ok. The bait I printed off took 2.5 hours on our printer. That was just on the default settings and not looking for high accuracy/quality.
-
I printed this one yesterday
-
What system are you using? The best way to get a smooth shape in most systems is to create a surface from multiple cross sections. Then from there (depending upon the system) you can edit the surface points to get the exact shape you want. Also with a 3d printed object the inside will have a criss-cross structural support system inside of the object. It will not be solid.
-
Welcome. The lures you posted looked great. I didn't know LPO was the site owner. I just received my order from them 2 days ago. Learn something new everyday.
-
That is a great idea Mark. Thank you. I was also going to start numbering the baits that way I can match the bait to the notebook entry.
-
Always tinkering..... I wasn't happy with one of the baits out of the first batch so I rounded the body more, changed the ballast, and changed the line tie location. Now it is a wake bait that runs about 4" deep and I am happy with the action. I painted it then tried it Sunday and the fish liked it. I really need to start a notebook on what changes do to the lure action.
-
Thank you Rod. If I had a scroll saw I would use it instead of the hacksaw.
-
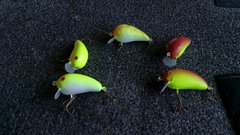
Thank you. I am not looking to advertise. I'm just starting the process on learning how to make baits and how to make them better. I will get better with my painting skills but for now I need to learn the basics. Rod: I started with a piece of stock and sketched an outline of what I wanted the shape to be. Cut that shape with my hacksaw. Then used a wood rasp to get close to the final shape. Sanded smooth, primed and painted it. I used rattle can clear since I had it laying around AND I will not use that again. I put 4 coats on them and it is not a durable top coat. I used screws for the hook hangers and line tie and used superglue to help anchor them in place. The colors are: chartreuse and white on the baits on the left; Copper/brown mix and chartreuse on the right; chartreuse and white then a little of the copper/brown mix on the nose and back of the bait in the top center.
-
I kept the paint jobs very simple as this was the first time I used an airbrush. I also didn't sand the top center bait smooth like I should have. I am going to have to add a little more weight to a few of the baits to get the action the way I want it, but all in all I am happy with the first batch. Oh yeah........ The smallmouth liked them.
-
 Thank you guys. Yes they are my first and my first time using an airbrush so I kept the paint job simple. I caught a couple smallmouth on them Sunday.
 -
I uploaded them to the gallery. I didn't think I was supposed to put them here.
-
Over the weekend I finished up my first 5 baits. I even caught a few smallmouth on them when I went to water test them. I have a long way to go on my painting skills but for my first batch I am happy with the way they look.


