

fishordie79
-
Posts
249 -
Joined
-
Last visited
-
Days Won
12
Content Type
Profiles
Articles
TU Classifieds
Glossary
Website Links
Forums
Gallery
Store
Everything posted by fishordie79
-
@azsouth @BobP Thanks for the info and advice!
-
Hello TU Community! So I bought several sheets of lure foil in different patterns but I have yet to try them out. I was just wondering if these foils can be painted over? Seems to me like painting over them may result in running or slowly drying paint. Does anyone have any experience with this they can share? I am using Createx paints.
-
@ravenlures Just looked up the Silhouette Curio based on your comment. That thing looks like it may be a game changer. Ordering tonight. Thanks man!
-
Hi all and thank you so much for the responses/suggestion! I should have been more clear in my original post and I apologize for that. This lure is not jointed. It is a single piece. Also, I don't know if styles of lures are always called the same thing across regions but maybe I should have said I am trying to get a swim bait action. What I am looking for in the action is a lure that makes wide sweeping arcs from left to right when reeled at a steady pace. So, imagine an ice skater just skating across the rink, pushing off with the left leg and gliding out to the right, then pushing off with the right leg and gliding out to the left. That is what I am trying to achieve. The lure below is made by Westin. It is from their Westin Swim line and is exactly what I am going for. My lure body is very similar but I have not yet been able to achieve the action that this thing has. I did watch a guy on YouTube (Solarbaits) showing how to weight glide baits (as they are mostly called here in Germany) and he put two weights, one each, at the front and back of the lure. I may remove all of the lead I have put in, fill the holes in and then re-drill similar to what he did and see what happens. I'll give you guys an update when I have done so. Once again, thank you to all of you awesome and helpful folks for helping me to get better at this awesome hobby!

-
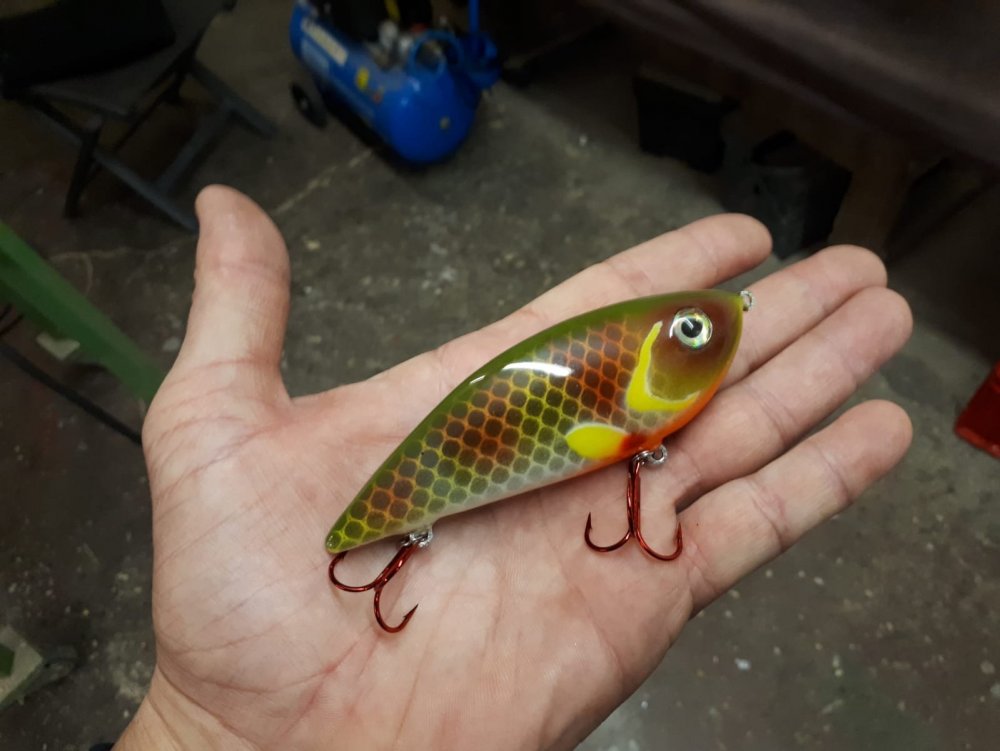
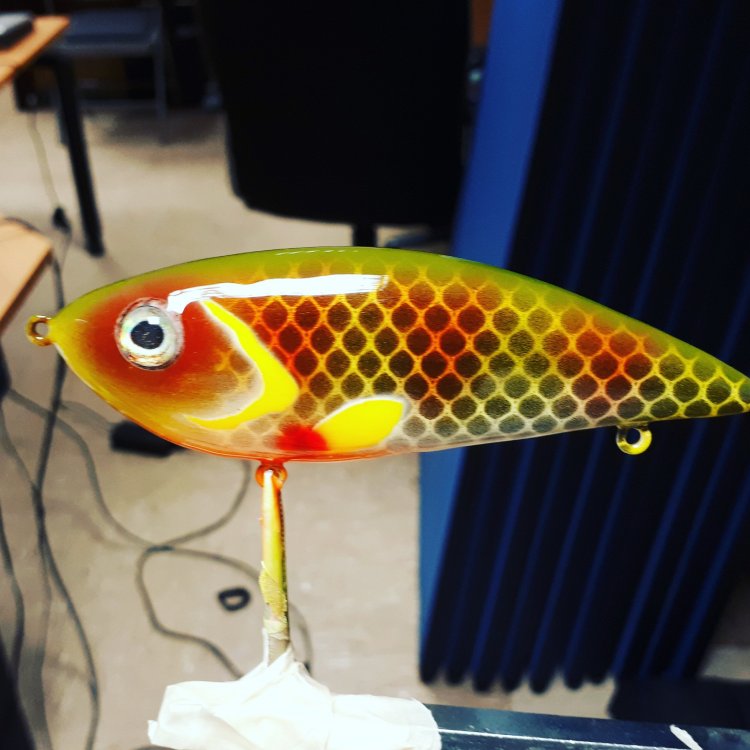
Hi @Nim713,, Lots of good suggestions in the comments above. For me just practicing with the airbrush gave me the best results. Each time you mess something up, and you will mess something up, makes you think harder about it the next time around and forces you to get better. One thing I found very helpful is to paint a bait with whatever base colors you choose, then allow it to dry fully. Then lay a piece of tracing paper over the bait and draw out whatever lines/gills/etc. you want exactly where you want them to be on the bait using a pencil with a thick point. Once you draw the outlines flip the tracing paper over and lay it onto a piece of card stock, index card, or some other rather thick paper, and then draw over the lines you made. This will transfer the lead/graphite you did on the lure body onto the thicker paper. Then just remove the tracing paper, go over the lines again to make them more pronounced, cut the shapes out with an exact knife and bam! You have a stencil that will line up perfectly on your bait. The first image I did using the tracing paper method and the second image I did using a mix of the tracing paper method and free hand with the airbrush.


-
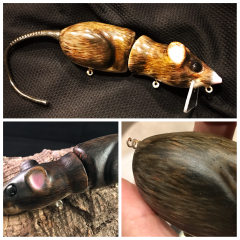
3rd place - Rat Bait - By Benzin555
fishordie79 commented on Curt - NC's gallery image in Best Homemade Hardbait
 Amazing work! Really awesome and inspiring stuff man.
 -
1st place - Bluegills Swimbait - By Yohan Custom Lures
fishordie79 commented on Curt - NC's gallery image in Best Homemade Hardbait
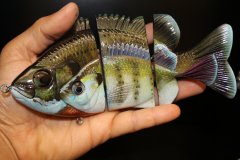 I am still afraid to try hand carving detail because I don't want to ruin a body. I can't imagine how long that took to carve.....
 -
1st place - Bluegills Swimbait - By Yohan Custom Lures
fishordie79 commented on Curt - NC's gallery image in Best Homemade Hardbait
That is....simply amazing. The amount of detail, the creativeness...I mean....dude..........wow. Amazing work that I can only aspire to one day be able to achieve. That is incredible. Awesome job! -
Okay so an update to this post.I took the bait out and tested it this afternoon and, although it does have a nice arc and glide action it is unstable and difficult to control. I am almost positive I screwed up by putting so much lead in the middle of the CoB and pouring it too deep into the body. I saw a great video on YouTube where a guy was demonstrating how to weigh glide baits and, well, I did not do as he suggested.....So I think I am going to remove the lead, fill in the holes, re-position, and try again while also considering any responses I may get from you all.
-
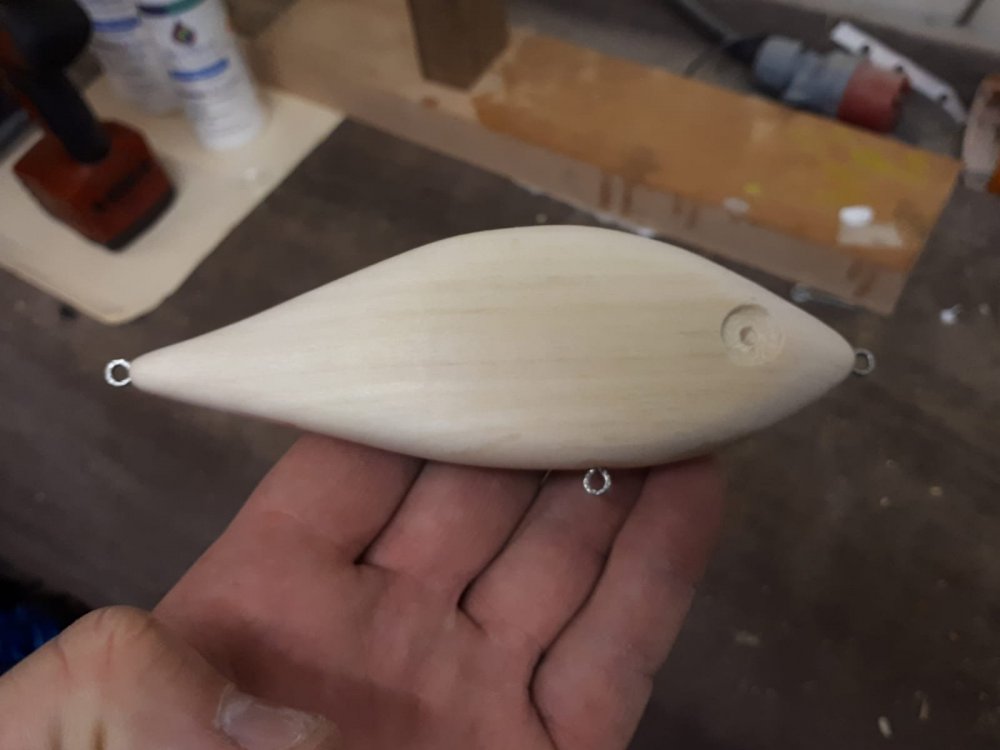
Hello TU Community! I have built a nice glide bait body the I intend to do a "real Tench" paint scheme on. Thanks to you guys I have found the center of balance/gravity of the lure and want to begin drilling my holes. Using some 10 gram jig heads taped to the side of the bait I did some sink tests and determined that it needs about 35 grams of lead. My question is this: How should I distribute this weight across the lure so that I achieve that wide, gliding "S" action? I'm thinking that I need to place the majority of the weight at the center of balance, with the rest distributed at one centimeter intervals toward the head and the tail. If I do it this way, however, I will have to drill a deep, almost to the middle of the body, 10cm hole for lead right where I determined the CoB to be. I keep reading that weight on a glide bait should be placed low in the body so I don't know if this is a good idea. In order to achieve that nice gliding action is it better to put more weight toward the center of the body or distribute it across? Thanks so much!
-
@jigmeister @BobP @Vodkaman Great suggestions and thank you all!! @Vodkaman what CAD software are you using?
-
Hey there TU community! I made a glide bait body tonight that I am really happy about and I was thinking about the best way to weight it so that it sinks parallel and relatively slowly. I see a lot of people talking about "center of buoyancy" and I was wondering if you guys could give me some suggestions on some good methods of finding this. What I have done until this point is just kind of eye the bait, drill holes where I think they need to be, pour some lead and then do a swim test. Then I just add or reduce weight how I see fit until I achieve the sink rate/position I am looking for. This has worked fairly well thus far but there has to be a more scientific approach to this. What do you guys suggest?
-
Hi @alsworms and thank you for the response and suggestion! When I click on "profile" and then on the picture in the lower left it only gives me the option to edit my actual profile picture. What I am trying to do is change the greenish crystalized??? looking picture that makes up the background of my profile. That one I can't seem to figure out.
-
I apologize if this has been asked before but I could not find an answer in the forums. Does anyone know how to change the background image on your profile? I have seen some members that have managed it but can't find any options in the "Edit Profile" section to allow me to do it. Thanks in advance!
-
So the last bait I did, after allowing the epoxy to cure a bit and then applying a couple more coats, turned out perfectly! I really think that my epoxy has an issue with the Createx paints. I am going to try the clear coat after paint method and see if the first coat of epoxy goes on smoothly next time. Thanks to all!
-
@OIR I use one cup to mix and two syringes for each part of the epoxy. I will try the two cup method next time. Thanks!!
-
First of all let me say.....what a great community! I got into this bait making thing because I love fishing, being creative, and I wanted to do something that I could share with other fishermen. Thank you all for the responses! @SlowFISH I think you are very likely correct. I just checked on the bait after about 12 hours and it looks magnificent! I think that first thin coat of cured epoxy sealed the painted surface and allowed the subsequent coats of epoxy to go on smoothly. I will definitely be trying the clear coat method on the next build. Thank you so much for your input! @BobP The epoxies that I am using are both rated very good here and, as you suggest, I am allowing them to sit after mixing to the point that most bubbles pop and the little remaining ones float to the surface. I use syringes to measure and mix for at least three minutes. Thank you so much for your input! @eastman03 Thank you! When I first started airbrushing I had a hell of a time trying to figure out the right amount of reducer to paint, how to use stencils properly, etc., and to hear another bait maker say that my paint looks good is extremely satisfying. The lures that I have completed thus far were all done in a room that was about 18 degrees Celsius so I will look into both of your suggestions where warm water and a lamp are concerned. This is one of the most satisfying (although frustrating at the same time:) endeavors I have ever undertaken. I will definitely be sticking with it and hope to converse more with you in the future. @mark poulson Thank you for the original response! I saw your name in several of the posts I looked at in the forums and I thank you for helping folks like me get better at this awesome hobby!
-
Hi bigblue2, For a couple of reasons. First, I personally like the look of epoxy finish better. Second, I fish for pike often. From what I have read it takes several coats of polyurethane to reach the same thickness that you can when using one or two coats of epoxy. Not sure if this is a fact but if so it means that I get more of a protective barrier to shield the wood from those 600+ razors in the pike's mouth. Also, I have about a gallon of epoxy and it wasn't cheap:)
-
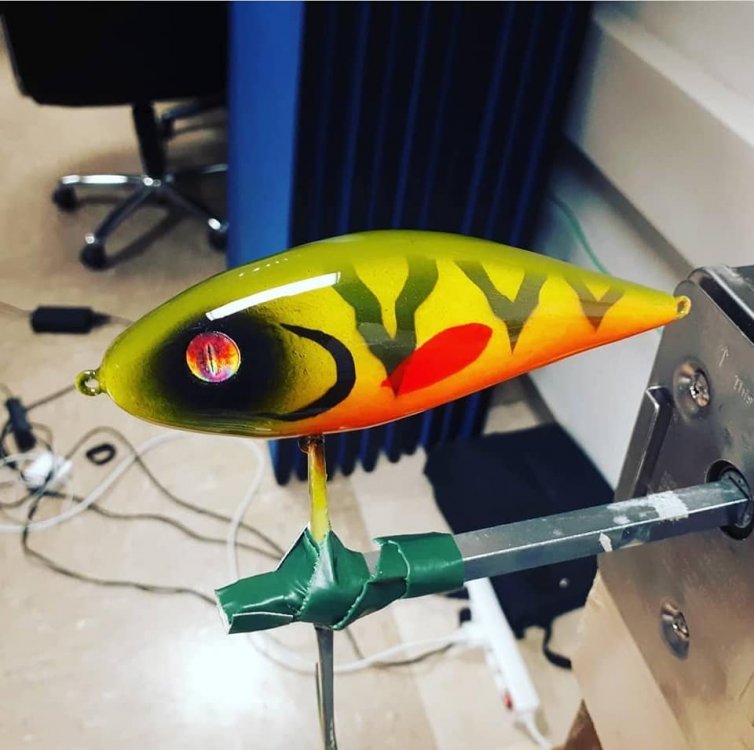
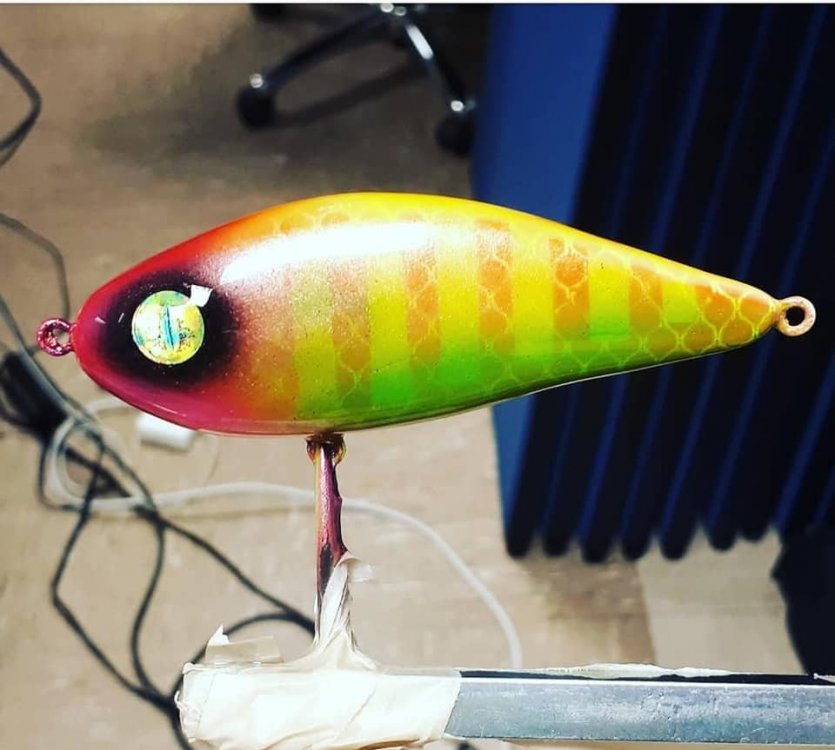
I made the bait pictures below last night and immediately after applying the epoxy it began fisheyeing and curing unevenly. So I let the epoxy cure a bit, used a new brush to wipe as much of it off as I could, and then let the remaining epoxy cure. This morning I applied another coat of epoxy to the bait and it went on evenly and remained that way. Of course there are some divots where the previously applied epoxy did not coat evenly but I figure I will keep applying thin coats of epoxy until those divots are filled in. Then maybe the bait won't have been a waste of time.
-
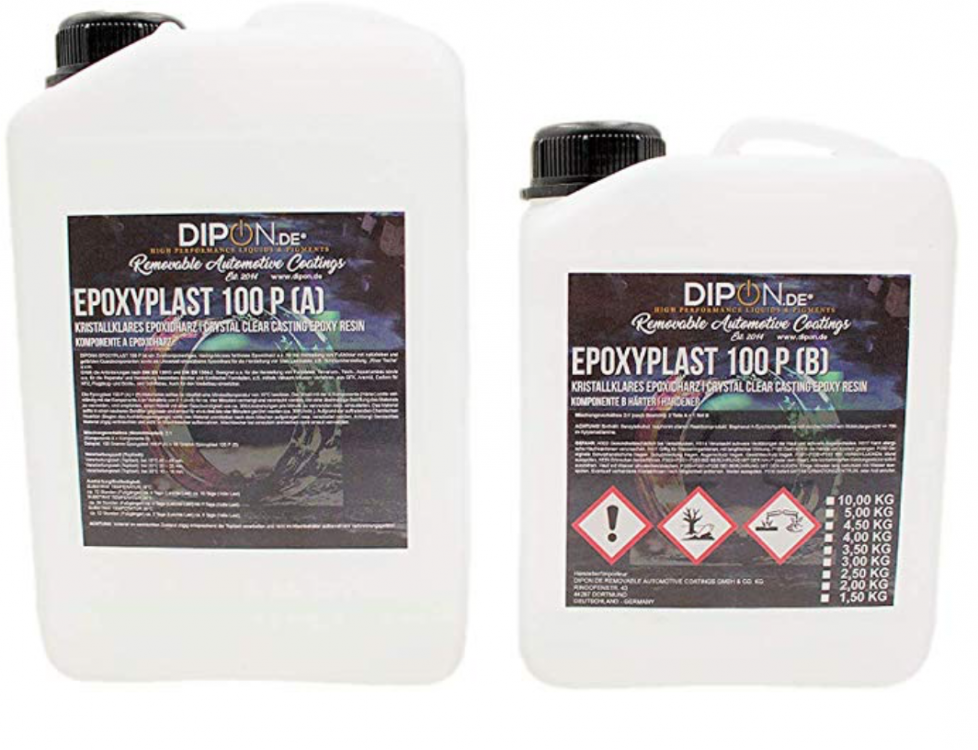
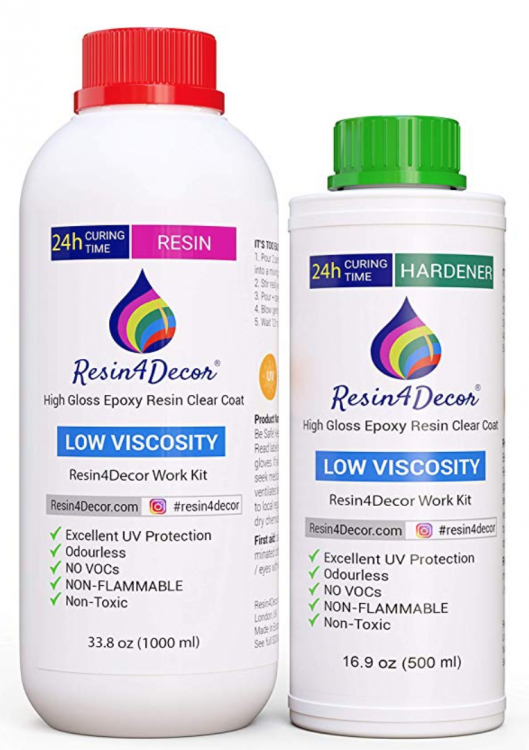
Hello Mark and thank you for responding. I have tried two different brands of epoxy with the same result. The first is called Dipon, which I believe is manufactured in Germany. The second is called Resin4Decor which is apparently a high grade epoxy resin. See images below. I purchased both of these from amazon.de (Germany) as I am a US ex-pat living in Germany. I should also mentioned that I have tried applying the epoxy with both brushes and a gloved finger but have gotten the same result with each method, and I am using Createx paints with Createx 4030 reducer.
-
Hi everyone, Before I began I must say I searched the forums for a solution to the issue I am having and found one post that had a good suggestion that I followed but I am still plagued by this issue. I am a beginner at this but have gotten pretty good at balancing and airbrushing but for the life of me I cannot figure out what I am doing wrong when applying epoxy. After the epoxy application my baits end up with parts of the bait with too much epoxy, parts with none, parts that have fish eyed, etc. After browsing the forums tonight and finding what I thought to be my problem I painted a big glide bait I made and made sure that my hands were gloved (non-powdered) at all times. I never touched the bait with an ungloved hand. I put the bait on the drier, started the motor, then applied a thin coat of epoxy to the entire bait. I stood over the bait for an hour, gently brushing over every single fish eye and spot that formed and then, when I was satisfied, walked away. A couple of hours later I came back to find the epoxy had once again began to cure unevenly and I nearly lost my mind. Hours and hours of work learning to carve, balance, airbrush, and every time the epoxy stage drags me through the mud. I have no idea what I am doing wrong. Of the four baits I have completed to this point only one has come out semi-acceptable. I just don't get it. I watched hours of bait makers on YouTube and did hours and hours of research online and got pretty good pretty fast at each stage of the process but when it comes to applying epoxy I just have no idea what my problem is. The one thing I have not tried yet that I did see suggested in the forums is to apply an aerosol based clear coat before applying epoxy. I don't know why this would be necessary as none of the bait makers I have been watching for months do this. Attached are some pics of a couple of the baits I have made thus far that, although they look good in the pictures, had epoxy topcoats that did not turn out well. Any suggestions would be greatly appreciated....... Thank you all!
-
I recently began building my own baits and, although I've gotten pretty good at balancing and airbrushing, I have had theses same issues with epoxy consistently and it has been extremely frustrating. So much time spent perfecting each aspect only to have it ruined during the final stage. In the attached image you can see how the epoxy is kind of.....pooling on the head and belly of the lure. Thanks to OP for the question and to all of the good folks who responded. Thanks to this post I think I know what my problem is and will now adjust my technique accordingly. Thanks to all!


